
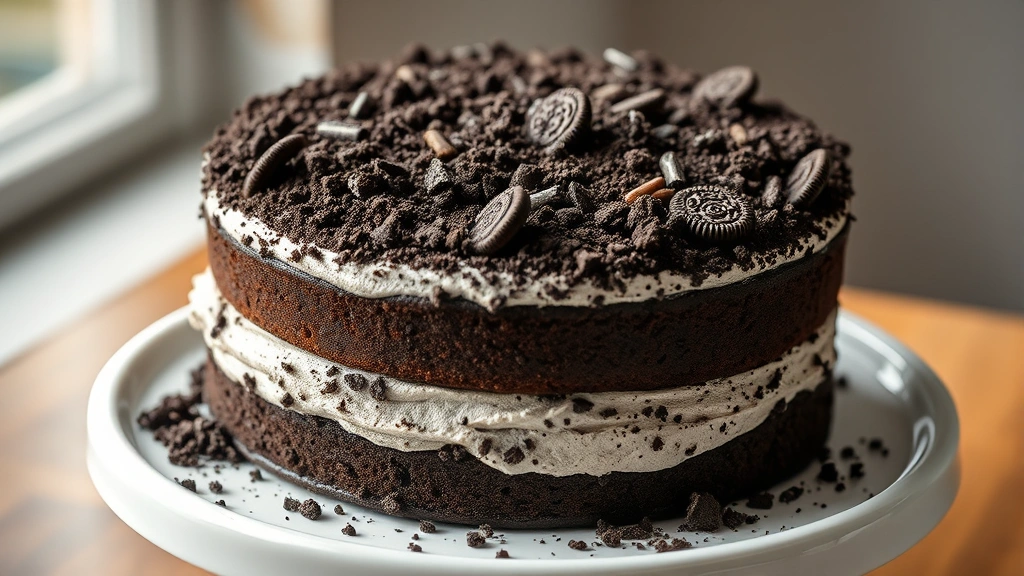
There’s something absolutely magical about Oreo dirt cake – it’s the dessert that brings back childhood memories while feeling sophisticated enough for any dinner party. This show-stopping treat combines layers of rich chocolate cake with creamy frosting, crushed Oreos, and a sprinkle of cookie crumbs on top that truly makes it look like a garden of edible dirt. The beauty of this recipe is that it’s surprisingly simple to execute, even for novice bakers, yet it delivers impressive results every single time.
The magic of an Oreo dirt cake lies in its textural contrast. You get the tender crumb of homemade chocolate cake (or quality boxed cake if you’re short on time), the silky smoothness of buttercream frosting, and that delightful crunch from the crushed cookie pieces throughout. The Oreo crumbs scattered on top add both visual interest and that addictive cookie flavor that makes people come back for seconds. Like any great layered dessert, the key is taking your time with assembly and not skipping the chilling steps.
What makes this recipe particularly special is its versatility. You can dress it up with chocolate shavings for an elegant gathering, keep it casual for a backyard barbecue, or even customize the frosting flavor to your preference. Some bakers prefer to use cream-based frostings for added richness, while others stick with classic American buttercream. The beauty is that there’s no wrong way to make this cake – it’s all about what brings you joy in the kitchen.
I’ve been making this Oreo dirt cake for years now, and I’ve perfected the technique to ensure you get a moist, flavorful cake with frosting that pipes beautifully and tastes absolutely divine. Whether you’re celebrating a special occasion or simply satisfying a chocolate craving, this recipe will become a staple in your dessert rotation. The combination of homemade goodness and that nostalgic Oreo flavor creates something truly irresistible. Just as with any carefully crafted recipe, the attention to detail in each step makes all the difference.
Before we dive into the recipe, I want to mention that you can absolutely make this cake ahead of time. It actually tastes better the next day when all the flavors have had time to meld together. Store it in an airtight container in the refrigerator for up to three days, or freeze the unfrosted layers for up to a month. This makes it perfect for meal prep or advance party planning. The frosting can be made a day ahead as well, which helps streamline your baking day.
For those looking to add even more decadence, consider adding a layer of Oreo cream filling between the cake layers, or drizzle the top with chocolate ganache. You could also incorporate crushed Oreos directly into the frosting for an extra cookie punch. The foundational techniques used here can be adapted to countless variations, so feel free to get creative. The important thing is that you’re making something delicious from scratch, and that’s always worth celebrating.
Ingredients
- 1 3/4 cups all-purpose flour
- 2 cups granulated sugar
- 3/4 cup unsweetened cocoa powder
- 2 teaspoons baking soda
- 1 teaspoon baking powder
- 1 teaspoon salt
- 2 large eggs
- 1 cup strong brewed coffee, cooled
- 1 cup whole milk
- 1/2 cup vegetable oil
- 1 teaspoon vanilla extract
- 1 cup crushed Oreo cookies (about 12-15 cookies), plus more for topping
- 1 pound (4 sticks) unsalted butter, softened
- 4-5 cups powdered sugar
- 1/2 cup unsweetened cocoa powder (for frosting)
- 1/4 cup whole milk (for frosting)
- 1 teaspoon vanilla extract (for frosting)
- 12-15 whole Oreo cookies, crushed into coarse crumbs (for decoration)
- Additional crushed Oreos or cookie crumbs for garnish

Instructions
- Preheat your oven to 350°F (175°C). Grease and flour two 9-inch round cake pans, or line the bottoms with parchment paper for easier removal. Set aside.
- In a large mixing bowl, whisk together the flour, granulated sugar, cocoa powder, baking soda, baking powder, and salt until well combined and no lumps remain.
- In another bowl, beat the eggs, then add the cooled coffee, milk, oil, and vanilla extract. Whisk these wet ingredients together until fully incorporated.
- Create a well in the center of your dry ingredients and pour the wet mixture into it. Using an electric mixer on low speed, gently combine the ingredients until just incorporated, then increase speed to medium and beat for about 2 minutes until the batter is smooth and slightly thick.
- Fold in the crushed Oreo cookies using a spatula or wooden spoon, being careful not to overmix. The batter should be well-combined but not overworked.
- Divide the batter evenly between the two prepared pans, smoothing the tops with a spatula.
- Bake for 28-32 minutes, or until a toothpick inserted into the center of each cake comes out with just a few moist crumbs (not wet batter). The cakes should spring back slightly when lightly touched.
- Remove the cakes from the oven and allow them to cool in their pans for about 10 minutes, then carefully turn them out onto wire cooling racks. Let cool completely before frosting, approximately 1-2 hours.
- While the cakes cool, prepare the frosting by beating the softened butter in a large bowl with an electric mixer on medium-high speed for 3-4 minutes until pale and fluffy, scraping down the bowl occasionally.
- Sift together the powdered sugar and cocoa powder to avoid lumps, then gradually add this mixture to the butter in several additions, alternating with the milk.
- Add the vanilla extract and beat the frosting on medium-high speed for another 2-3 minutes until light, fluffy, and spreadable. If the frosting is too thick, add a little more milk; if too thin, add more powdered sugar.
- Once the cake layers are completely cool, place the first layer on a cake plate or stand and spread a generous layer of frosting on top using an offset spatula or knife.
- Sprinkle a handful of crushed Oreo cookies over the frosting layer, distributing them evenly across the top of the first cake layer.
- Carefully place the second cake layer on top, pressing down very gently to secure it. Make sure the cake is level by checking from different angles.
- Apply a thin crumb coat of frosting over the entire outside of the cake, covering all exposed areas. This seals in the crumbs and creates a smooth base for the final frosting layer. Refrigerate for 15-20 minutes.
- Apply the final, thicker layer of frosting over the crumb coat, creating decorative swirls and peaks with your spatula or a piping bag fitted with a large round tip.
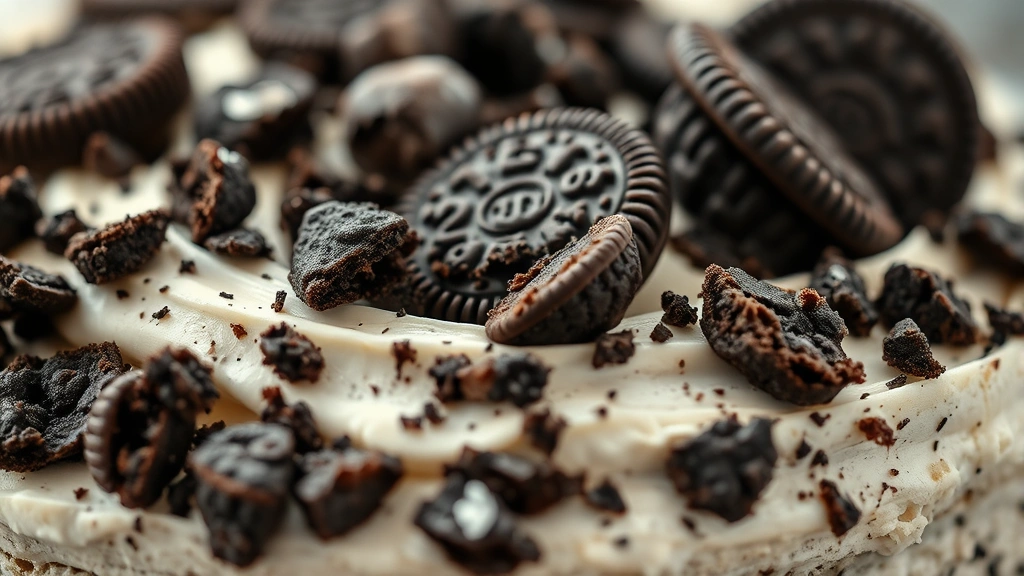
- Generously coat the top and sides of the frosted cake with crushed Oreo cookies, pressing them gently into the frosting so they adhere properly. The more cookie crumbs you use, the more authentic the “dirt” effect.
- For a polished finish, place whole Oreo cookies around the top edge of the cake or create a decorative pattern with the crushed cookies.
- Refrigerate the finished cake for at least 30 minutes before serving to allow the frosting to set and the flavors to meld. Serve chilled or at room temperature, depending on your preference.
Pro Tips
Coffee Deepens Chocolate Flavor: The brewed coffee in the cake batter doesn’t make it taste like coffee – it actually enhances and deepens the chocolate flavor significantly. Don’t skip this ingredient.
Oreo Variety: You can use regular Oreos, Double Stuf, or even Golden Oreos depending on your preference. Just make sure you have enough crushed cookies for both the batter and decoration.
Make Ahead Options: The cake layers can be baked up to 2 days in advance and wrapped tightly. The frosting can also be made a day ahead and stored in an airtight container at room temperature. This makes party planning much easier.
Frosting Consistency: If your frosting is too soft, chill it for 15 minutes. If it’s too stiff, let it sit at room temperature for a few minutes or add a tablespoon of milk at a time until you reach the right consistency for piping.
Crumb Coat Technique: This thin first layer of frosting traps all the crumbs and makes your final frosting layer look pristine. It’s an extra step but absolutely worth it for a professional appearance.
Customization Ideas: Add 1 teaspoon of espresso powder to the frosting for deeper chocolate flavor, or stir in 1/2 cup of crushed Oreos directly into the frosting itself for added cookie flavor throughout.
Serving Temperature: While this cake is delicious at room temperature, many people prefer it slightly chilled as the frosting holds its shape better and the flavors are more pronounced. Experiment to find your preference.
Storage: Keep the finished cake in an airtight container in the refrigerator for up to 3 days. You can also freeze unfrosted cake layers for up to a month – just thaw at room temperature before frosting.
Decoration Tools: An offset spatula is helpful for spreading frosting smoothly, but a regular knife works just fine. For piping decorative elements, a pastry bag with a large round tip gives professional results.
Baking Pan Preparation: For the easiest cake removal, use parchment paper circles on the bottom of your pans in addition to greasing and flouring the entire pan.
Don’t Overmix: Once you combine wet and dry ingredients, mix just until combined. Overmixing develops gluten and results in a tougher, denser cake.