
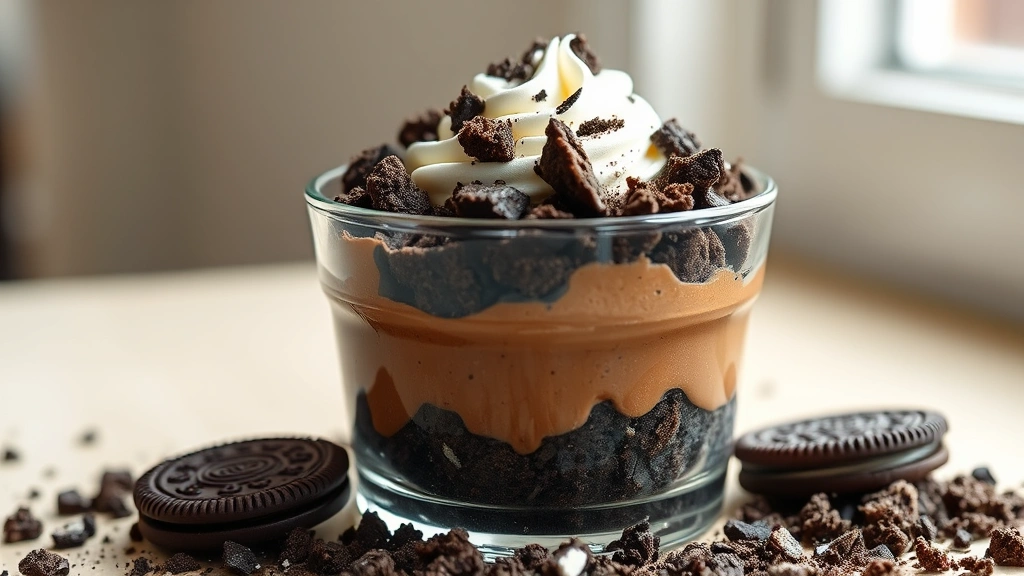
There’s something absolutely magical about Oreo Dirt Pudding – it’s the kind of dessert that looks fancy enough to impress guests but is honestly so easy to make that you’ll find yourself whipping it up on a Tuesday night just because. This stunning layered dessert combines creamy, rich chocolate pudding with crushed Oreos that mimic real dirt, creating a presentation that’s equal parts sophisticated and playful.
I’ve been making this recipe for years, and it never fails to be a crowd-pleaser. Whether you’re bringing it to a potluck, serving it at a dinner party, or simply treating yourself to something sweet, this Oreo Dirt Pudding delivers on both taste and visual appeal. The beauty of this recipe is in its simplicity – you’re essentially layering just a few quality ingredients to create something that looks like you spent hours in the kitchen.
The secret to the best Oreo Dirt Pudding lies in using quality ingredients and not skimping on the chocolate flavor. I always recommend using real whipped cream rather than the canned variety, and investing in good chocolate pudding mix or making it from scratch. The Oreos are what really make this dessert special – they create that delightful “dirt” texture that gives this pudding its charming name.
What I love most about this recipe is how versatile it is. You can make it in individual cups for elegant single servings, layer it in a large trifle dish for a showstopping centerpiece, or even prepare it in mason jars for easy transport to parties. It’s the perfect make-ahead dessert since it actually tastes better after spending a few hours in the refrigerator, allowing all those flavors to meld together beautifully.
You can also get creative with variations – try using different types of cookies, adding a layer of crushed chocolate cake, or mixing in some chocolate chips. For more sophisticated flavor combinations, check out some creative sauce ideas that might inspire you to experiment with chocolate drizzles. Or if you’re planning a full dessert spread, you might want to explore other layered dessert concepts.
This Oreo Dirt Pudding recipe makes the perfect dessert for any occasion, and I promise your family and friends will be asking for the recipe. Let me share my tried-and-true method for creating this absolute showstopper.
For additional inspiration on creating beautiful dessert presentations, you might enjoy exploring plating techniques or checking out layered dish ideas. And if you’re interested in other indulgent treats, unique flavor combinations might spark your creativity.
Ingredients
- 2 packages (3.9 oz each) instant chocolate pudding mix
- 3 cups cold whole milk
- 2 cups heavy whipping cream
- 3 tablespoons powdered sugar
- 1 teaspoon vanilla extract
- 1 package (14.3 oz) Oreo cookies, divided
- 2 tablespoons butter, melted (optional, for extra richness)
- Pinch of sea salt for garnish
Instructions
- Prepare your serving vessel – either a large trifle dish, individual cups, or mason jars. Have everything ready before you begin assembling, as the pudding will start to set quickly.
- In a medium bowl, whisk together the chocolate pudding mix and cold milk according to package directions. Stir vigorously for about 1-2 minutes until the pudding reaches a smooth, creamy consistency. Set aside and let sit for 5 minutes to fully set.
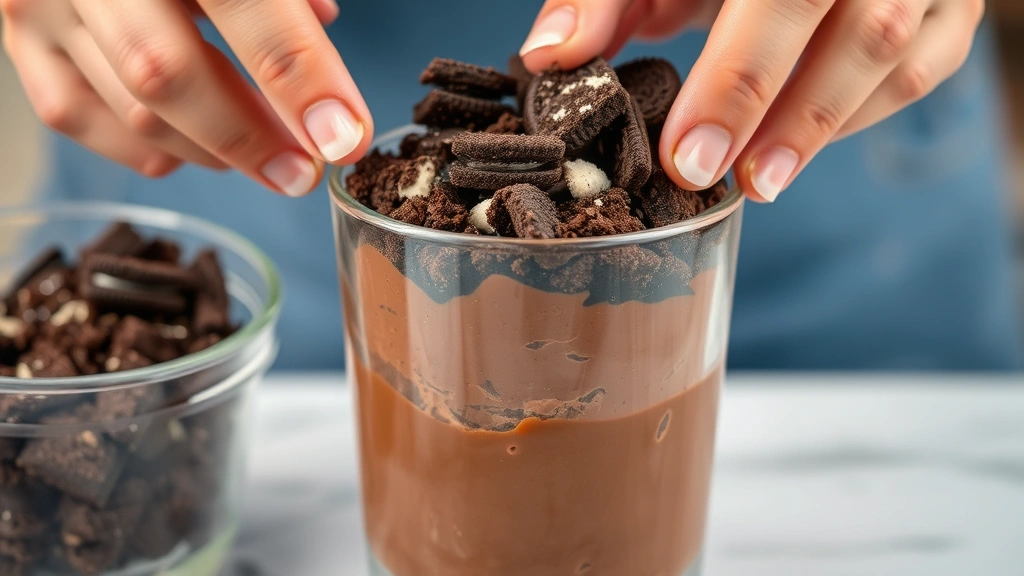
- While the pudding sets, prepare your Oreo crumble by separating about 30-35 cookies into a food processor or sturdy zip-top bag. Pulse or crush them until you achieve a mixture of fine crumbs and slightly larger chunks – you want some texture variation, not a fine powder. Reserve about 8-10 whole cookies for garnish.
- In a separate chilled bowl, pour the heavy whipping cream and add the powdered sugar and vanilla extract. Using an electric mixer or whisk, beat on medium-high speed for 2-3 minutes until stiff peaks form. Be careful not to overbeat, or you’ll end up with butter.
- For individual servings, spoon about 1/4 cup of the chocolate pudding into the bottom of each serving glass or cup.
- Sprinkle a generous handful of the crushed Oreos over the pudding layer – this creates your first “dirt” layer. Don’t be shy with the cookies; the more dirt you use, the more impressive the presentation.
- Add another layer of chocolate pudding on top of the Oreo crumbles, using about 1/4 cup per serving.
- Top with a dollop of whipped cream, spreading it gently to create an even layer across the top.
- Finish with another generous sprinkle of Oreo crumbles, making it look like a garden bed of soil. This is your showstopper layer, so make it look beautiful and rustic.
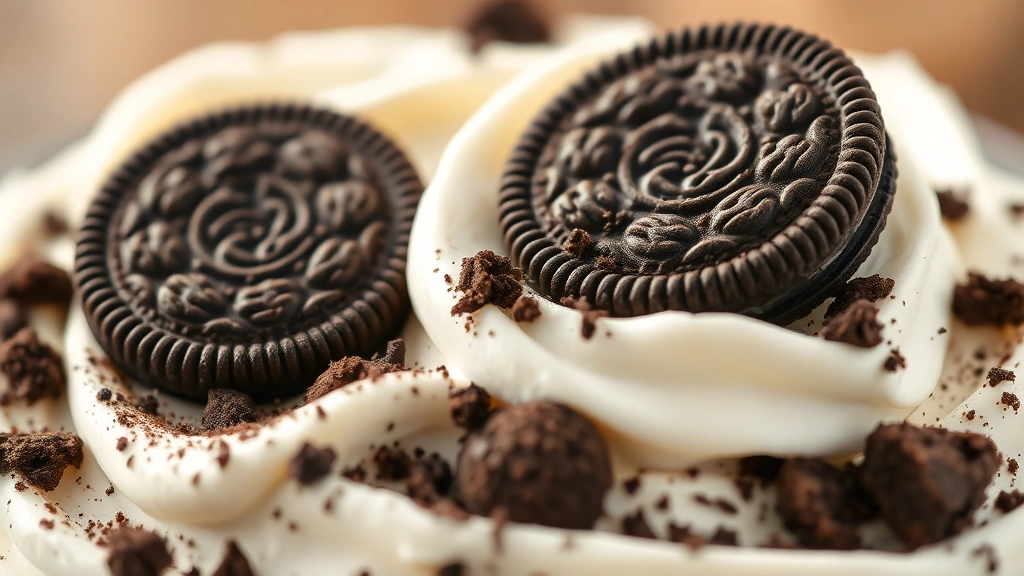
- If desired, place one whole Oreo cookie on top of each serving as a final garnish, or create a decorative pattern with additional crumbles.
- Refrigerate the assembled pudding for at least 2 hours, or up to 8 hours before serving. This resting time allows the flavors to meld and the texture to become perfectly creamy.
- Just before serving, check that everything is properly chilled and add a tiny pinch of sea salt to the top if desired – this enhances the chocolate flavor beautifully.
- Serve chilled directly from the refrigerator. The pudding will maintain its perfect texture for up to 24 hours when properly covered and stored.
Pro Tips
Make-ahead friendly: This dessert is actually better when made 4-6 hours ahead. The Oreos will soften slightly and distribute their flavor throughout the pudding, creating a more cohesive taste.
Individual vs. large batch: Individual portions look more elegant for dinner parties, while a large trifle dish is perfect for casual family gatherings. Both methods work equally well.
Whipped cream alternative: If you prefer not to make fresh whipped cream, you can use high-quality store-bought whipped cream, though homemade is superior and takes only minutes.
Customization options: Try using double-stuffed Oreos for extra indulgence, or mix in some chocolate chips for added richness. You can also layer in some crumbled chocolate cake for extra texture.
Storage: Keep covered in the refrigerator for up to 3 days. The pudding and Oreos will continue to soften over time, which many people prefer.
Serving temperature: This dessert is best served directly from the refrigerator when it’s coldest and most refreshing.
Vegan option: Use plant-based pudding mix, coconut cream, and dairy-free whipped cream with vegan Oreos to create a fully plant-based version.
Nut-free: This recipe is naturally nut-free, making it perfect for those with allergies.
Proportions: The ratio of pudding to Oreos to whipped cream can be adjusted based on your preferences – increase Oreos for more “dirt” or increase whipped cream for extra richness.
Pudding consistency: If your pudding seems too thick, you can thin it with a splash of milk. If too thin, let it set for an additional 5-10 minutes before assembling.
Garnish ideas: Fresh mint leaves, cocoa powder, chocolate shavings, or crushed chocolate wafer cookies all make beautiful garnishes.
Pingback: How to make the BEST Taco Rice Recipe (Quick & Delicious!) – Simple Recipe Finder