
There’s something absolutely magical about Oreo Fluff that takes me back to childhood summers and potluck gatherings. This no-bake dessert is the epitome of easy elegance – a cloud-like combination of whipped cream, marshmallow fluff, and crushed Oreos that comes together in mere minutes. Whether you’re hosting a dinner party, bringing a dish to share, or simply craving something sweet and indulgent, this Oreo Fluff recipe delivers every single time.
What I love most about this recipe is its versatility and simplicity. There are no complicated techniques, no special equipment needed, and honestly, it’s nearly impossible to mess up. The beauty lies in the quality of your ingredients and the way you fold them together with care. I always recommend using full-fat whipped cream and quality Oreos – it makes a noticeable difference in the final texture and taste. This dessert is perfect for feeding a crowd because it’s light, satisfying, and absolutely crowd-pleasing.
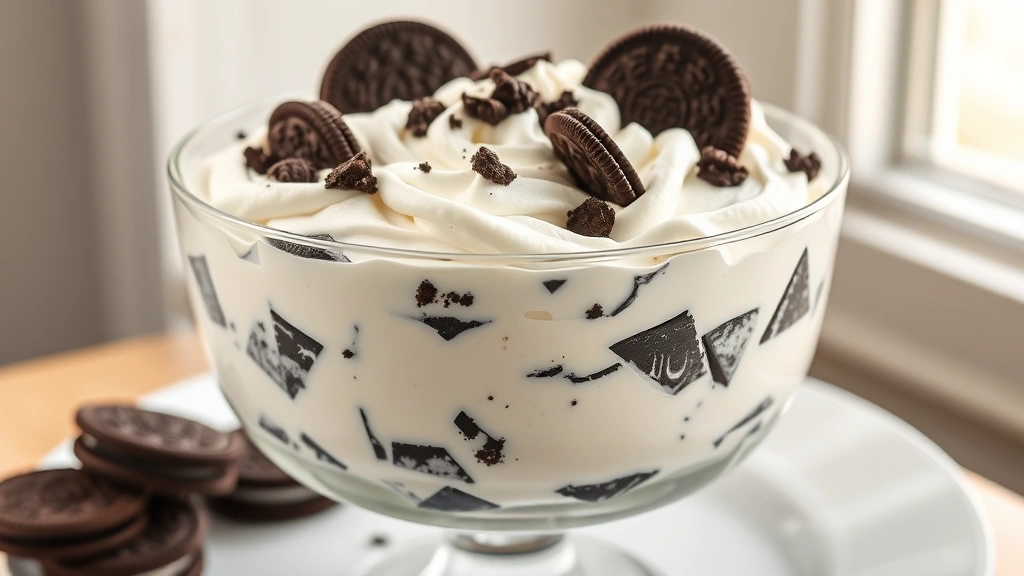
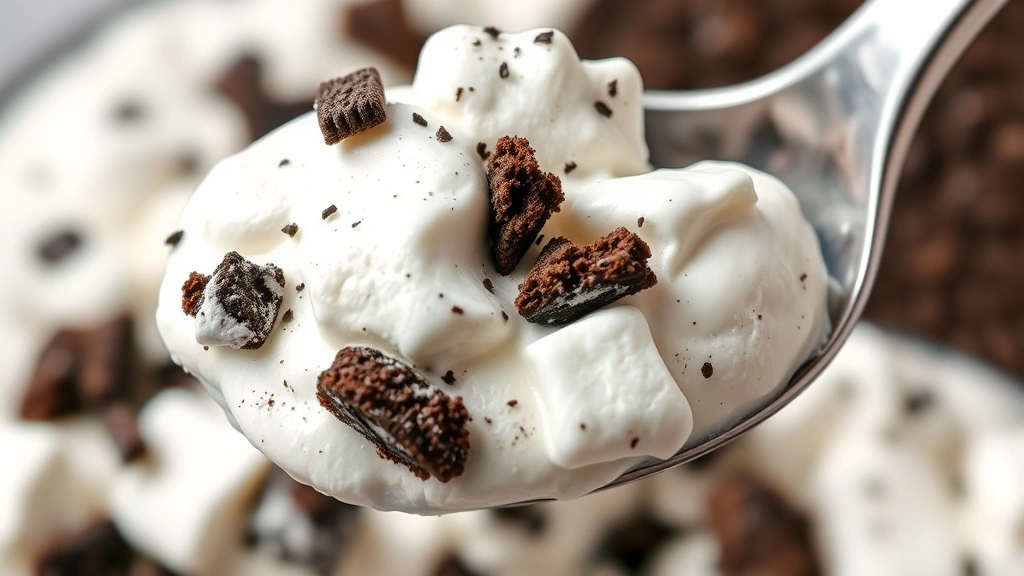
The combination of textures in every spoonful is what makes this fluff so special. You get the pillowy softness of the marshmallow fluff, the rich creaminess of whipped cream, and those delightful cookie pieces throughout. It’s like eating a cloud made of your favorite cookies. I often serve this in individual glasses or a large trifle dish to showcase those beautiful layers. For an extra touch of elegance, I like to reserve some crushed Oreos to sprinkle on top just before serving.
One of my favorite tips is to make this ahead of time – it actually tastes better after sitting in the refrigerator for a few hours, allowing all the flavors to meld together beautifully. The fluff becomes even more luscious and the cookie pieces soften just slightly, creating a more cohesive dessert. Plus, when you’re entertaining, having your dessert ready means less stress in the kitchen.
If you’re looking for other no-bake desserts that are just as impressive, you might also enjoy exploring cream-based recipes or checking out other creamy dessert options. For those who love Oreos in unexpected ways, creative ingredient combinations can inspire new flavor adventures. You might also want to explore complementary flavors like tangy pickled elements or unique pepper-based garnishes for more sophisticated entertaining.
For more detailed techniques on working with whipped cream and marshmallow-based desserts, Bon Appétit offers excellent guidance on dessert preparation. Serious Eats provides scientific insights into how different ingredients interact in no-bake desserts. New York Times Cooking features numerous variations on classic fluff desserts that might inspire your next creation.
Ingredients
- 2 cups heavy whipping cream, cold
- 3 tablespoons granulated sugar
- 1 teaspoon vanilla extract
- 1 jar (7 ounces) marshmallow fluff, at room temperature
- 20-24 Oreo cookies, divided (about 2 cups crushed)
- Pinch of salt
- Additional crushed Oreos for topping (optional)
Instructions
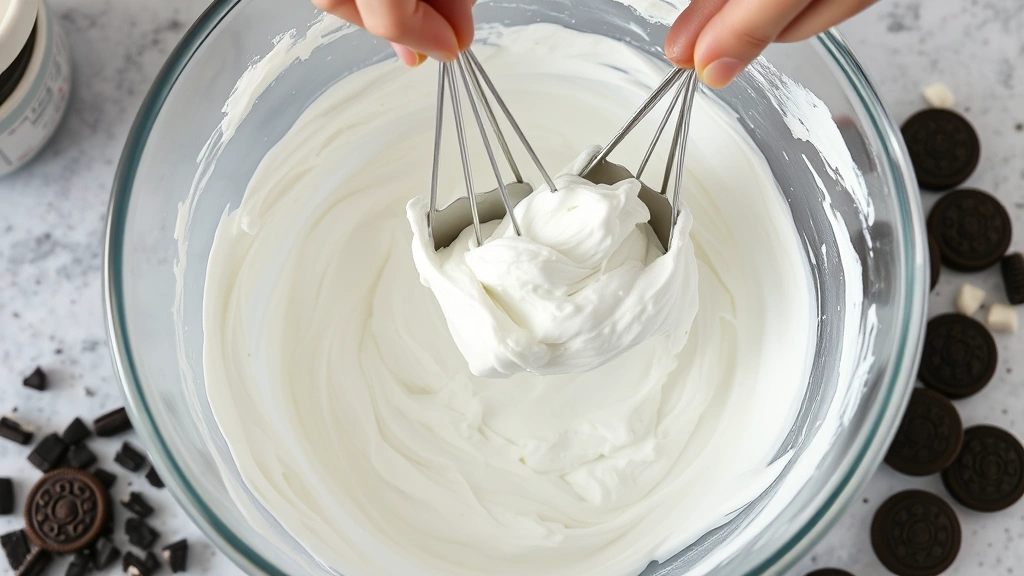
- Pour the cold heavy whipping cream into a large mixing bowl. Using an electric mixer on medium speed, begin whipping the cream. This should take about 2-3 minutes until soft peaks form.
- Once soft peaks have formed, add the granulated sugar, vanilla extract, and a pinch of salt to the whipped cream. Continue beating on medium speed until stiff peaks form and the cream is thick and fluffy, about 1-2 additional minutes.
- Set the bowl of whipped cream aside. In a separate medium bowl, place the room-temperature marshmallow fluff.
- Gently fold one-third of the whipped cream into the marshmallow fluff using a rubber spatula, being careful to maintain the airy texture. Use an under-and-over folding motion rather than stirring.
- Add the remaining whipped cream to the marshmallow mixture in two additions, folding gently after each addition until just combined. The mixture should be light and fluffy with no visible streaks of marshmallow.
- Place 20-24 Oreo cookies in a food processor and pulse until you have a mixture of fine crumbs and small chunks – you want some texture, not a fine powder. You should have about 2 cups of crushed cookies.
- Reserve about 1/4 cup of the crushed Oreos for garnish. Fold the remaining crushed Oreos into the fluff mixture using gentle folding motions, distributing them evenly throughout.
- Transfer the Oreo Fluff to a serving dish. This can be a large bowl, a trifle dish, individual glasses, or a 9×13-inch baking dish, depending on your preference.
- Sprinkle the reserved crushed Oreos over the top of the fluff for garnish.
- Cover the dish with plastic wrap and refrigerate for at least 2 hours, or up to 24 hours, before serving. This allows the flavors to meld and the texture to set slightly.
- When ready to serve, give it a quick stir if desired and use a spoon or ice cream scoop to portion into serving bowls or cups.
Pro Tips
- Make-Ahead Magic: This dessert can be prepared up to 24 hours in advance, making it perfect for entertaining. Simply store it covered in the refrigerator until serving time.
- Quality Matters: Use full-fat heavy whipping cream for the best texture and taste. Ultra-pasteurized cream can sometimes be more difficult to whip, so opt for regular pasteurization if possible.
- Oreo Variations: Feel free to experiment with different Oreo varieties such as Golden Oreos, Double Stuf Oreos, or even seasonal flavors. Each variation will give you a slightly different flavor profile.
- Texture Control: For a fluffier consistency, use 8 ounces of marshmallow fluff. For a denser, more cookie-forward dessert, use only 6 ounces. Adjust based on your personal preference.
- Folding Technique: The key to maintaining the airy texture is gentle folding rather than aggressive mixing. Use a rubber spatula and fold from the bottom of the bowl up and over, rotating the bowl as you go.
- Marshmallow Temperature: Allow marshmallow fluff to come to room temperature before folding into the whipped cream. Cold marshmallow fluff is harder to incorporate smoothly.
- Serving Suggestions: Serve in chilled glasses or bowls for the best presentation. You can also layer this with crushed Oreos and whipped cream in a trifle dish for a more dramatic presentation.
- Stability: While this dessert is best served within 24 hours, it can be refrigerated for up to 48 hours. The texture may become slightly softer as it sits.
- Whipped Cream Tips: Chill your mixing bowl and beaters in the freezer for 10-15 minutes before whipping cream. This helps achieve better volume and stability.
- Flavor Enhancements: Add a pinch of cinnamon or a tablespoon of instant coffee powder to the whipped cream for interesting flavor variations.
- Storage: Cover tightly with plastic wrap to prevent the fluff from absorbing refrigerator odors and to maintain its freshness.
- Portioning: Use an ice cream scoop dipped in hot water for clean, attractive portions. Alternatively, layer in individual serving glasses for an elegant presentation.