
There’s something absolutely magical about pulling a perfectly tender, fall-apart brisket out of the oven. This oven-baked brisket recipe is my go-to for impressing family and friends without needing a smoker or spending all day tending to a grill. The secret? Low and slow cooking in a covered Dutch oven that transforms this notoriously tough cut into pure, juicy perfection.
I’ve been making brisket this way for years, and I can confidently say it rivals any Texas barbecue joint. The beauty of oven-baking is that you get consistent, reliable results every single time. The meat becomes so tender it practically melts on your tongue, and the seasonings create a gorgeous bark on the outside while keeping everything moist inside.
This recipe serves a crowd and actually gets better the next day, making it perfect for meal prep or entertaining. Pair it with pickled red onions for brightness or creamy sides like heavy cream pasta for comfort. The possibilities are endless, and your dinner table will thank you.
What I love most about this method is how hands-off it is once everything gets going. You’re not standing over a grill or smoker, constantly monitoring temperature and adding fuel. Just set it, forget it (mostly), and let your oven do the heavy lifting. The result is restaurant-quality brisket that tastes like you spent way more effort than you actually did.
I always recommend Serious Eats for understanding the science behind meat cooking, but this recipe is truly foolproof. Whether you’re a seasoned cook or trying brisket for the first time, you’ll nail it. The key is patience, quality beef, and not peeking too much! Let me walk you through exactly how I make the best oven-baked brisket every single time.
Ingredients
- 1 whole beef brisket, 12-14 pounds (with fat cap)
- 3 tablespoons kosher salt
- 2 tablespoons freshly ground black pepper
- 2 tablespoons garlic powder
- 2 tablespoons onion powder
- 1 tablespoon smoked paprika
- 1 tablespoon brown sugar
- 1 teaspoon cayenne pepper
- 1 teaspoon dry mustard
- 2 tablespoons olive oil
- 2 large yellow onions, thickly sliced
- 1 head of garlic, halved
- 3 cups beef broth
- 1 cup apple cider vinegar
- 3 bay leaves
- 4-5 sprigs fresh thyme
- 2 tablespoons butter
- 1 tablespoon cornstarch (optional, for sauce)
Instructions
- Remove your brisket from the refrigerator 30-45 minutes before cooking to bring it to room temperature. This ensures even cooking throughout the meat.
- Preheat your oven to 300°F. Position the rack in the lower-middle portion of your oven.
- Pat the brisket completely dry with paper towels. This is crucial for developing a good crust and bark on the outside.
- In a small bowl, combine the kosher salt, black pepper, garlic powder, onion powder, smoked paprika, brown sugar, cayenne pepper, and dry mustard to create your dry rub.
- Rub the entire brisket generously with olive oil, then coat thoroughly with the dry rub mixture on all sides, pressing it gently into the meat.
- Heat a large Dutch oven over medium-high heat until very hot. Carefully place the brisket fat-side down into the hot pot and sear for 3-4 minutes until deeply browned.
- Flip the brisket and sear the other side for another 3-4 minutes until you achieve a dark caramelized crust.
- Remove the brisket from the Dutch oven and set aside on a cutting board.
- Add the sliced onions to the pot with the remaining fat and cook for 2-3 minutes, stirring occasionally, until they begin to soften.
- Pour in the beef broth and apple cider vinegar, scraping the bottom of the pot with a wooden spoon to release all the browned bits and flavor.
- Add the halved garlic head, bay leaves, and fresh thyme sprigs to the liquid.
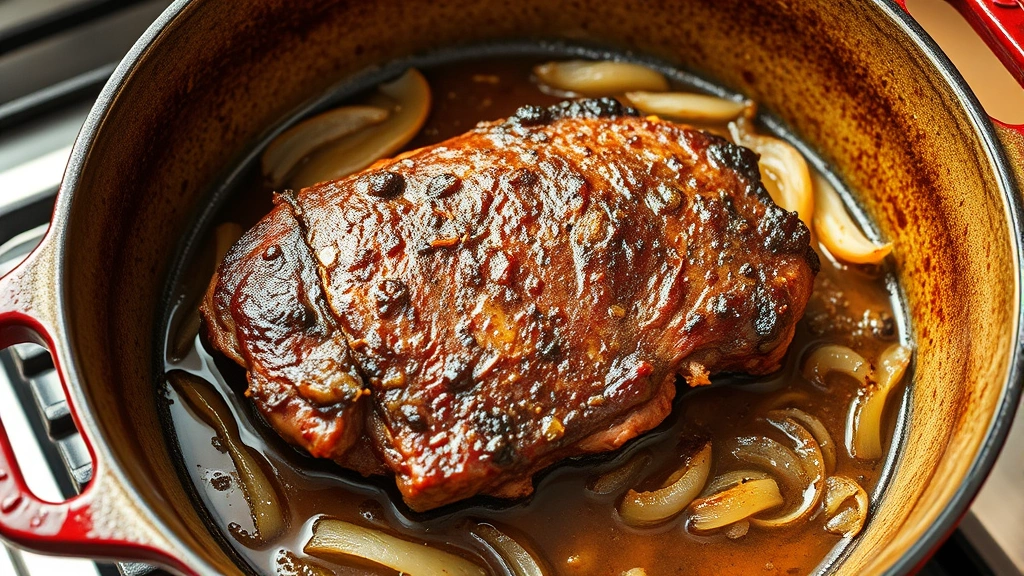
- Return the brisket to the pot, fat-side up, nestling it among the onions and aromatics.
- Cover the Dutch oven with its lid and transfer to the preheated 300°F oven.
- Cook for 4-5 hours, depending on the size of your brisket. It should be fork-tender when done. Resist the urge to peek constantly, but check after 3 hours.
- After 2.5 hours, you can flip the brisket so the fat cap faces down for the second half of cooking if you prefer, though this is optional.
- The brisket is done when a fork easily pierces the thickest part of the meat and it shreds effortlessly.
- Carefully remove the brisket from the Dutch oven and transfer to a cutting board. Tent loosely with foil and let rest for 15 minutes.
- Strain the cooking liquid into a saucepan, discarding the solids. Skim off excess fat from the top if desired.
- Place the saucepan over medium heat and simmer the braising liquid for 5-10 minutes to concentrate the flavors.
- If you prefer a thicker sauce, mix the cornstarch with 2 tablespoons of cold water, then whisk into the simmering liquid and cook for 1-2 minutes until thickened.
- Whisk in the butter until the sauce is silky and glossy.
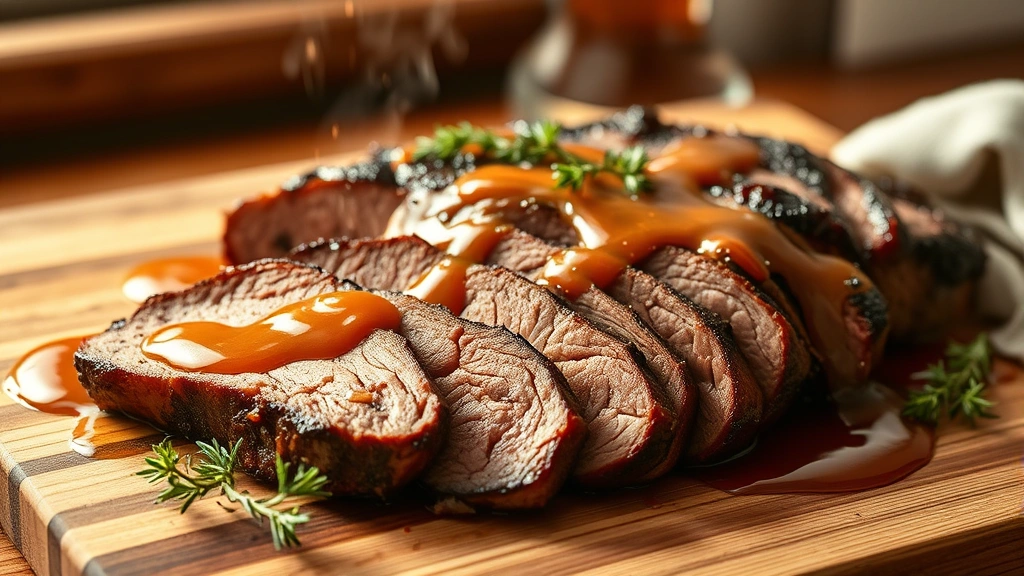
- Slice the brisket against the grain into ¼-inch thick slices. The grain runs in different directions in different sections, so look carefully at each portion.
- Arrange the sliced brisket on a serving platter and drizzle with the warm pan sauce.
- Serve immediately with crusty bread or your favorite sides.
Pro Tips
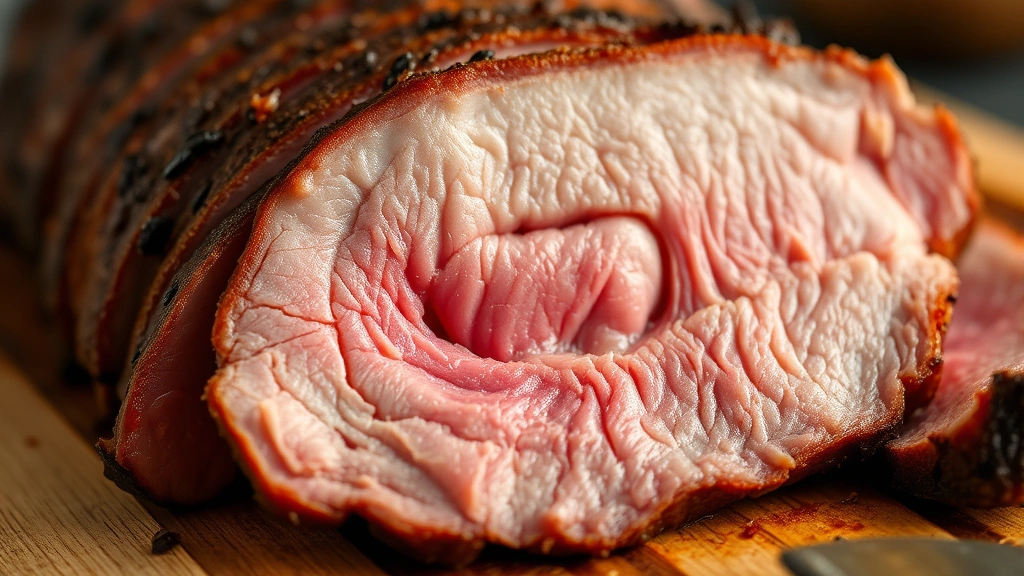
- The fat cap on your brisket is your friend—it keeps the meat moist and flavorful during the long cook. Don’t trim it off before cooking, though you can trim it after if preferred.
- Beef brisket comes in two parts: the flat and the point. Using a whole packer brisket (both parts together) gives you different textures and flavors, making for the best eating experience.
- Don’t skip the resting period after cooking. Those 15 minutes allow the juices to redistribute throughout the meat, ensuring every slice is juicy rather than dry.
- Slicing against the grain is absolutely essential. The grain runs in different directions in the flat versus the point, so examine each piece before slicing to identify which direction to cut.
- This brisket actually tastes even better the next day. The flavors continue to develop, and the meat becomes easier to slice when cold. Reheat gently in a low oven (300°F) with some of the sauce to keep it moist.
- You can make this recipe a day ahead. Cool the brisket completely in its braising liquid, then refrigerate overnight. The fat will solidify on top and can be easily removed.
- For a more pronounced smoky flavor, use smoked paprika and add a teaspoon of liquid smoke to the braising liquid.
- If your brisket is done before you’re ready to serve, you can keep it warm in a 200°F oven, tightly covered, for up to an hour without drying it out.
- The braising liquid makes an incredible sauce or can be frozen for future use in soups and stews.
- For a crowd, this recipe easily doubles. Just use a larger Dutch oven or cook in two separate pots.
- Serve with fresh salads or creamy sides for a complete meal.
- Check Bon Appétit for more inspiring meat recipes and techniques.