
There’s something absolutely magical about homemade peanut butter eggs that store-bought versions simply cannot replicate. These sweet, creamy confections feature a smooth peanut butter center enrobed in rich chocolate, making them the perfect treat for Easter, gift-giving, or whenever you’re craving something truly special. What I love most about making these at home is that you control every ingredient—no mystery additives or preservatives, just pure peanut butter goodness wrapped in quality chocolate.
This recipe has been a springtime favorite in my kitchen for years, and I’m thrilled to share my foolproof method with you. The beauty of homemade peanut butter eggs lies in their simplicity and the incredible results you’ll achieve with just a few basic ingredients and minimal equipment. Whether you’re an experienced candy maker or tackling this for the first time, these eggs come together beautifully with a little patience and attention to detail.
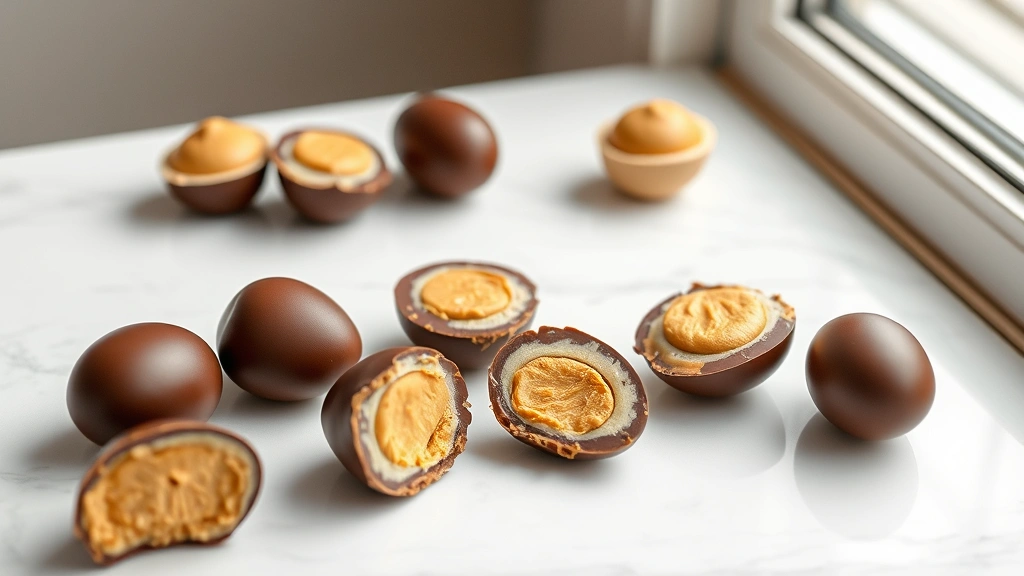
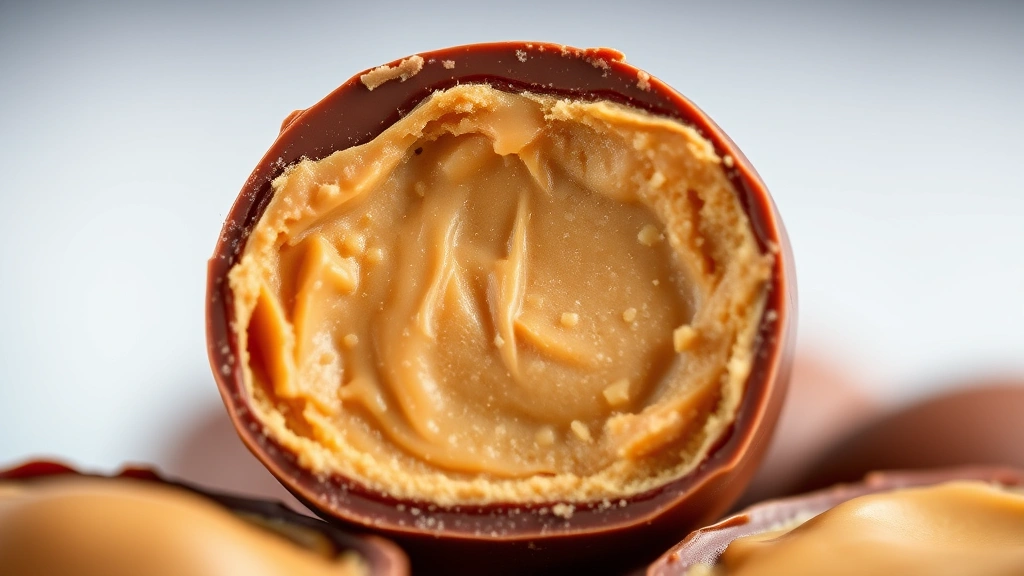
The process is surprisingly straightforward: create a creamy peanut butter mixture, shape it into egg forms, chill until firm, then dip each one into melted chocolate. The contrast between the smooth, slightly salty peanut butter interior and the crisp chocolate shell is absolutely divine. I’ve found that the key to success is keeping your peanut butter mixture at the right consistency and ensuring your chocolate is tempered properly for that beautiful snap and shine.
What makes this recipe truly special is its versatility. You can customize the peanut butter filling by adjusting the sweetness or adding a touch of vanilla extract for extra flavor dimension. Some years I make half my batch with dark chocolate and half with milk chocolate, allowing guests to choose their favorite combination. You can even experiment with different nut butters if you’re feeling adventurous—almond butter creates a lovely variation that’s equally delicious.
These peanut butter eggs also make incredibly thoughtful homemade gifts. Package them in cellophane bags tied with pretty ribbons, or arrange them in a decorative box lined with tissue paper. Your friends and family will be absolutely delighted to receive something handmade with such obvious care and attention. I always make extra batches during Easter season specifically for gift-giving because people truly appreciate the homemade touch.
One of my favorite things about this recipe is how forgiving it is. Even if your eggs aren’t perfectly uniform in shape, they’re still absolutely delicious. The important thing is that you’re creating something special from scratch, and that effort always shines through in the final product. Plus, your kitchen will smell absolutely wonderful while you’re making these—that combination of peanut butter and chocolate is simply irresistible.
For best results, I recommend making these in a cool kitchen or during cooler months, as the peanut butter filling needs to stay firm enough to hold its shape during the chocolate-dipping process. If you’re making these during warmer weather, you might want to work quickly and keep your filling in the refrigerator between shaping batches. I also suggest using natural peanut butter if possible, as it provides a cleaner, more authentic peanut flavor, though conventional peanut butter works beautifully too.
The chocolate coating is equally important to the success of these treats. I prefer using chocolate chips or chopped chocolate rather than melting bars, as they melt more evenly and consistently. If you don’t have a double boiler, a heat-safe bowl set over a pot of simmering water works perfectly. The key is keeping your chocolate at the right temperature—warm enough to coat smoothly, but not so hot that it breaks or becomes grainy.
These homemade peanut butter eggs also store beautifully, making them perfect for preparing ahead of time. Kept in an airtight container in a cool location, they’ll maintain their quality for up to two weeks, though I doubt they’ll last that long! You can even freeze them for longer storage—just allow them to come to room temperature before serving for the best texture and flavor. I love having a batch stashed away in my freezer for unexpected guests or when I need a little pick-me-up.
What I appreciate most about teaching this recipe is watching people realize how achievable homemade candy truly is. Many home cooks think confectionery requires special skills or fancy equipment, but this recipe proves that’s simply not the case. With basic kitchen tools and quality ingredients, you can create restaurant-quality treats that taste infinitely better than anything you’d find at a candy counter. That sense of accomplishment when you bite into a perfectly made homemade peanut butter egg is truly unbeatable.
I encourage you to read through the entire recipe before beginning, and don’t hesitate to reference it while you work. Having all your ingredients prepped and ready—what bakers call mise en place—will make the process flow smoothly. Take your time shaping the peanut butter mixture, as this step sets up your success during chocolate dipping. And remember, imperfection is part of the charm of homemade candy. These treats are meant to be enjoyed, not judged on their appearance.
Once you master this basic recipe, you might enjoy exploring variations like adding different flavor dimensions to your confections or experimenting with complementary ingredients. Some candy makers enjoy adding a sprinkle of sea salt to the chocolate coating for a sweet-and-salty contrast, while others prefer to keep things pure and simple. There’s no wrong answer—just trust your taste preferences and have fun with the process.
I’m so excited for you to try this recipe and experience the joy of making homemade peanut butter eggs. There’s truly nothing quite like the satisfaction of creating something delicious from scratch, and these treats are the perfect introduction to candy making. Happy making, and I hope your kitchen fills with the wonderful aroma of chocolate and peanut butter very soon!
Ingredients
- 1 cup creamy peanut butter (natural or conventional)
- 4 tablespoons unsalted butter, softened
- 2 cups powdered sugar, sifted
- 1 teaspoon vanilla extract
- 1/4 teaspoon salt
- 12 ounces semi-sweet or milk chocolate chips
- 1 tablespoon coconut oil or shortening (for chocolate consistency)
- Optional: 1/4 teaspoon sea salt for topping
Instructions
- In a large mixing bowl, combine the softened butter and peanut butter, stirring until well combined and smooth.
- Gradually add the sifted powdered sugar to the peanut butter mixture, stirring after each addition to incorporate fully and prevent lumps.
- Add the vanilla extract and salt to the mixture, stirring until the entire filling is smooth, creamy, and well combined.
- Line a baking sheet with parchment paper and set aside for shaping the eggs.
- Using your hands or a small cookie scoop, form the peanut butter mixture into egg-shaped portions (approximately 1 to 1.5 inches long).
Place each shaped egg on the prepared parchment paper.
- Once all eggs are shaped, transfer the baking sheet to the refrigerator and chill for at least 1 hour until the filling is very firm and holds its shape.
- After chilling, prepare your chocolate coating by combining the chocolate chips and coconut oil in a heat-safe bowl.
- Create a double boiler by setting the heat-safe bowl over a pot of gently simmering water (ensuring the bowl doesn’t touch the water directly).
- Stir the chocolate and coconut oil mixture frequently until completely melted and smooth, approximately 5 to 7 minutes.
- Remove the chocolate from heat and allow it to cool for 2 to 3 minutes—this prevents the chocolate from being too hot when coating the eggs.
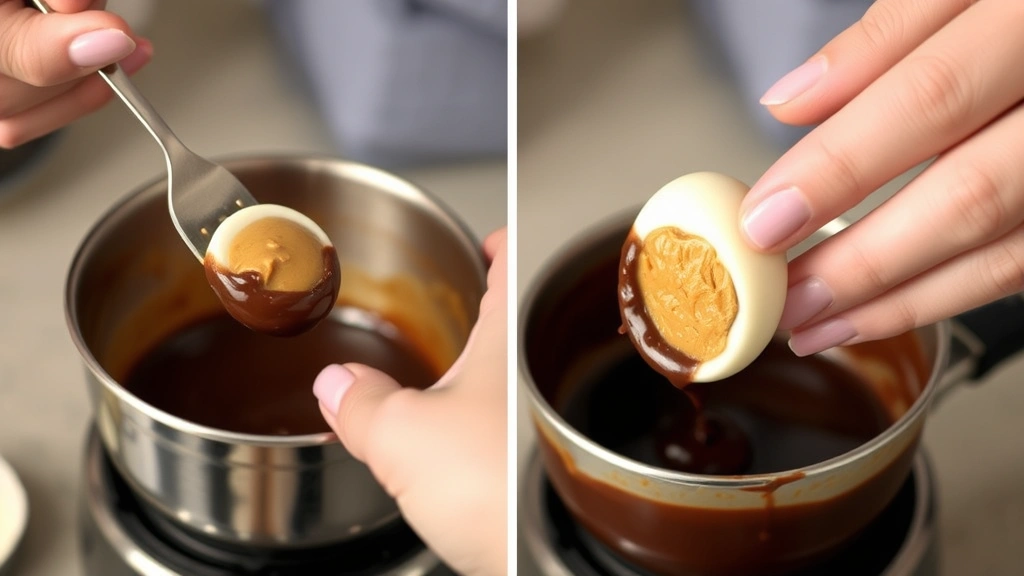
- Working with one egg at a time, carefully drop a chilled peanut butter egg into the melted chocolate.
- Using a fork or chocolate dipping tool, roll the egg to coat it completely on all sides with chocolate.
- Carefully remove the coated egg from the chocolate using the fork, allowing excess chocolate to drip back into the bowl for 2 to 3 seconds.
- Transfer the chocolate-coated egg back to the parchment-lined baking sheet.
- If desired, immediately sprinkle a tiny pinch of sea salt on top of the egg before the chocolate sets.
- Repeat the dipping process with remaining peanut butter eggs, working efficiently to prevent the chocolate from cooling too much.
- If the chocolate begins to thicken while dipping, simply return it to the double boiler for a few seconds to restore its consistency.
- Once all eggs are coated and placed on the baking sheet, transfer them to the refrigerator to set for at least 1 hour until the chocolate is firm.
- Once the chocolate coating has set completely, you can remove the eggs from the refrigerator and store them in an airtight container.
Pro Tips
Chocolate Selection: The quality of your chocolate dramatically affects the final result. Look for chocolate with cocoa butter as a primary ingredient rather than vegetable oils for superior flavor and texture.
Double Boiler Alternative: If you don’t own a double boiler, simply place a heat-safe bowl over a pot of simmering water, ensuring the bottom of the bowl doesn’t touch the water directly.
Coating Consistency: The addition of coconut oil or shortening to the chocolate is essential—it prevents the coating from becoming too thick and difficult to work with, ensuring smooth, glossy coverage.
Peanut Butter Selection: Natural peanut butter works wonderfully but may require stirring the oil back in before measuring. Conventional peanut butter with added stabilizers works equally well and may be easier to incorporate.
Storage Options: Store these eggs in an airtight container at room temperature for up to one week, in the refrigerator for up to two weeks, or frozen for up to three months. Allow frozen eggs to thaw at room temperature before serving.
Shaping Tips: If your peanut butter mixture is too soft to hold its shape, refrigerate it for 15 to 20 minutes before shaping. If it becomes too hard, let it sit at room temperature for a few minutes to soften slightly.
Customization Ideas: Add a quarter teaspoon of almond extract to the filling for subtle depth, or replace half the powdered sugar with crushed pretzels for a sweet-and-salty variation.
Chocolate Melting: Never allow water to splash into your chocolate while melting, as even a small amount can cause it to seize and become grainy and unusable.
Gift Presentation: These eggs make beautiful gifts when packaged in cellophane treat bags, decorative boxes, or on tiered stands with tissue paper. They’re always well-received as homemade gifts.
Batch Making: This recipe doubles easily if you want to make a larger quantity for gift-giving or Easter celebrations. Simply multiply all ingredients proportionally.
Pingback: How to Make the Best Smoked Chicken Thighs Recipe! – Simple Recipe Finder