
There’s something wonderfully nostalgic about making pizza at home, and Pillsbury pizza dough is the secret weapon that makes it effortless and delicious. Whether you’re a busy weeknight parent or someone who loves hosting pizza nights without the stress, this versatile dough deserves a spot in your kitchen rotation. The beauty of Pillsbury pizza dough lies in its convenience—it comes ready to use, eliminating hours of rising time—while still delivering that satisfying homemade pizza experience.
In this guide, we’re going to explore everything you need to know about transforming Pillsbury pizza dough into the best pizza you’ve ever made at home. From selecting the right dough to mastering baking techniques, we’ll cover all the tips and tricks that professional pizzerias use, adapted for your home kitchen. You’ll learn how to properly prep your dough, create the perfect crispy-yet-chewy crust, and build flavor layers that rival your favorite pizzeria.
Pillsbury pizza dough is incredibly forgiving, making it perfect for beginners, but it also rewards attention to detail. With just a few simple adjustments and the right toppings, you can create restaurant-quality pizza in under 30 minutes. The best part? Your kitchen will smell absolutely amazing, and your family will be amazed at how easy this is. Let’s dive into the secrets that make Pillsbury pizza dough shine.
One of the most important things to remember is that this dough works beautifully with various topping combinations. Pair it with fresh vegetables like shishito peppers for a gourmet twist, or keep it classic with traditional cheese and pepperoni. You can also experiment with pickled red onions for an unexpected pop of flavor and color. The dough’s neutral flavor profile makes it the perfect canvas for your culinary creativity.
Beyond pizza, this dough opens doors to other delicious possibilities. You can transform it into pizza bread, stuffed crust creations, or even use it as a base for chickpea salad flatbreads. The versatility is truly endless, and once you master the basic technique, you’ll find yourself reaching for Pillsbury dough regularly.
For more detailed information on pizza dough techniques and variations, check out Serious Eats, which offers comprehensive pizza science explanations. You can also explore Bon Appétit for creative topping inspiration and New York Times Cooking for classic pizza recipes that pair beautifully with quality dough.
The key to consistently excellent results is understanding the fundamentals: proper temperature management, adequate seasoning, and respecting your ingredients. Pillsbury has perfected their dough formula over decades, so when you use it correctly, you’re benefiting from professional expertise. This recipe guide will show you exactly how to leverage that quality to create pizzas that look and taste like they came from a professional kitchen.
Ingredients
- 2 cans (13.8 oz each) Pillsbury pizza dough
- 3 tablespoons olive oil, divided
- 1 teaspoon Italian seasoning
- ½ teaspoon garlic powder
- ½ teaspoon onion powder
- Salt and black pepper to taste
- 1½ cups pizza sauce or marinara sauce
- 2 cups shredded mozzarella cheese
- 1 cup additional toppings of choice (pepperoni, fresh basil, vegetables, etc.)
- 2 cloves garlic, minced
- Fresh herbs for garnish (basil, oregano)
- Cornmeal or flour for dusting (optional)
Instructions
- Preheat your oven to 425°F (220°C). If you have a pizza stone or baking steel, place it in the oven now to preheat; this creates a crispier crust.
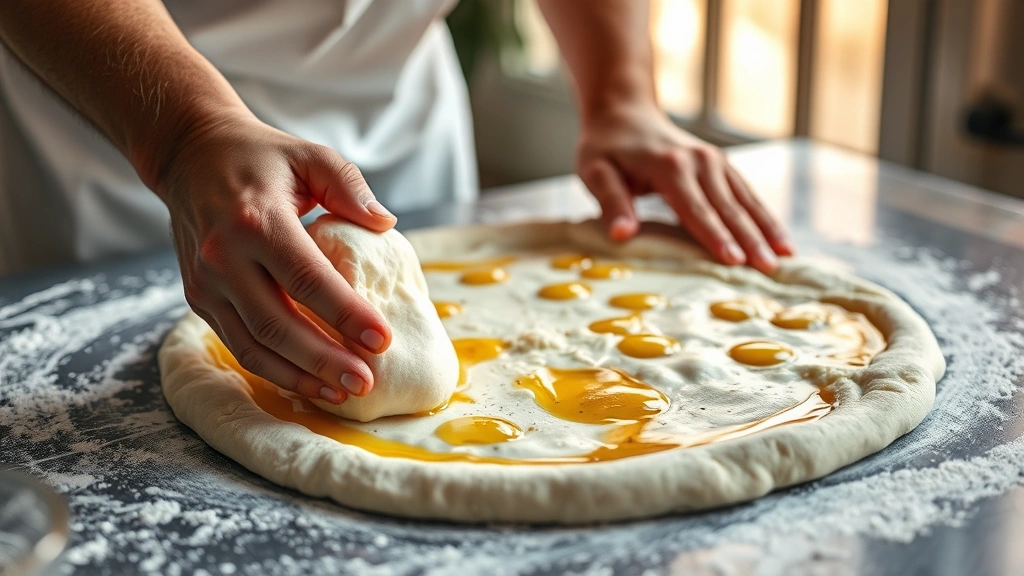
- Remove both cans of Pillsbury pizza dough from the refrigerator and let them sit at room temperature for 3-5 minutes to make unrolling easier.
- Unroll the first can of dough onto a clean work surface or directly onto a pizza pan or baking sheet. If using a pan, lightly drizzle with ½ tablespoon of olive oil and spread gently to coat the surface.
- Using your fingertips or knuckles, gently stretch the dough to fit your pizza pan, working from the center outward. Don’t be aggressive; let the dough relax and resist a bit—this builds texture and structure.
- Create a slightly raised edge around the perimeter of the dough by gently pressing and rolling the edges between your fingers. This forms the traditional pizza crust rim.
- In a small bowl, combine Italian seasoning, garlic powder, onion powder, salt, and black pepper. Mix well to create your seasoning blend.
- Brush the surface of the stretched dough with 1 tablespoon of olive oil, covering the entire surface including the edges. This promotes browning and flavor development.
- Sprinkle half of your seasoning blend evenly over the oiled dough, reserving the rest for the second pizza.
- Spread ¾ cup of pizza sauce evenly over the seasoned dough, leaving about ½ inch clear around the edges for the crust. Use the back of a spoon to spread gently.
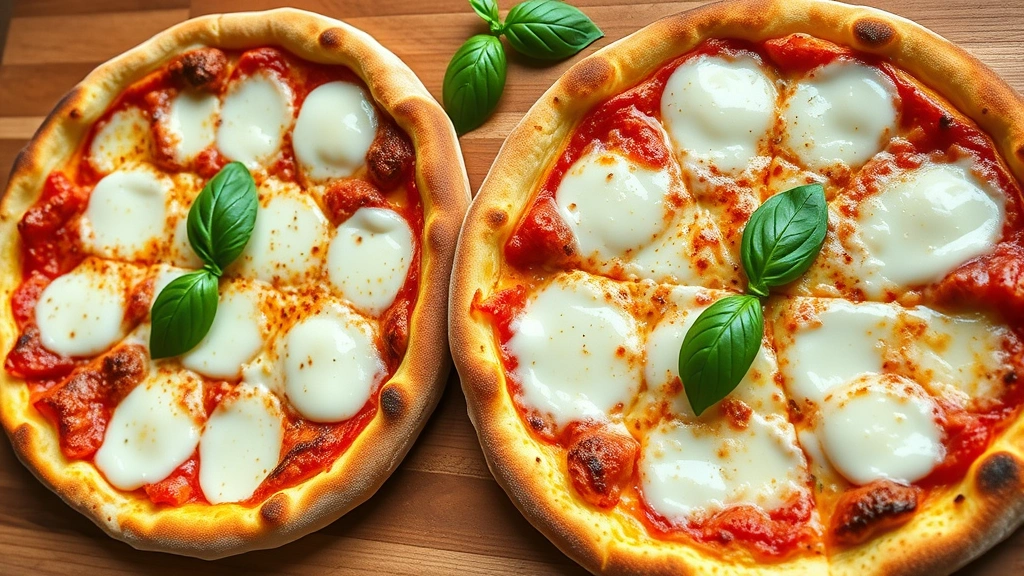
- Scatter 1 cup of mozzarella cheese evenly over the sauce, covering most of the surface.
- Add your choice of toppings evenly over the cheese layer. If using pepperoni, arrange slices slightly overlapping for even distribution. Avoid overloading—a thin layer of toppings cooks more evenly.
- Top with any remaining cheese, pressing gently so it adheres to the toppings and sauce.
- Place the assembled pizza on the preheated pizza stone or directly on the middle oven rack on a baking sheet.
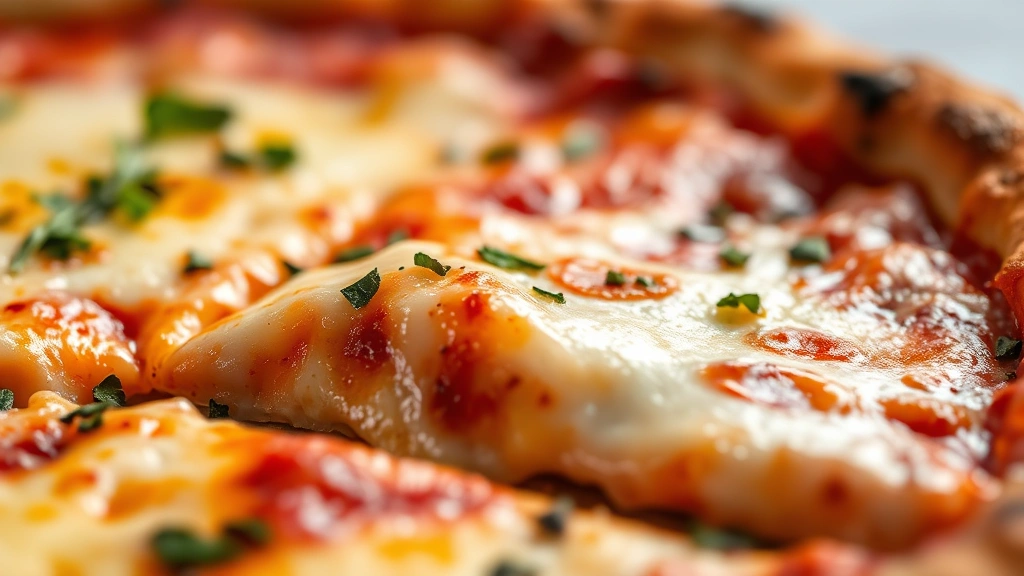
- Bake for 15-18 minutes, or until the crust is golden brown and the cheese is bubbly with light browning around the edges.
- While the first pizza bakes, repeat steps 2-12 with the second can of dough, creating your second pizza.
- When the first pizza is done, carefully remove it from the oven using a pizza peel or large spatula. Let it rest for 2-3 minutes before slicing.
- Place the second pizza in the oven and bake for 15-18 minutes until it reaches the same golden, bubbly perfection.
- Remove the second pizza and let it rest briefly. Finish both pizzas with fresh herbs like torn basil, dried oregano, or fresh parsley as desired.
- Slice using a sharp pizza cutter or knife, cutting from the center outward for clean, even slices.
- Serve immediately while the crust is still warm and crispy, allowing the cheese to showcase its perfect melted texture.
Pro Tips
- **Dough Temperature Matters**: Cold dough straight from the fridge can be difficult to stretch. Letting it sit for 5 minutes at room temperature makes it more pliable and easier to work with without tearing.
- **Don’t Skip the Oil**: Brushing the dough with olive oil before seasoning and sauce creates a flavorful barrier that prevents excess moisture from making the crust soggy. It also promotes that desirable golden-brown exterior.
- **Seasoning Strategy**: Season the oiled dough before adding sauce. This ensures the flavors are distributed throughout the crust rather than just sitting on top of the sauce where they can wash away.
- **Sauce Ratio**: Use approximately ¾ cup of sauce per pizza. Too much sauce will make the crust soggy and prevent proper browning; too little leaves the pizza dry. You can always add more sauce to individual slices after baking.
- **Cheese Distribution**: Fresh mozzarella can be used but adds moisture; low-moisture mozzarella is ideal for achieving that crispy crust. Pre-shredded cheese works fine and often has anti-caking agents that help prevent clumping.
- **Topping Placement**: Place heavier toppings in the center where they cook better, and lighter toppings toward the edges. This ensures even cooking throughout. Fresh vegetables should be cut into similarly sized pieces for uniform cooking.
- **Pizza Stone Benefits**: If you have a pizza stone or baking steel, preheat it in the oven. It distributes heat more evenly than a baking sheet, resulting in a crispier crust. Always place it in a cold oven, then preheat.
- **Temperature Control**: 425°F is ideal for Pillsbury dough—hot enough to cook the dough through and brown the cheese, but not so hot that the crust burns before the interior cooks. Every oven varies, so monitor your first pizza closely.
- **Resting Time**: Letting the finished pizza rest for 2-3 minutes allows the cheese to set slightly, making it easier to slice without the toppings sliding around.
- **Storage**: Leftover pizza stores beautifully. Keep it in an airtight container in the refrigerator for up to 3 days. Reheat in a 350°F oven for 10 minutes to restore crispness, or use a toaster oven for individual slices.
- **Make-Ahead Tips**: You can prepare the dough and toppings ahead of time. Have all toppings measured and ready in bowls before you start assembling. This streamlines the process and ensures consistent results.
- **Flavor Enhancements**: Add minced garlic to your olive oil before brushing the dough for extra flavor. Finish baked pizzas with a drizzle of high-quality olive oil and fresh herbs for restaurant-quality results.
Pingback: How to make the BEST Roasted Peppers Recipe – So Simple! – Simple Recipe Finder