

There’s nothing quite like homemade plantain chips—crispy, golden, and absolutely addictive! This recipe transforms simple plantains into the ultimate snack that’s perfect for entertaining or satisfying those afternoon cravings. The key to achieving that perfect crunch is using the right plantains at the right ripeness level and mastering your frying technique.
Plantains are a staple in Caribbean and Latin American cuisine, and for good reason. Unlike bananas, plantains are starchy and less sweet, making them ideal for both savory and sweet applications. When you fry them until they’re golden brown, they develop this incredible textural contrast—crispy on the outside and tender on the inside. This plantain chips recipe will become your go-to whenever you need an impressive appetizer or a crowd-pleasing snack.
What makes these chips so irresistible is their versatility. You can season them with simple sea salt for a classic approach, or get creative with homemade seasoning salt for extra flavor complexity. They pair beautifully with pickled red onions or alongside other appetizers like crispy shishito peppers. For a more complete snack board, serve them with protein-packed chickpea salad or even alongside a Greek yogurt dip.
According to Serious Eats, the secret to perfect fried plantains lies in understanding the different stages of ripeness and adjusting your technique accordingly. Green plantains will give you savory chips with a more potato-like texture, while yellow plantains offer a slightly sweeter result. This recipe uses yellow plantains for that perfect balance of flavor and texture.
Before you start frying, it’s essential to prepare your workspace properly. Set up a cooling station with paper towels to absorb excess oil, and have your seasoning ready to sprinkle on immediately after frying. Bon Appétit recommends working in batches to maintain consistent oil temperature, which is crucial for achieving that perfect golden color without burning. The oil temperature should remain between 325-350°F (163-177°C) throughout the cooking process.
One thing many home cooks overlook is the importance of slicing consistency. Using a mandoline slicer ensures uniform thickness, which means all your chips cook evenly. This is especially important when you’re frying multiple batches and want consistent results every time. The New York Times Cooking emphasizes that even slicing is one of the most critical steps in achieving restaurant-quality fried foods at home.
These plantain chips are best served immediately while they’re still warm and crispy, though they’ll keep in an airtight container for up to three days. Simply reheat them in a 350°F oven for a few minutes to restore their crispness. They’re perfect as a standalone snack, served at parties, or packed in lunch boxes for a satisfying treat that beats any store-bought version.
Ingredients
- 3-4 medium yellow plantains, just beginning to show brown spots
- Oil for frying (vegetable, canola, or peanut oil recommended)
- Sea salt to taste
- Optional: cayenne pepper, garlic powder, or paprika for seasoning
- Optional: fresh lime juice for finishing
Instructions
- Fill a large, heavy-bottomed pot or deep skillet with oil to a depth of about 2 inches. Place a thermometer in the oil and heat to 325°F (163°C). Maintaining proper temperature is crucial for crispy chips that aren’t greasy.
- While the oil heats, prepare the plantains. Rinse them under cool water and pat completely dry with paper towels—any moisture will cause the oil to splatter.
- Using a sharp knife or mandoline slicer, carefully slice the plantains into thin, even slices, approximately 1/8-inch thick. Thinner slices will be crispier, while thicker slices will have a softer interior.
- Line a large plate or baking sheet with several layers of paper towels. This is where your fried chips will drain immediately after cooking.
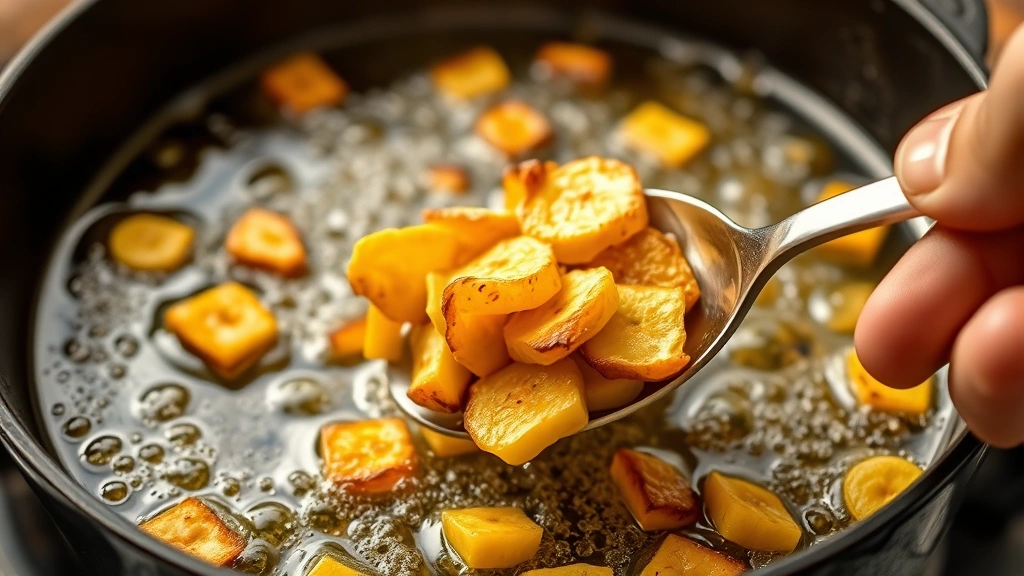
- Once the oil reaches temperature, carefully place a small batch of plantain slices into the hot oil, being mindful not to overcrowd the pan. Work in batches of 8-10 slices depending on your pan size.
- Fry for 3-4 minutes, using a slotted spoon to gently stir and flip the chips occasionally, ensuring they cook evenly on both sides and develop a uniform golden-brown color.
- When the chips are golden and crispy (they may continue to crisp up slightly as they cool), use a slotted spoon to transfer them to your prepared paper towels, spacing them in a single layer.
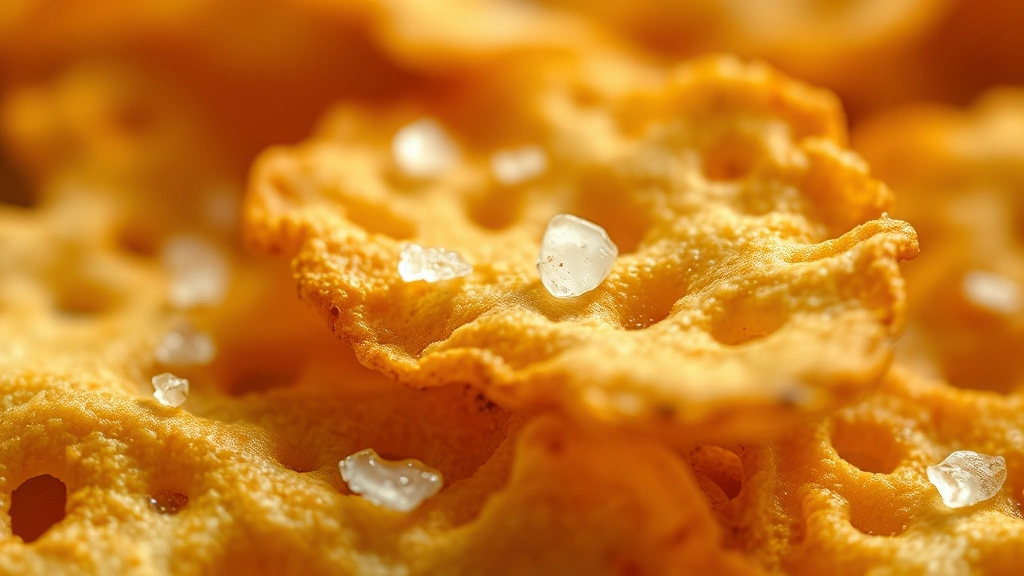
- While the chips are still warm and the oil is still clinging to them, immediately sprinkle with sea salt and any other desired seasonings. The salt will stick better to warm chips.
- Repeat the frying process with the remaining plantain slices, allowing the oil to return to 325°F between batches.
- If using lime juice, drizzle it over the warm chips just before serving for a bright, fresh flavor boost.
- Serve immediately while the chips are at their crispiest, or transfer to an airtight container for storage. Reheat in a 350°F oven for 5-7 minutes if needed to restore crispness.
Pro Tips
- **Plantain Selection Matters**: Choose plantains that are yellow with some brown spots, not green (too starchy and firm) or completely black (too soft and sweet). The slight browning indicates the perfect ripeness for balanced flavor and texture.
- **Oil Temperature Is Critical**: Invest in a reliable kitchen thermometer. Oil that’s too cool will result in greasy, soggy chips, while oil that’s too hot will burn the outside before the inside cooks. Maintain 325-350°F throughout.
- **Thickness Consistency**: A mandoline slicer is worth the investment if you make fried foods regularly. Even thickness ensures all chips cook in the same amount of time, preventing some from burning while others remain undercooked.
- **Don’t Skip the Paper Towels**: Patting plantains dry before frying prevents dangerous oil splattering and reduces moisture that would make your chips less crispy. Additionally, draining on paper towels immediately after frying removes excess oil.
- **Season While Warm**: Salt and seasonings adhere best to warm chips with residual oil. If you wait until they’ve cooled, the seasonings will simply fall off.
- **Batch Cooking Strategy**: Never overcrowd your pan. Frying too many chips at once lowers the oil temperature, resulting in oil absorption rather than crisping. Smaller batches ensure consistent quality.
- **Flavor Variations**: Beyond basic salt, experiment with cayenne pepper for heat, garlic powder for savory depth, smoked paprika for complexity, or a sprinkle of fresh lime juice for brightness.
- **Storage and Reheating**: Store cooled chips in an airtight container at room temperature for up to three days. Reheat in a 350°F oven for 5-7 minutes to restore crispness—microwaving will make them soggy.
- **Safety Precautions**: Always use a long-handled slotted spoon when frying, and keep a fire extinguisher nearby. Never use water to extinguish an oil fire; smother it with baking soda or a metal lid.
- **Oil Reuse**: Strain cooled oil through a fine-mesh sieve or coffee filter to remove debris. Properly strained oil can be reused 3-4 times before requiring replacement.