
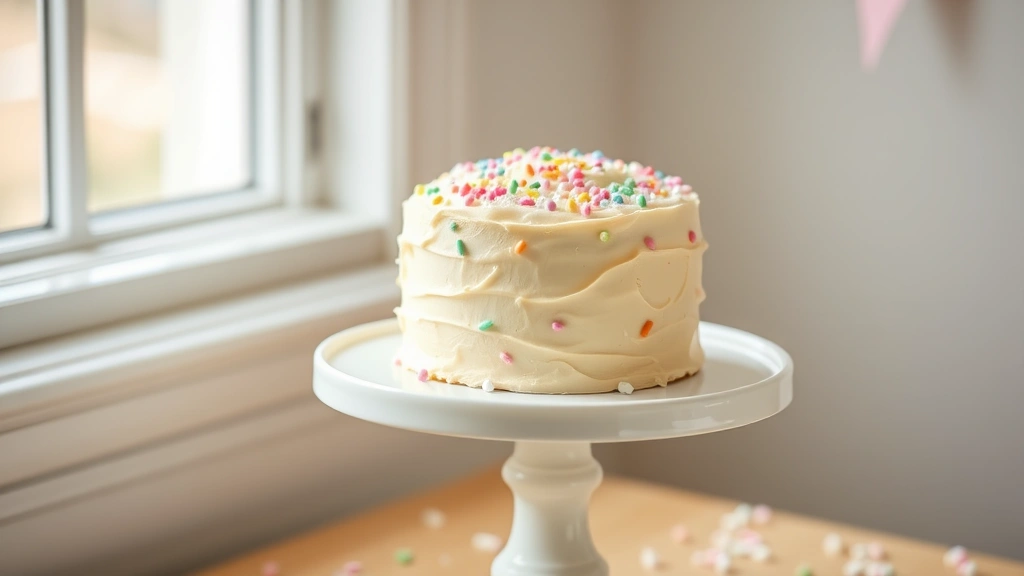
A smash cake is the perfect way to celebrate your little one’s first birthday! This super easy smash cake recipe is designed specifically for one-year-olds to enjoy during their milestone photo shoot. Unlike traditional cakes, this version is simple, moist, and made with soft, easy-to-eat ingredients that little hands can grab and explore without any choking hazards.
The beauty of a smash cake is that it doesn’t need to be elaborate or perfect—it’s meant to be messy and fun! This recipe creates a tender, flavorful cake that’s sturdy enough to handle being smashed, squeezed, and thrown around while remaining delicious enough for parents to enjoy too. I love making these cakes because they’re stress-free and focus on what matters most: capturing those precious first-birthday moments.
What makes this recipe the best is its simplicity and reliability. You’ll find that most smash cakes use basic pantry ingredients that come together in minutes. The vanilla-forward flavor appeals to both babies and adults, and the moist crumb means it won’t dry out, even after sitting on a high chair tray for a few minutes during photos.
This recipe is perfect for any first birthday celebration, whether you’re doing a full photo shoot or just a casual family gathering. The cake is forgiving, foolproof, and absolutely delicious. Plus, you can easily customize it with different extracts or add a touch of fruit puree if you want to get creative. I recommend making two cakes—one for the smash photo session and one for the actual birthday celebration with family.
For more celebration inspiration, check out our Heavy Cream Alfredo Sauce Recipe for a savory side dish at the party. If you’re planning a larger menu, our Easy Chicken Alfredo Recipe is always a crowd-pleaser. For lighter fare, consider our Chickpea Salad Recipe for a nutritious addition to your party menu. You might also love our Heavy Cream Pasta Recipe for feeding a crowd, or our Shishito Peppers Recipe as an elegant appetizer.
For professional baking tips and techniques, check out Serious Eats for detailed baking science. Bon Appétit offers wonderful cake decoration ideas for special occasions. For more detailed cake recipes and variations, visit New York Times Cooking. You can also find great decorating inspiration on Serious Eats’ dessert section, and Bon Appétit’s cake tutorials are absolutely worth exploring.
Ingredients
- 1/2 cup all-purpose flour
- 1/4 teaspoon baking powder
- Pinch of salt
- 1/4 cup unsalted butter, softened
- 1/4 cup granulated sugar
- 1 large egg
- 1/4 teaspoon vanilla extract
- 3 tablespoons whole milk
- 1/4 cup unsalted butter, softened (for frosting)
- 1/2 cup powdered sugar, sifted
- 1/8 teaspoon vanilla extract (for frosting)
- Pinch of salt (for frosting)
- 1-2 tablespoons whole milk (for frosting consistency)
Instructions
- Preheat your oven to 350°F (175°C). Grease a 4-inch round cake pan with butter or cooking spray, then line the bottom with parchment paper for easy removal.
- In a small bowl, whisk together the all-purpose flour, baking powder, and salt. Set this dry mixture aside.
- In another bowl, cream together the softened butter and granulated sugar by beating with an electric mixer on medium speed for about 2-3 minutes until the mixture is light and fluffy.
- Add the egg to the butter-sugar mixture and beat well for about 1 minute until fully incorporated.
- Stir in the vanilla extract, mixing until the batter is smooth and well combined.
- Add half of the dry flour mixture to the wet ingredients and fold gently with a spatula until just combined.
- Pour in the milk and stir until incorporated, then add the remaining dry mixture and fold gently until no flour streaks remain. Do not overmix.
- Pour the batter into your prepared cake pan, smoothing the top with a spatula.
- Bake for 18-22 minutes, or until a toothpick inserted in the center comes out clean or with just a few moist crumbs.
- Remove the cake from the oven and let it cool in the pan for 5 minutes, then turn it out onto a wire rack to cool completely before frosting.
- While the cake cools, prepare the frosting by beating together the softened butter and sifted powdered sugar until light and fluffy, about 2-3 minutes.
- Add the vanilla extract and salt to the frosting, beating until well combined.
- Add milk one tablespoon at a time until you reach your desired frosting consistency—it should be spreadable but hold its shape.
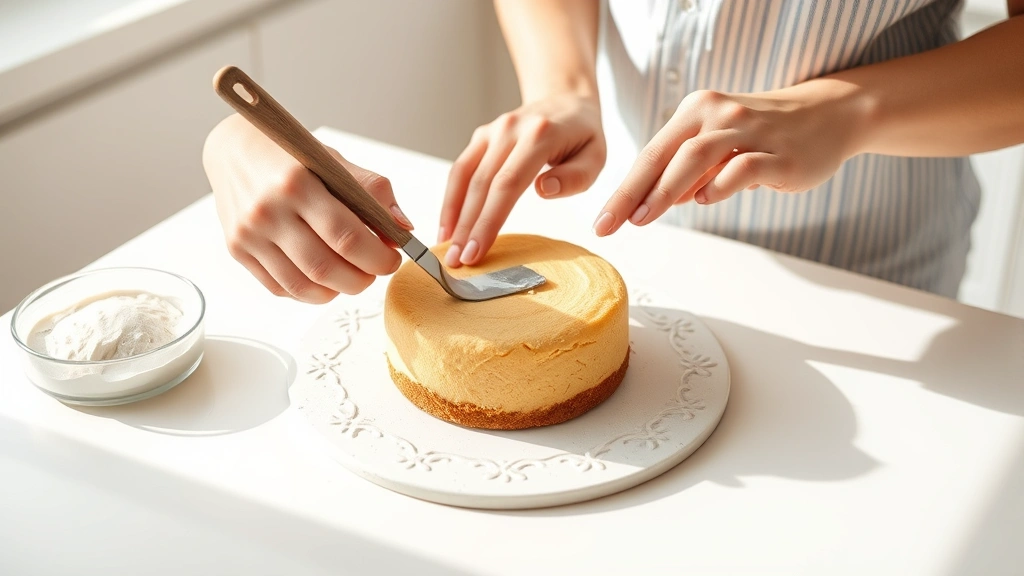
- Once the cake is completely cool, spread or pipe the frosting on top and around the sides as desired.
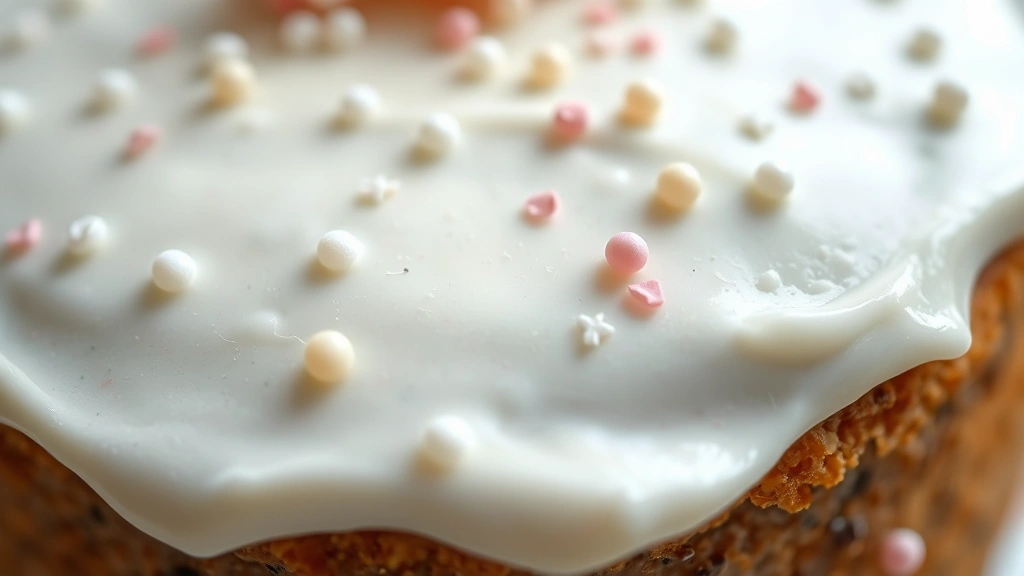
- Decorate with sprinkles, edible pearls, or whatever fits your first birthday theme, keeping in mind that anything should be soft and easily managed for a one-year-old.
- Refrigerate the smash cake for at least 30 minutes before the photo session to ensure it holds its shape and stays fresh.
Pro Tips
- This smash cake recipe is specifically designed for one year olds, so all ingredients are soft, easy to gum, and safe for babies just beginning to explore solid foods.
- The 4-inch size is perfect for a single smash cake portion—it’s big enough to be fun and photogenic but small enough for a one-year-old to handle.
- You can substitute the milk with breast milk or formula if you prefer, which many parents do for added sentimental value.
- This cake is best made fresh on the day of the photo shoot, as it stays moist and tender when made ahead by just a few hours.
- If your little one has any allergies or dietary restrictions, you can easily substitute all-purpose flour with a gluten-free flour blend in a 1:1 ratio.
- Don’t worry about perfect frosting application on a smash cake—rustic and imperfect actually looks better in photos and is more authentic to the experience!
- For a healthier version, consider using applesauce or mashed banana in place of half the butter, though this may slightly change the texture.
- The frosting can be made up to two days in advance and stored in an airtight container in the refrigerator. Bring it to room temperature and re-beat before using.
- If you’re making multiple smash cakes for different flavor preferences, simply double or triple this recipe and bake in separate pans.
- Keep the unfrosted cake layers wrapped tightly in plastic wrap at room temperature for up to one day, or freeze for up to one month.
- During the photo shoot, have plenty of baby wipes and a change of clothes handy—this is meant to be messy and fun!
- You can tint the frosting with a small amount of food coloring to match your party theme, just keep colors soft and pastels for a sweet aesthetic.
- This cake is also delicious served with a small portion of whipped cream or yogurt on the side for the birthday baby to explore.