

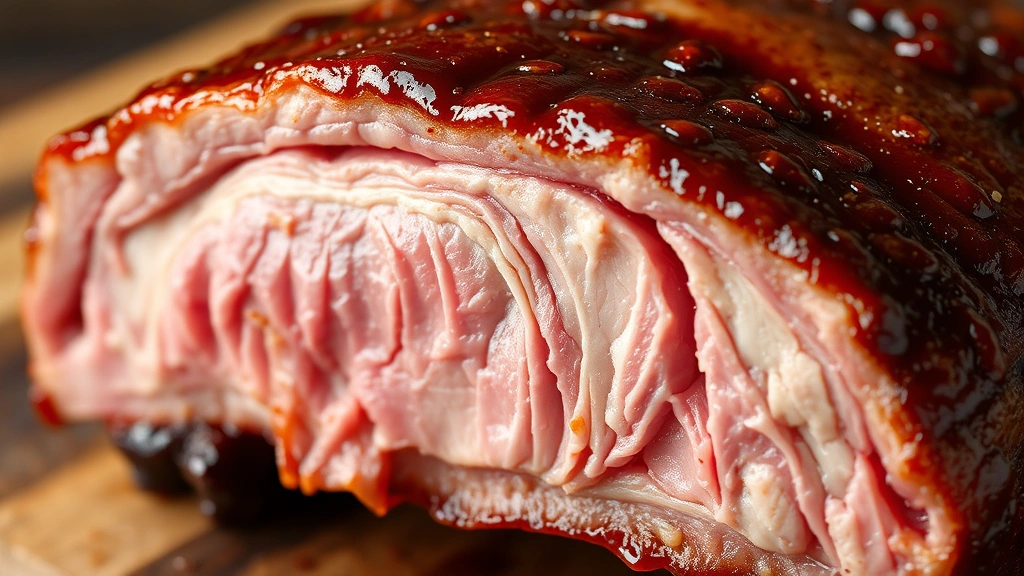
St. Louis ribs are a barbecue lover’s dream, and this recipe will teach you exactly how to make them perfectly at home. These ribs are trimmed into a distinctive rectangular shape, glazed with a sweet and tangy sauce, and cooked low and slow until they’re fall-off-the-bone tender. The magic is in the dry rub, the smoking technique, and that signature St. Louis glaze that makes your guests come back for more.
What makes St. Louis ribs different from other rib styles is the cut itself. Unlike baby back ribs that are curved, St. Louis ribs are trimmed into a rectangle, which gives them a more uniform appearance and makes them easier to cut and serve. This style originated in St. Louis, Missouri, where barbecue is practically a religion, and it’s become increasingly popular across the country.
When you’re preparing this recipe, you’ll want to start with quality ribs from a trusted butcher or grocery store. Look for ribs that have good color and aren’t too thin. The dry rub is essential—it creates that beautiful bark on the outside while the meat stays incredibly juicy inside. We’re using a combination of brown sugar, paprika, garlic powder, and other spices that complement the smoky flavor perfectly.
The cooking process involves three phases: the dry phase, the wrap phase, and the glaze phase. This method ensures optimal tenderness and flavor development. You’ll smoke the ribs for several hours, then wrap them to keep them moist, and finally glaze them for that signature sticky finish.
For side dishes, consider pairing these ribs with hearty pasta sides or fresh salads for balance. You could also serve them with coleslaw, baked beans, or cornbread—classic barbecue companions that round out the meal beautifully.
One of the secrets to amazing St. Louis ribs is understanding the importance of the 3-2-1 method, which is a timing technique used by competition barbecuers. This involves smoking for three hours, wrapping and cooking for two hours, and then glazing and finishing for one hour. It’s a proven method that delivers consistent, delicious results every single time.
Temperature control is absolutely critical when smoking ribs. You want your smoker to maintain a steady 225-250°F throughout the entire cooking process. Fluctuating temperatures can result in uneven cooking and tough ribs, so invest in a good thermometer if you haven’t already. Proper technique in cooking applies to barbecue just as much as it does to other dishes.
The wood you choose for smoking also makes a significant difference. Hickory and oak are traditional choices for St. Louis ribs, providing that authentic smoky flavor. Some pitmasters blend woods—maybe mixing hickory with apple for a slightly sweeter smoke. Experiment to find your preference, but don’t go too heavy-handed; you want smoke flavor, not smoke overwhelm.
When you wrap the ribs during phase two, you have options. Some traditionalists use butcher paper (also called peach paper), while others prefer aluminum foil. Butcher paper is slightly more breathable and prevents the ribs from steaming too much, while foil speeds up the cooking process. For authentic St. Louis style, butcher paper is the way to go. Add some butter, brown sugar, and a splash of apple juice to the wrap for extra moisture and flavor.
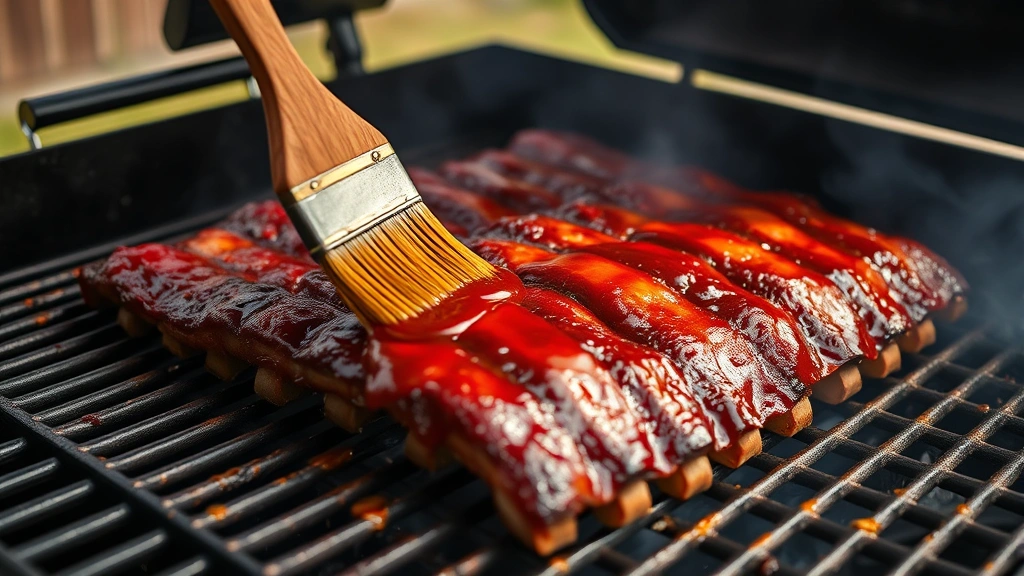
The glaze you apply in the final phase is what makes St. Louis ribs truly special. This sticky, caramelized coating is usually a balance of sweet and tangy—think ketchup-based with hints of vinegar, mustard, and spices. You’ll brush this on during the last hour of cooking, allowing it to caramelize and create that gorgeous mahogany color that makes these ribs instantly recognizable.
For those looking to expand their grilling repertoire, trying complementary recipes can help you master the art of cooking for crowds. Barbecue is as much about the experience as it is about the food, so take your time, enjoy the process, and let the smoke do its magic.
Storage is simple: wrap cooled ribs tightly in plastic wrap or foil and refrigerate for up to four days, or freeze for up to three months. Reheat gently in a low oven to restore their tenderness. These ribs also make excellent leftovers for sandwiches, rib tacos, or chopped into salads for added protein.
Ingredients
- 2 full racks St. Louis-style ribs (about 4-5 pounds total)
- 3 tablespoons brown sugar
- 2 tablespoons paprika
- 1 tablespoon garlic powder
- 1 tablespoon onion powder
- 1 tablespoon black pepper
- 1 tablespoon kosher salt
- 1 teaspoon cayenne pepper
- 1 teaspoon dried thyme
- 1 teaspoon dried oregano
- 1/2 teaspoon ground cumin
- 3 tablespoons butter
- 1/2 cup apple juice
- 1 cup ketchup
- 1/4 cup apple cider vinegar
- 2 tablespoons Worcestershire sauce
- 2 tablespoons brown sugar (for glaze)
- 1 tablespoon mustard powder
- 1 teaspoon garlic powder (for glaze)
- 1/2 teaspoon black pepper (for glaze)
- Hickory or oak wood chips for smoking
Instructions
- Remove the membrane from the back of each rib rack by sliding a knife under it and peeling it away completely. Pat the ribs dry with paper towels.
- Trim each rib rack into the St. Louis shape by removing the flap on the side and cutting away the rib tips to create a rectangular shape.
- In a small bowl, combine brown sugar, paprika, garlic powder, onion powder, black pepper, kosher salt, cayenne pepper, thyme, oregano, and cumin to create your dry rub.
- Generously apply the dry rub to both sides of the ribs, pressing it in gently so it adheres well. Let the ribs sit at room temperature for 15-20 minutes.
- Preheat your smoker to 225-250°F using hickory or oak wood, maintaining this temperature throughout the cooking process.
- Place the ribs on the smoker grates, bone-side down, ensuring they don’t touch each other. If space is limited, stand them up vertically.
- Smoke the ribs for 3 hours without opening the smoker door. Maintain steady temperature and add wood chips as needed to maintain smoke.
- After 3 hours, remove the ribs from the smoker and lay out two large pieces of butcher paper for each rack.
- Place each rib rack in the center of its butcher paper, then divide the butter between the two packages and distribute it over the ribs.
- Sprinkle brown sugar and apple juice over each rack, then fold the butcher paper tightly around the ribs to create sealed packets.
- Return the wrapped ribs to the smoker and cook for 2 hours at 225-250°F without opening the door.
- While the ribs cook in their wrap, prepare the glaze by combining ketchup, apple cider vinegar, Worcestershire sauce, brown sugar, mustard powder, garlic powder, and black pepper in a saucepan.
- Simmer the glaze over medium-low heat for 5-10 minutes, stirring occasionally, until it reaches a thick, spreadable consistency.
- After 2 hours of wrapping time, carefully remove the ribs from the smoker and unwrap them, being careful of the steam and hot liquid inside.
- Place the unwrapped ribs back on the smoker grates, bone-side down.
- Brush the ribs generously with the glaze, covering both sides completely.
- Smoke for 45 minutes to 1 hour, then apply another layer of glaze and continue smoking for the final 15-30 minutes until the glaze is caramelized and sticky.
- Remove the ribs from the smoker and let them rest for 10 minutes before cutting.
- Slice between the bones to separate individual ribs, and arrange on a platter.
- Drizzle with any remaining glaze and serve hot with your favorite sides.
Pro Tips
Smoker Type: This recipe works with any smoker type—offset barrel, kamado, pellet, or electric. The key is maintaining consistent temperature throughout the process.
Wood Selection: Hickory provides a strong, traditional flavor, while oak is milder. Apple wood adds sweetness. Never use softwoods like pine or cedar, which produce acrid smoke.
Dry Rub Timing: You can prepare and apply the rub the night before smoking. Wrap the rubbed ribs in plastic wrap and refrigerate. Remove them 30 minutes before smoking to allow them to reach closer to room temperature.
The 3-2-1 Method: This timing is a guideline, not absolute law. If your ribs are very thick, add 30 minutes to each phase. Thinner ribs may need slightly less time. The bend test is reliable: when you pick up a rib from the center, it should bend significantly without breaking.
Glaze Consistency: Your glaze should coat the back of a spoon. If it’s too thin, simmer longer. If it’s too thick, add more apple juice or vinegar a tablespoon at a time.
Temperature Monitoring: Invest in a reliable meat thermometer and a smoker thermometer. The ribs are done when they reach 195-205°F internally and the meat pulls back from the bones.
Wrapping Paper: Butcher paper is superior to foil for this style because it allows better bark development while still keeping ribs moist. If using foil, add slightly less liquid.
Glaze Application: Don’t apply glaze too early or it will burn. Wait until the final hour of cooking, then apply two to three layers for maximum flavor and appearance.
Resting Period: Those final 10 minutes of rest allow the juices to redistribute, resulting in more tender, juicy ribs. Don’t skip this step.
Leftover Storage: Refrigerate cooked ribs within two hours. They keep for up to four days and can be reheated low and slow in a 250°F oven wrapped in foil.
Serving Suggestions: Serve with classic sides like coleslaw, baked beans, cornbread, or mac and cheese. Fresh sides like salads provide nice balance to the rich ribs.