
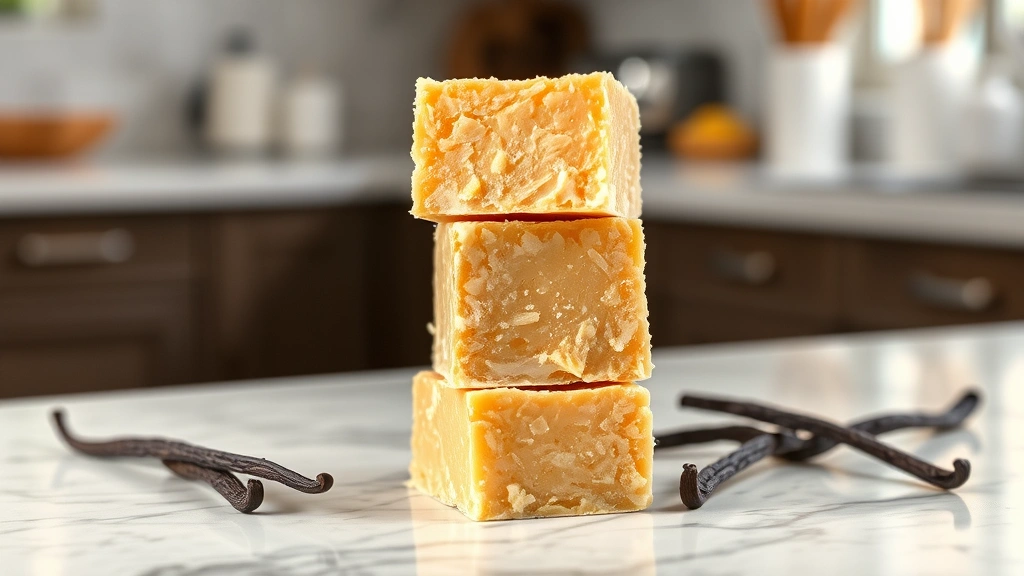
There’s something absolutely magical about homemade vanilla fudge – it’s the kind of treat that instantly transports you back to childhood memories of holiday candy platters and special occasions. The beauty of this vanilla fudge recipe lies in its elegant simplicity; you need just a handful of ingredients and about thirty minutes of your time to create something that tastes like it came from a fancy candy shop.
What I love most about making fudge at home is that you have complete control over the quality of ingredients. You can use real vanilla extract instead of imitation, choose premium butter, and skip all those mysterious additives found in store-bought versions. This recipe produces fudge with that perfect creamy texture – not too soft, not too hard – that practically melts on your tongue.
The key to success with vanilla fudge is understanding the importance of temperature control. You’ll be cooking a mixture of butter, sugar, and condensed milk to a specific temperature, which ensures your fudge sets up perfectly every single time. I’ve included detailed instructions on how to test for doneness without a thermometer, because I know not everyone has one in their kitchen.
This vanilla fudge recipe makes an excellent homemade gift, and it stores beautifully in an airtight container for up to two weeks. I often make several batches during the holiday season – one batch never seems to last long! You can also customize this recipe by adding a pinch of sea salt on top, swirling in some creamy pesto for a savory twist, or mixing in chopped nuts if you prefer.
The process of making fudge is actually quite meditative. There’s something satisfying about watching the ingredients transform from separate components into a glossy, smooth candy. Whether you’re an experienced candy maker or attempting this for the first time, this straightforward approach will yield professional-quality results.
For those interested in exploring other rich, indulgent treats, you might also enjoy making homemade caramels or chocolate truffles using similar techniques. The principles of candy making – patience, precision, and quality ingredients – remain constant across all these delicious confections.
I recommend reading through the entire recipe before you begin, gathering all your ingredients and equipment. Having everything prepared (what the French call “mise en place”) makes the actual cooking process smooth and stress-free. You’ll want to have your baking pan ready, lined with parchment paper, and all your ingredients measured before you start heating anything on the stove.
This vanilla fudge recipe is perfect for beginners because it doesn’t require candy-making experience or fancy equipment. If you can boil water and read a thermometer, you can make this fudge. The reward – creamy, luxurious vanilla fudge that rivals any confectioner’s creation – is absolutely worth the minimal effort required.
Ingredients
- 1 cup (2 sticks) unsalted butter
- 2 cups granulated sugar
- 3/4 cup whole milk
- 1 can (14 ounces) sweetened condensed milk
- 1/4 cup light corn syrup
- 1/4 teaspoon salt
- 2 tablespoons pure vanilla extract
- Fleur de sel or sea salt for topping (optional)

Instructions
- Line an 8×8-inch baking pan with parchment paper, allowing the edges to hang over the sides for easy removal. Set aside in a cool location.
- In a heavy-bottomed saucepan, combine the butter, granulated sugar, whole milk, sweetened condensed milk, corn syrup, and salt. Stir together over medium heat until the butter melts and the sugar begins to dissolve.
- Stop stirring once the mixture comes to a gentle boil. Insert a candy thermometer into the mixture, making sure it doesn’t touch the bottom of the pan. Allow the mixture to cook without stirring.
- Continue cooking until the temperature reaches 238°F on your candy thermometer (soft-ball stage), which should take approximately 12-15 minutes. If you don’t have a thermometer, you can test by dropping a small amount of the mixture into cold water; it should form a soft ball that flattens when removed from the water.
- Remove the saucepan from heat and allow the mixture to cool for exactly 5 minutes without stirring. This cooling period is crucial for achieving the right texture.
- Add the vanilla extract to the mixture and stir vigorously for 1-2 minutes. The mixture will begin to lose its glossy appearance and become slightly thicker as you beat it.
- Pour the fudge mixture immediately into your prepared baking pan, spreading it evenly with a spatula or the back of a spoon. Work quickly, as the fudge will begin to set as it cools.
- If desired, sprinkle a light dusting of fleur de sel or sea salt over the top of the warm fudge. Allow the fudge to cool completely at room temperature for at least 2 hours before cutting.
- Using the parchment paper overhang, lift the entire fudge slab out of the pan onto a cutting board. Using a sharp knife (dip it in hot water and wipe dry between cuts for cleaner edges), cut the fudge into 32 equal pieces.
- Store the finished vanilla fudge in an airtight container with parchment paper between layers. Keep at room temperature for up to 2 weeks, or refrigerate for longer storage.

Pro Tips
- The quality of your vanilla extract makes a significant difference in the final flavor – always use pure vanilla extract rather than imitation for the best results
- A candy thermometer is highly recommended for this recipe, as it removes the guesswork from the cooking process and ensures consistent results every time you make a batch
- Do not skip the 5-minute cooling period after removing the pan from heat; this step is essential for achieving the proper texture and consistency of your finished fudge
- If your fudge turns out too soft, you likely didn’t cook it to a high enough temperature; if it’s too hard and grainy, it probably cooked too long or you beat it too vigorously
- This recipe works beautifully with additions like chopped pecans, walnuts, or pistachios stirred in during the beating phase, or a swirl of peanut butter for variation
- For gift-giving, wrap individual pieces in wax paper or small cellophane bags and tie with ribbon – homemade fudge makes an impressive and delicious present
- You can make this recipe in advance and freeze it for up to three months, making it perfect for holiday preparation
- If you’re at high altitude, you may need to cook the fudge to 240°F instead of 238°F due to the lower boiling point of water
- The corn syrup in this recipe helps prevent crystallization and creates a smoother, creamier texture than fudge made without it
- Always use a heavy-bottomed saucepan to ensure even heat distribution and prevent scorching on the bottom
- If the fudge seizes or becomes grainy, you can salvage it by adding a tablespoon of water and reheating gently, though prevention is easier than correction