
There’s something absolutely timeless and elegant about a perfectly baked vanilla pound cake. This classic dessert has graced tables for generations, and for good reason—it’s buttery, moist, and bursting with pure vanilla flavor. Whether you’re a seasoned baker or just starting your culinary journey, this vanilla pound cake recipe will become your go-to for special occasions and everyday indulgences alike.
Pound cake earned its name from its traditional ratio of one pound each of butter, sugar, eggs, and flour. This simple formula creates a dense, tender crumb that’s absolutely irresistible. What makes this version truly the BEST is the careful balance of ingredients and techniques that ensure your cake rises beautifully while maintaining that signature moist interior. The secret lies in using real vanilla bean paste or high-quality vanilla extract, room temperature ingredients, and proper creaming methods.
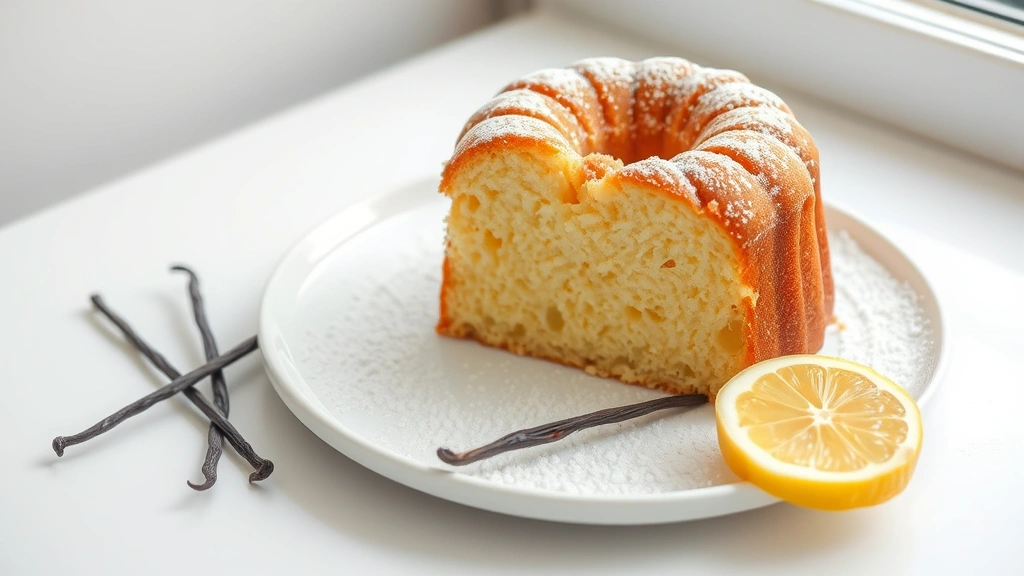
I’ve perfected this recipe through countless iterations, and I’m thrilled to share it with you today. The result is a cake that’s golden on the outside, perfectly moist inside, and infused with authentic vanilla flavor that will make your kitchen smell absolutely divine. This pound cake pairs beautifully with fresh berries, a simple glaze, or even served plain with a cup of tea. It’s also the perfect canvas for creative variations—try adding lemon zest, almond extract, or even a hint of cardamom for your own signature twist.
Baking this cake is truly therapeutic. The process of creaming butter and sugar until light and fluffy, then gently folding in the dry ingredients, becomes a meditation of sorts. You’ll love watching it bake through the oven window, seeing it rise and develop that beautiful golden-brown exterior. The aroma filling your home is pure joy.
What I adore most about pound cake is its versatility. Serve it at brunch with whipped cream and fresh strawberries, use it as the base for a trifle, or simply enjoy it with your morning coffee. You can even toast day-old slices for breakfast—they’re absolutely delicious that way. This recipe makes enough to share with friends and family, or to enjoy throughout the week. It keeps beautifully for several days when stored properly, making it an ideal make-ahead dessert for busy entertaining.
The technique matters just as much as the ingredients here. Make sure everything is at room temperature before you begin—this ensures proper emulsification and a lighter, more tender crumb. Don’t rush the creaming step; those five to seven minutes of beating butter and sugar really do make a difference. And when you’re adding the flour mixture, alternate with the sour cream to keep the batter light and prevent overmixing.
I’ve included detailed instructions and helpful notes to guide you through each step. Even if you’ve never made pound cake before, you’ll find this recipe straightforward and forgiving. The key is following the steps carefully and not opening the oven door too early. Trust the process, and you’ll be rewarded with the most spectacular vanilla pound cake you’ve ever tasted. Your family will be asking for this recipe, I promise!
For more classic dessert inspiration, check out our baking fundamentals and explore complementary recipes like flavor pairing techniques. You might also enjoy learning about ingredient quality and sourcing, which applies beautifully to selecting the finest vanilla and butter for this recipe. For additional pound cake variations and expert tips, visit Serious Eats, Bon Appétit, and New York Times Cooking for inspiration and technique refinement.
Ingredients
- 3 cups all-purpose flour
- 1/2 teaspoon baking powder
- 1/2 teaspoon salt
- 1 cup (2 sticks) unsalted butter, room temperature
- 3 cups granulated sugar
- 6 large eggs, room temperature
- 1 cup sour cream, room temperature
- 2 tablespoons vanilla bean paste or 2 teaspoons pure vanilla extract
- 1/4 teaspoon almond extract (optional, enhances vanilla flavor)
- Zest of 1 lemon (optional, adds brightness)
- Powdered sugar for dusting (optional)

Instructions
- Preheat your oven to 325°F (160°C). Thoroughly grease and flour a 10-inch bundt pan or loaf pan, ensuring all crevices are covered to prevent sticking. Alternatively, you can line the bottom with parchment paper for extra insurance.
- In a medium bowl, whisk together the flour, baking powder, and salt. Set this dry mixture aside. This step ensures even distribution of the leavening agents throughout the cake.
- In the bowl of an electric mixer, cream the softened butter and sugar together on medium-high speed for 5-7 minutes. The mixture should become light, fluffy, and pale in color—this is crucial for incorporating air into the batter and creating a tender crumb.
- Add eggs one at a time to the creamed butter mixture, beating well after each addition. This gradual incorporation ensures proper emulsification and prevents the batter from breaking. Take your time with this step.
- Reduce the mixer speed to medium-low. Add the vanilla bean paste, almond extract if using, and lemon zest if desired. Mix until just combined.
- Alternate adding the dry flour mixture and the sour cream to the batter, beginning and ending with the flour mixture. Start with one-third of the flour, then half the sour cream, then another third of the flour, then the remaining sour cream, and finally the last third of the flour. Mix on low speed after each addition until just combined—do not overmix.
- Pour the batter into your prepared pan, smoothing the top with an offset spatula or the back of a spoon. Gently tap the pan on the counter a few times to release any large air bubbles.
- Place the pan in the preheated oven and bake for 60-75 minutes, depending on your oven and pan type. The cake is done when a toothpick inserted in the thickest part comes out clean or with just a few moist crumbs—not wet batter.
- Remove the cake from the oven and let it cool in the pan for 15-20 minutes. This resting period allows the cake to set and makes removal easier without damaging the structure.
- Run a thin knife around the edges of the cake to loosen it from the pan. Invert the cake onto a wire cooling rack and allow it to cool completely before slicing—at least 1-2 hours at room temperature.
- Once completely cooled, dust with powdered sugar if desired, slice, and serve. Store leftover cake covered at room temperature for up to 4 days, or wrap well and freeze for up to 3 months.

Pro Tips
Vanilla Quality Matters: Use real vanilla bean paste or pure vanilla extract, never imitation vanilla. The difference in flavor is dramatic and worth the investment. Vanilla bean paste offers the most authentic, intense flavor.
Don’t Overmix: Once you begin adding the dry ingredients, mix only until just combined. Overmixing develops gluten, which makes the cake tough and dense rather than tender and delicate.
Oven Temperature: A 325°F oven is lower than typical cake temperatures, which allows the cake to bake more gently and evenly, preventing overdrying on the edges while the center remains moist.
Pan Selection: Bundt pans create beautiful presentation, but loaf pans work wonderfully too. The baking time may vary slightly depending on your pan’s thickness and material. Start checking for doneness around 60 minutes.
Toothpick Test: The cake is done when a toothpick comes out clean or with just a few moist crumbs. If it comes out with wet batter, bake for another 5 minutes and test again. If it comes out completely dry, you may have overbaked slightly.
Cooling is Critical: Don’t skip the cooling period in the pan. This allows the cake to set enough to release without breaking. Complete cooling on the rack is also important before slicing.
Flavor Variations: Add 1 teaspoon of lemon zest for brightness, 1/4 teaspoon of cardamom for sophistication, or 1/2 teaspoon of almond extract to enhance vanilla notes. You can also experiment with different extracts.
Storage Tips: Store covered at room temperature for 3-4 days. For longer storage, wrap tightly in plastic wrap and freeze for up to 3 months. Thaw at room temperature before serving. Day-old cake is actually more moist and flavorful.
Serving Suggestions: Serve plain with tea or coffee, topped with fresh berries and whipped cream, glazed with a simple vanilla or lemon glaze, or toasted with butter for breakfast.
Troubleshooting: If your cake is dense, you likely overmixed the batter or didn’t cream the butter and sugar long enough. If it’s dry, reduce baking time by 5 minutes next time. If it didn’t rise well, check that your baking powder isn’t expired.
Pingback: How to make the Perfect Meatloaf Seasoning Recipe! – Simple Recipe Finder
Pingback: How to make the Perfect Miso Chicken Recipe! – Simple Recipe Finder
Pingback: How to make the Perfect Pork Chop Brine Recipe! – Simple Recipe Finder
Pingback: How to make the BEST Rock Fish Recipe – So Easy & Tasty! – Simple Recipe Finder
Pingback: How to make the BEST Sirloin Tip Roast Recipe! – Simple Recipe Finder
Pingback: How to make the Best Sweet Potato Gnocchi Recipe! – Simple Recipe Finder