
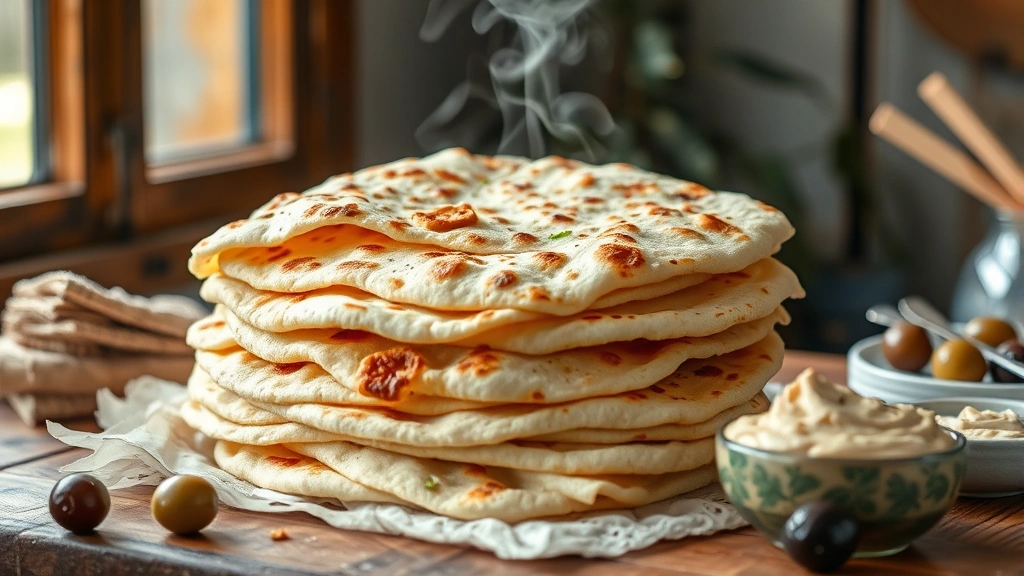
Lavash bread is one of the most versatile and easiest flatbreads you can make at home! This delicate, paper-thin Armenian bread requires just five simple ingredients and minimal effort, making it perfect for beginners and experienced bakers alike. Whether you’re serving it alongside your favorite dips, using it as a wrap for sandwiches, or simply enjoying it warm with butter and herbs, homemade lavash will elevate any meal.
The beauty of lavash bread lies in its simplicity. Unlike many other flatbreads that require special equipment or extensive kneading, lavash comes together in under an hour with just your hands and a basic rolling pin. The dough is incredibly forgiving, and the baking process is straightforward—no fancy oven required! Mastering bread baking fundamentals will help you understand the science behind this recipe, but truly, anyone can make lavash successfully on their first try.
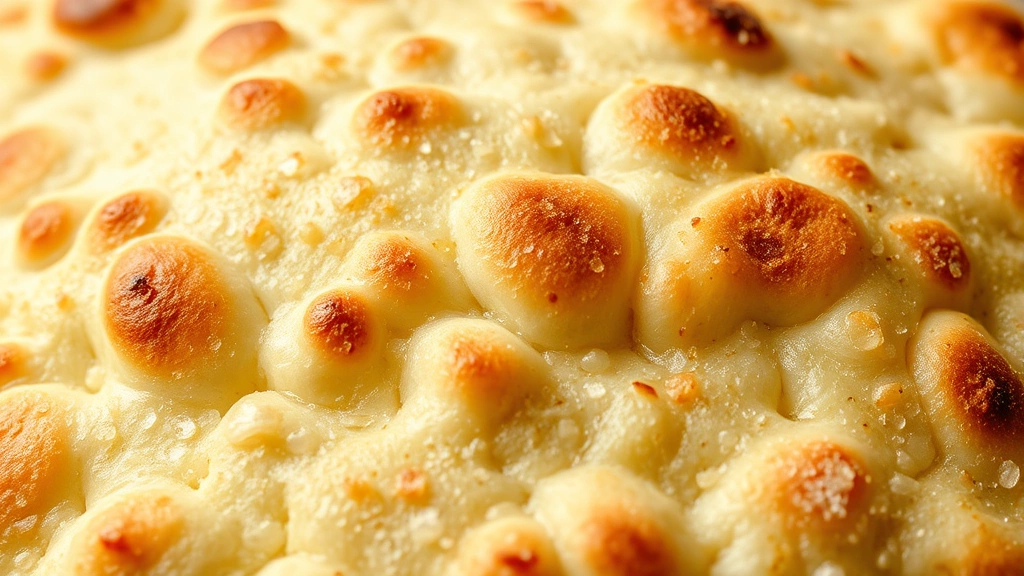
What makes this recipe so special is how the bread puffs up in the oven, creating those beautiful layers and a wonderfully chewy yet crispy texture. The exterior develops a gorgeous golden-brown color while the interior remains soft and pliable. Exploring different flatbread varieties will show you how lavash compares to other options like pita, naan, and tortillas. This recipe produces authentic results that rival bakery-quality lavash, and you’ll be amazed at how restaurant-quality your homemade version tastes.
I love making a big batch of lavash on Sunday and using it throughout the week. It stores beautifully in an airtight container and can even be frozen for up to three months. Reheat it in a dry skillet for just 30 seconds per side, and it tastes freshly baked. This is the kind of recipe that becomes a staple in your kitchen once you realize how easy it truly is. According to Serious Eats’ guide to flatbreads, lavash has been made for centuries across the Caucasus region, and this simplified version captures all the traditional charm while being accessible to modern home cooks.
The technique I’m sharing with you today is foolproof and produces consistent results every single time. You don’t need to worry about perfect circles or uniform thickness—part of the charm of homemade lavash is its rustic, slightly irregular appearance. Perfecting your rolling technique takes just a little practice, but even on your first attempt, you’ll create something delicious. This recipe has been tested dozens of times, and I’m confident you’ll become a lavash-making expert after trying it once or twice.
Many people are intimidated by bread baking, but lavash is the perfect gateway bread that will build your confidence in the kitchen. The dough requires no special treatment, the rise time is minimal, and the baking happens quickly. Understanding bread dough basics will demystify the process and help you appreciate what’s happening at each stage. Plus, nothing beats the aroma of fresh bread baking in your oven—your entire home will smell absolutely amazing.
I’ve included detailed notes below with troubleshooting tips, variations, and storage instructions to ensure your lavash-making journey is completely successful. Whether you’re planning a Mediterranean feast, preparing a simple weeknight dinner, or just want to impress your family with homemade bread, this lavash recipe is your answer. According to Bon Appétit’s flatbread collection, lavash is experiencing a major moment in contemporary cooking, and now is the perfect time to master this essential recipe. Let’s get baking!
Ingredients
- 2½ cups all-purpose flour
- 1 teaspoon salt
- 1 tablespoon sugar
- 1 tablespoon vegetable oil, plus more for the bowl
- ¾ cup warm water (around 110°F)
Instructions
- In a large mixing bowl, combine 2½ cups all-purpose flour, 1 teaspoon salt, and 1 tablespoon sugar. Whisk these dry ingredients together until evenly combined, making sure there are no lumps.
- Create a well in the center of the flour mixture and pour in 1 tablespoon of vegetable oil and ¾ cup of warm water. Using a wooden spoon or your hands, start mixing the wet and dry ingredients together until a shaggy dough begins to form.
- Transfer the dough to a clean work surface and knead for about 8-10 minutes by hand until the dough becomes smooth, elastic, and slightly tacky to the touch. The dough should be softer than bread dough but not sticky—adjust with small amounts of flour or water if needed.
- Lightly oil a large bowl and transfer your kneaded dough into it, turning it over to coat all sides with the oil. This prevents sticking and helps the dough rise evenly.
- Cover the bowl with a damp kitchen towel or plastic wrap and let the dough rest for 15-20 minutes at room temperature. The dough doesn’t need to rise significantly—just a brief rest to relax the gluten.
- After resting, turn the dough out onto a lightly floured surface and divide it into 8-10 equal pieces. You can use a bench scraper or knife to divide it evenly.
- Working with one piece at a time (keep the others covered with a damp towel), gently flatten each piece into a small disk using your hands.
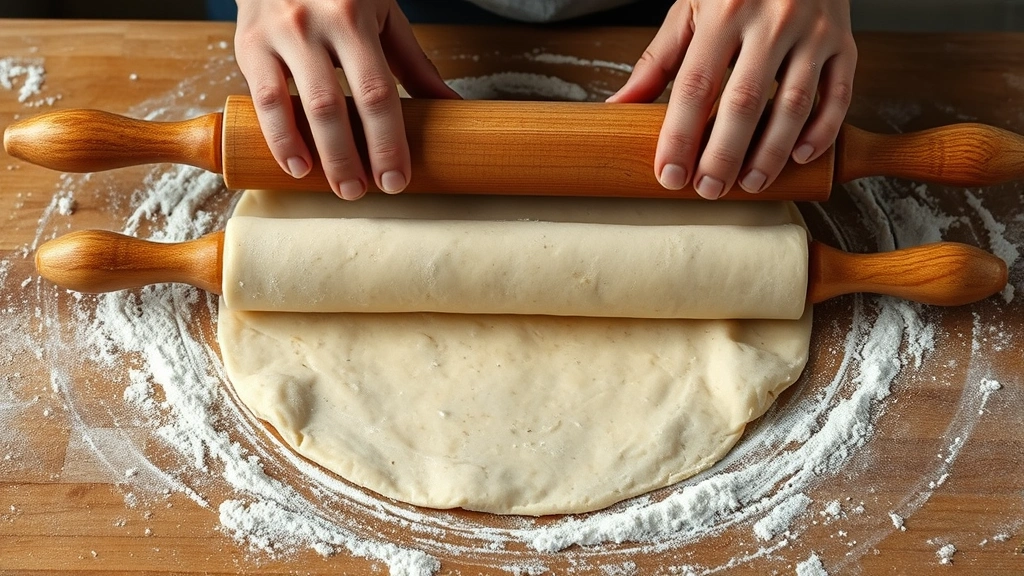
- Using a rolling pin, roll each disk into a very thin, almost translucent rectangle, about ⅛-inch thick. Lavash should be noticeably thinner than pita bread. Don’t worry about achieving a perfect shape—rustic rectangles are absolutely fine.
- Preheat your oven to 475°F. You can use a large baking sheet or, even better, a baking stone if you have one.
- Once your oven is heated, carefully transfer the first rolled-out piece of lavash to your baking sheet. If using a baking stone, place the stone in the oven and let it preheat for at least 10 minutes before baking.
- Place the lavash in the preheated oven and bake for 2-3 minutes until it just begins to puff up and the bottom starts to show light golden-brown spots.
- Carefully flip the lavash over using tongs or a spatula and bake for another 1-2 minutes on the other side until both sides are lightly golden and the bread has puffed up beautifully.
- Remove the lavash from the oven and transfer it to a clean kitchen towel or cooling rack. The bread will crisp up slightly as it cools.
- Repeat steps 8-13 with the remaining dough pieces, rolling and baking each one individually. You can stack the finished lavash on top of each other—they’ll stay warm and slightly soft when stacked together.
- Serve the lavash warm or at room temperature. If it cools and becomes too crispy, you can briefly steam it or wrap it in a damp kitchen towel to soften it again.
Pro Tips
- **Dough Consistency**: Your dough should be soft but not sticky. If it’s too dry, add water one tablespoon at a time. If it’s too wet, dust with small amounts of flour. The right consistency is crucial for easy rolling and puffing.
- **Resting Time**: While 15-20 minutes is ideal, you can rest the dough for up to 30 minutes. Longer resting times make the dough easier to roll out without shrinking back.
- **Rolling Technique**: Roll from the center outward in all directions for the most even thickness. Lavash should be much thinner than pita—aim for almost translucent. Thinner bread puffs better and has better texture.
- **Oven Temperature**: 475°F is ideal for puffing, but if your oven runs hot or cold, adjust accordingly. The bread should puff noticeably and develop light brown spots, not dark brown spots.
- **Baking Stone vs. Baking Sheet**: A preheated baking stone gives superior results because it provides even, intense heat that promotes better puffing. However, a regular baking sheet works perfectly fine.
- **Batch Baking**: Bake one piece at a time for best results. Trying to bake multiple pieces simultaneously can result in uneven cooking and less dramatic puffing.
- **Storage**: Store cooled lavash in an airtight container at room temperature for up to 4 days. For longer storage, wrap tightly and freeze for up to 3 months. Thaw at room temperature before serving.
- **Reheating**: To refresh lavash, place it in a dry skillet over medium heat for 30 seconds per side, or wrap it in damp paper towels and microwave for 10-15 seconds.
- **Flavor Variations**: Brush the finished lavash with melted butter and sprinkle with za’atar, sesame seeds, or fresh herbs like thyme or oregano. You can also add these to the dough itself.
- **Whole Wheat Version**: Substitute up to 1 cup of the all-purpose flour with whole wheat flour for a nuttier flavor and more rustic appearance.
- **Water Temperature**: Warm water (around 110°F) helps activate the dough, but room temperature water works too—just allow a few extra minutes for the dough to come together.
- **Troubleshooting – Dough Won’t Puff**: Ensure your oven is fully preheated and your lavash is thin enough. If dough is too thick, it won’t puff properly. Also, make sure your oven temperature is accurate.
- **Troubleshooting – Too Crispy**: Remove from oven a minute earlier and wrap in kitchen towels immediately after baking to trap steam and keep it soft.
- **Troubleshooting – Shrinking While Rolling**: Allow longer resting periods between rolling. Cover dough pieces with a damp towel while you work on others.
- **Vegan Option**: This recipe is already vegan as written. The oil is vegetable-based and there’s no dairy or eggs.
- **Make-Ahead Tip**: You can prepare and roll all your lavash pieces up to 2 hours ahead. Stack them between parchment paper and store at room temperature. Bake just before serving for the best texture.