
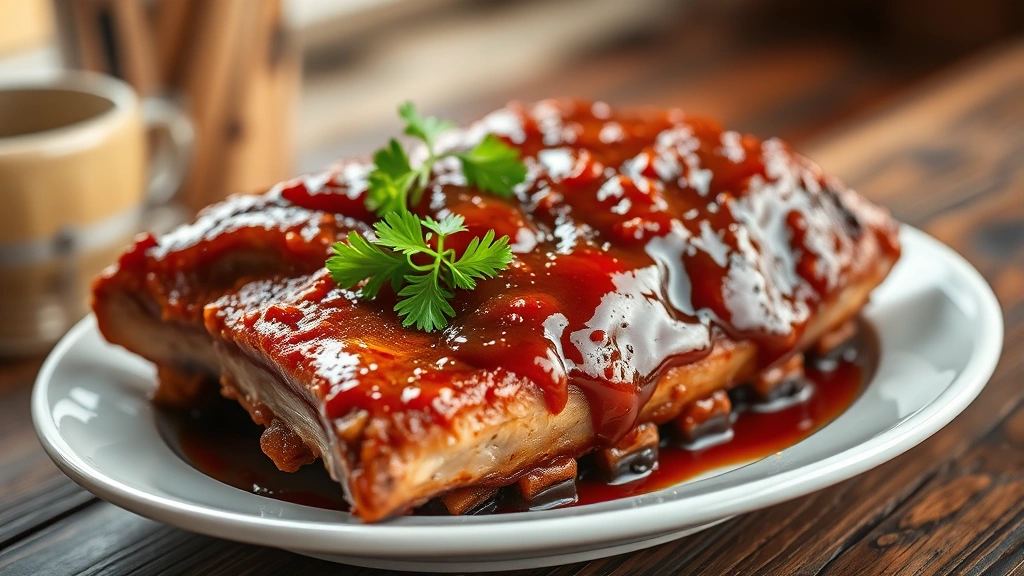
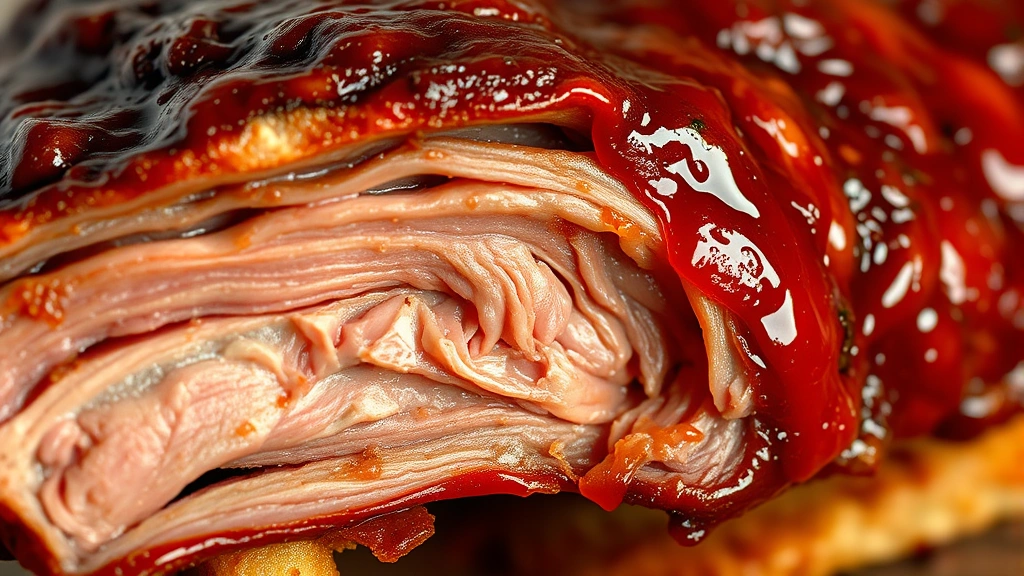
There’s something absolutely magical about baked pork ribs – the way the meat becomes so tender it practically falls off the bone, the caramelized edges with just the right amount of char, and that incredible smoky-sweet flavor that fills your entire kitchen. This baked pork ribs recipe is my go-to method for achieving restaurant-quality results right in your own oven, without needing a smoker or grill.
I’ve been making these ribs for years, and I’ve finally perfected the technique. The secret lies in a three-part process: a flavorful dry rub that creates an amazing crust, a low-and-slow baking method that keeps the meat incredibly moist, and a quick broil at the end to get those beautiful caramelized edges. The result? Ribs that are fall-off-the-bone tender on the inside with a delicious bark on the outside.
What I love most about this method is how foolproof it is. You’re not hovering over a grill, worrying about flare-ups or hot spots. Instead, you’re letting your oven do the heavy lifting while you prepare sides like a fresh chickpea salad or pickled red onions to accompany them.
These baked pork ribs are perfect for family dinners, weekend entertaining, or whenever you’re craving that authentic barbecue flavor. They pair beautifully with classic sides – think coleslaw, cornbread, baked beans, or mac and cheese. I’ve even served them at dinner parties, and everyone always asks for the recipe. The best part? They’re surprisingly easy to make, and the hands-on time is minimal.
One of my favorite things about this recipe is how customizable it is. The dry rub can be adjusted to your taste preferences – add more cayenne if you like heat, increase the brown sugar for extra sweetness, or throw in some smoked paprika for deeper complexity. You can also experiment with different finishing sauces. While I love serving these with a classic barbecue sauce on the side, you could also try a different sauce approach if you’re feeling adventurous.
The key to perfect baked pork ribs is understanding the importance of temperature control and timing. Low heat for an extended period allows the collagen in the meat to break down slowly, transforming it into gelatin that keeps everything incredibly juicy. The initial foil-covered phase steams the ribs gently, while the final uncovered phase allows the exterior to develop that beautiful crust we all crave.
I also want to mention that this recipe works wonderfully whether you’re using baby back ribs, spare ribs, or St. Louis-style ribs. The cooking time might vary slightly depending on the size and thickness, but the method remains the same. Baby back ribs will be done a bit quicker, while larger spare ribs might need an extra 15-20 minutes.
According to Serious Eats, the science behind perfectly cooked ribs involves understanding how heat breaks down the proteins and collagen. This recipe leverages that science to deliver consistently amazing results. And if you want to learn more about rib selection and preparation, Bon Appétit has excellent resources on choosing quality pork ribs.
Once you master this basic technique, you’ll find yourself making these baked pork ribs regularly. They’re impressive enough for company but simple enough for a Tuesday night dinner. The aroma alone will have your family gathering in the kitchen, eager for dinner to be ready. And the best part? Cleanup is incredibly easy – just line your baking sheet with foil, and you’re done in minutes.
I genuinely believe this is the best method for cooking ribs indoors, and I hope you’ll give it a try. For more inspiration on complementary sides, check out our creamy pasta recipes for a unique twist on dinner. Whether you’re a seasoned cook or trying ribs for the first time, this recipe will not disappoint.
Ingredients
- 2 full racks pork ribs (about 5-6 pounds total), trimmed
- 3 tablespoons brown sugar
- 2 tablespoons paprika
- 1 tablespoon garlic powder
- 1 tablespoon onion powder
- 1 tablespoon black pepper
- 2 teaspoons kosher salt
- 1 teaspoon cayenne pepper (optional, for heat)
- 1 teaspoon dried thyme
- ½ teaspoon ground cumin
- ¼ cup apple juice or apple cider vinegar
- 2 tablespoons honey
- 1 tablespoon Worcestershire sauce
- 1 cup barbecue sauce (store-bought or homemade)
- Fresh parsley or cilantro for garnish (optional)
Instructions
- Preheat your oven to 275°F (135°C). This low temperature is crucial for achieving tender, juicy ribs.
- Remove the thin membrane from the back of the ribs by sliding a butter knife underneath it and peeling it away. This helps the dry rub penetrate the meat better and improves texture.
- Pat the ribs completely dry with paper towels. Moisture on the surface prevents proper browning and crust formation.
- In a small bowl, combine brown sugar, paprika, garlic powder, onion powder, black pepper, salt, cayenne pepper, dried thyme, and ground cumin to create your dry rub.
- Generously apply the dry rub to both sides of the ribs, pressing gently so it adheres well. Don’t be shy – you want a good coating for that delicious bark.
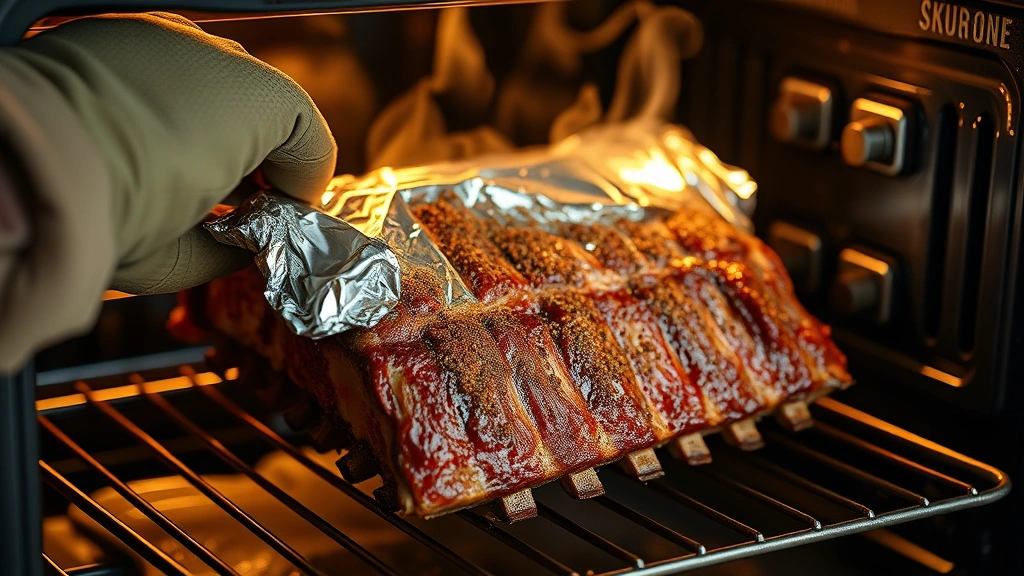
- Line a large baking sheet with aluminum foil for easy cleanup. Place the ribs meat-side up on the prepared sheet.
- Cover the baking sheet tightly with another layer of aluminum foil. This creates a steaming effect that keeps the ribs moist during the initial cooking phase.
- Place in the preheated 275°F oven and bake for 2 hours. The ribs will steam gently during this time, becoming incredibly tender.
- After 2 hours, carefully remove the foil (watch out for hot steam). The ribs should be very tender but not falling apart yet.
- In a small bowl, whisk together apple juice, honey, and Worcestershire sauce to create a glaze.
- Brush this mixture over the top of the ribs.
- Return the uncovered ribs to the oven and increase the temperature to 400°F (200°C).
- Bake for an additional 30 minutes to allow the exterior to caramelize and develop a beautiful bark.
- Remove from the oven and let rest for 5 minutes before brushing generously with your favorite barbecue sauce.
- If desired, place under the broiler for 2-3 minutes to give the sauce a slight char and glossy finish. Watch carefully to prevent burning.
- Remove from the oven and let rest for another 5 minutes before cutting between the bones to serve.
- Garnish with fresh parsley or cilantro if desired, and serve with extra barbecue sauce on the side.
- Cut the ribs between the bones using a sharp knife, or simply cut them into 2-3 bone sections for family-style serving.
Pro Tips
- Temperature control is absolutely essential for this recipe. A reliable oven thermometer ensures your oven maintains 275°F during the initial cooking phase. Ovens can vary significantly, so don’t skip this step.
- For the dry rub, feel free to adjust the spices to your preference. If you like more heat, increase the cayenne pepper to 1½ teaspoons. For a sweeter profile, add another tablespoon of brown sugar. Smoked paprika can replace regular paprika for deeper complexity.
- The apple juice in the glaze adds moisture and a subtle sweetness that complements the savory rub beautifully. If you don’t have apple juice, apple cider vinegar works wonderfully and adds a tangy dimension.
- These ribs can be made a day ahead. Wrap them tightly in plastic wrap and refrigerate, then reheat gently in a 300°F oven for about 20 minutes before serving.
- Leftover ribs make fantastic sandwiches. Simply shred the meat from the bones and reheat it with your favorite barbecue sauce.
- For a more authentic smoke flavor indoors, you can add ½ teaspoon of liquid smoke to the dry rub, though this is entirely optional.
- Removing the membrane from the back is crucial. It prevents the rub from penetrating properly and can affect the final texture. Most butchers will remove it for you if you ask.
- Don’t skip the foil-covered phase. This steaming step is what makes the ribs so incredibly tender and juicy. It’s the difference between tough, dry ribs and fall-off-the-bone perfection.
- When brushing the glaze on, make sure the ribs are relatively dry first. This helps the glaze adhere better and creates a more uniform coating.
- The broiler step is optional but highly recommended. It caramelizes the sauce and creates a beautiful glossy finish that looks restaurant-quality. Just watch carefully – it only takes 2-3 minutes.
- Ribs are best served immediately while still warm, but they’re also delicious at room temperature or even cold the next day.
- For a larger gathering, this recipe doubles easily. Just increase your baking sheet size or use two sheets and rotate them halfway through cooking.
- Pair these with coleslaw, baked beans, cornbread, or mac and cheese for a complete barbecue feast.