
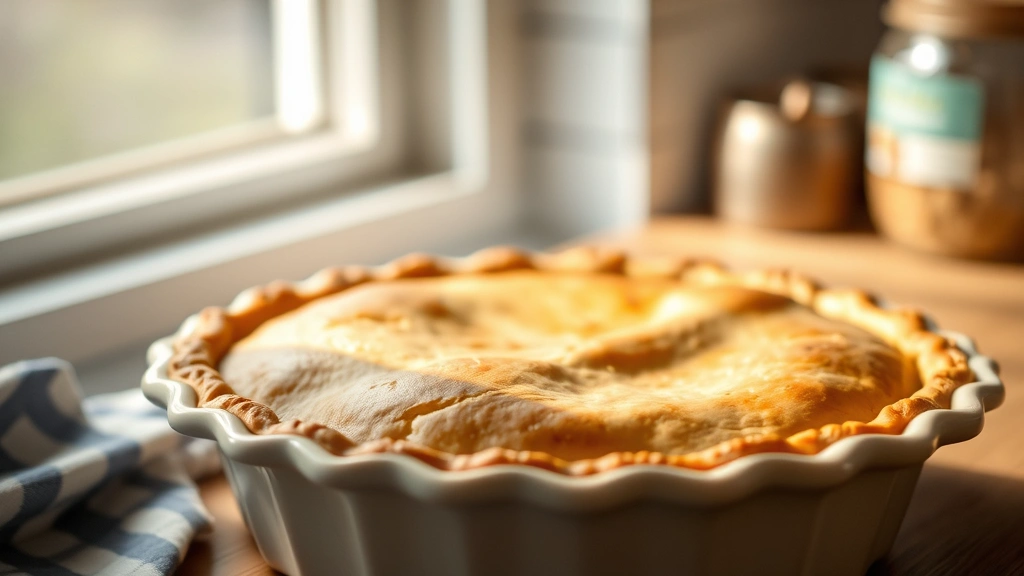
There’s something absolutely magical about a homemade pie crust, and let me tell you, making one with Crisco is truly the secret to achieving that perfectly flaky, buttery texture that will have everyone asking for your recipe. I grew up watching my grandmother work her magic in the kitchen, and this Crisco pie crust was her most treasured secret. The beauty of using Crisco is that it creates those gorgeous, delicate layers that make every bite absolutely divine—whether you’re filling it with a classic apple pie, a silky custard, or a tangy lemon meringue.
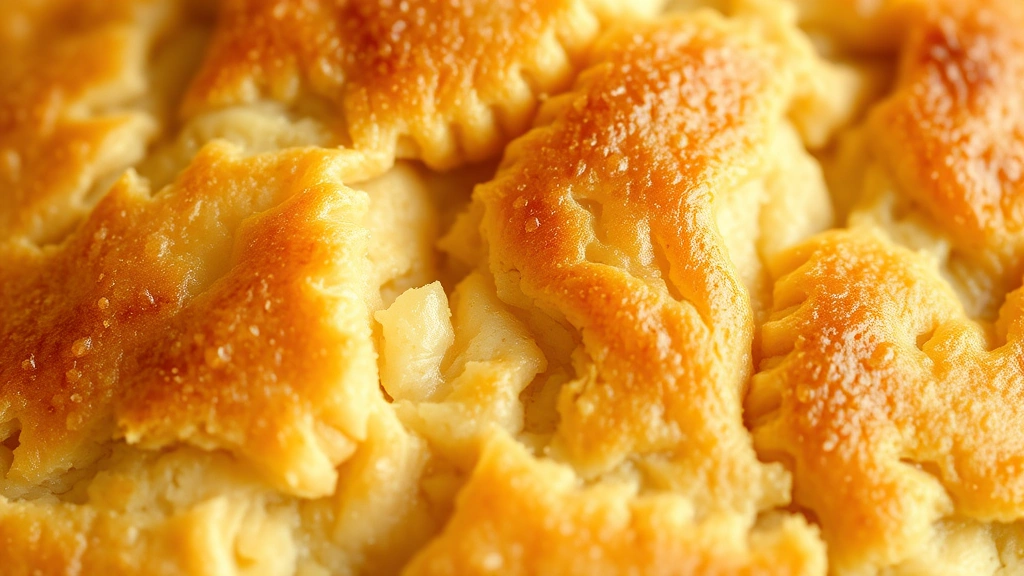
When I first started making pies, I’ll admit I was intimidated. But once I understood the science behind why Crisco works so beautifully in pie dough, everything clicked into place. Crisco, being a solid vegetable shortening, has a higher melting point than butter, which means it stays suspended in the dough longer during mixing and baking. This creates those beautiful, distinct flaky layers that make people close their eyes and sigh with contentment. Unlike butter, which can sometimes make dough tough if you overwork it, Crisco is incredibly forgiving.
The key to pie crust perfection is keeping everything cold, working quickly, and not overworking your dough. I’m going to walk you through every single step, and I promise you’ll be making this crust for every pie occasion from here on out. This recipe makes enough for a double-crust pie, which is perfect for those deep-dish fruit pies or a classic chicken pot pie. If you need a single crust, you can easily halve the recipe.
One thing I always tell people is that making pie crust is more about feel than precision. Yes, you need measurements, but your hands will tell you when the dough is ready. You want it to feel like coarse sand mixed with pea-sized pieces of Crisco—not a smooth dough. This is what creates those magnificent flakes.
For savory applications, this crust works beautifully with Easy Chicken Alfredo Recipe, or you could top a Best Chickpea Salad Recipe with a pot pie version. The versatility of this crust is truly endless.
I’ve tested this recipe countless times, and I’m sharing every tip and trick I’ve learned. Whether you’re a complete beginner or someone who’s been baking for years, this guide will help you create a pie crust that’s worthy of the cover of a food magazine. The texture will be so tender it practically melts in your mouth, and the flavor will be perfectly neutral, letting whatever filling you choose shine. Let’s get started on creating pie crust magic together!
Ingredients
- 2½ cups all-purpose flour
- 1 teaspoon salt
- 1 tablespoon granulated sugar
- 1 cup Crisco vegetable shortening, chilled and cubed
- 6-8 tablespoons ice water
- 1 tablespoon apple cider vinegar or fresh lemon juice
- Additional flour for dusting
Instructions
- In a large bowl, whisk together the flour, salt, and sugar. Make sure these are evenly distributed throughout the flour—this is important for even seasoning in every bite of your crust.
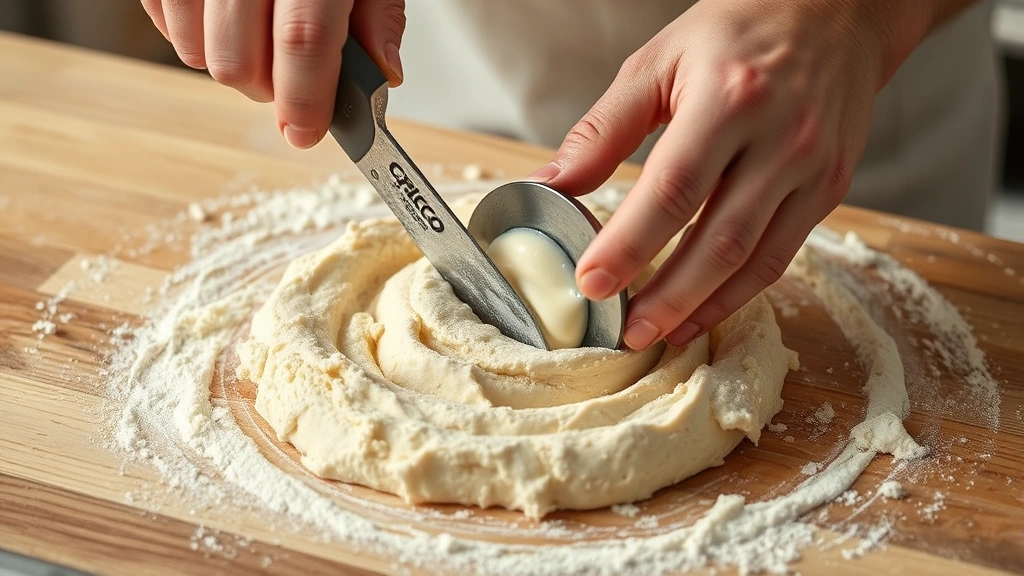
- Add the chilled Crisco cubes to the flour mixture. Using a pastry cutter, two knives, or your fingertips, work the Crisco into the flour until the mixture resembles coarse cornmeal with some pea-sized pieces of Crisco still visible. This is crucial for flakiness.
- In a small bowl, combine the ice water and apple cider vinegar or lemon juice. The acidity helps relax the gluten strands, making the dough more tender and easier to work with.
- Sprinkle the ice water mixture over the flour mixture, a little at a time, tossing gently with a fork until the dough just comes together. You may not need all the water—stop when the dough holds together when squeezed but still looks somewhat shaggy.
- Divide the dough in half and shape each portion into a flat disk about ¾-inch thick. This shape helps the dough chill evenly and makes it easier to roll out later.
- Wrap each disk tightly in plastic wrap and refrigerate for at least 1 hour, but preferably up to 24 hours. This resting time allows the gluten to relax and the Crisco to firm up, which results in a more tender, flakier crust.
- When ready to use, remove one disk from the refrigerator and let it sit at room temperature for 5-10 minutes until it’s just pliable enough to roll without cracking.
- On a lightly floured surface, roll out the dough to about an 11-inch circle, working from the center outward. If the dough cracks, simply pinch it back together—it’s very forgiving. You want the thickness to be about ⅛-inch.
- Transfer the rolled dough to your 9-inch pie pan by rolling it loosely around your rolling pin and unrolling it over the pan. Gently press it into the bottom and sides, being careful not to stretch it.
- For a single-crust pie, trim the excess dough to 1-inch overhang, then fold under and crimp decoratively with your fingers or a fork. For a double-crust pie, leave the excess dough as is and add your filling.
- If making a double-crust pie, roll out the second disk the same way and place it over your filling. Trim both crusts to 1-inch overhang, fold under together, and crimp to seal.
- For a single-crust pie that will be blind-baked, prick the bottom and sides with a fork to prevent puffing. Line with parchment paper, fill with pie weights or dried beans, and bake at 425°F for 10-12 minutes until the edges are set but not colored.
- For a filled pie, follow your specific recipe’s baking instructions, but remember that this crust bakes beautifully to a golden brown and crispy texture.
Pro Tips
- Crisco is the secret ingredient here because it creates superior flakiness compared to butter or lard alone. Its higher melting point means it stays distinct from the flour longer during baking, creating those gorgeous layers everyone loves.
- Temperature control is absolutely critical. Everything should be cold: your Crisco, your water, your bowl, and even your hands if possible. Some bakers even chill their flour. Cold ingredients mean less gluten development and more flakiness.
- Do not skip the resting and chilling time. This allows the gluten to relax, which prevents shrinkage during baking and makes rolling easier. Even 30 minutes helps, but overnight is ideal.
- The vinegar or lemon juice in the water serves multiple purposes: it relaxes gluten strands, adds subtle flavor, and helps preserve the crust if you’re making it ahead.
- When cutting in the Crisco, aim for a mixture that looks like coarse cornmeal with some pea-sized pieces still visible. Those visible pieces are what create the flakes, so don’t overwork it to a smooth paste.
- If your dough seems too soft or warm while rolling, pop it back in the refrigerator for 10-15 minutes. It will be much easier to work with.
- This crust can be made up to 2 days ahead and stored in the refrigerator, or frozen for up to 3 months. Thaw frozen dough overnight in the refrigerator before using.
- For a double-crust pie, you can assemble it and refrigerate or freeze before baking. This actually improves the texture because the Crisco becomes even more firm.
- If your crust cracks while rolling or transferring, simply pinch it back together. Crisco dough is very forgiving and the cracks will seal during baking.
- For extra shine and browning, brush the top crust with an egg wash (1 egg beaten with 1 tablespoon water) before baking.
- Different pie fillings bake at different temperatures, so always follow your specific pie recipe’s instructions for baking temperature and time.
Pingback: Quick & Tasty Thin Cut Chicken Breast Recipe – Simple Recipe Finder
Pingback: How to Make the Best Taco Chili Recipe – So Delicious! – Simple Recipe Finder