
Dal fry is one of my absolute favorite comfort foods to make at home, and honestly, it couldn’t be easier! This simple yet deeply satisfying Indian dish transforms humble lentils into something absolutely magical with just a few pantry staples and a little bit of love. Whether you’re new to Indian cooking or a seasoned pro, this dal fry recipe is going to become your go-to weeknight dinner.
I first fell in love with dal fry during my travels through India, where I watched street vendors expertly toss bubbling pots of spiced lentils with such ease and confidence. What I discovered is that making restaurant-quality dal fry at home is completely achievable – you just need to understand a few key techniques and use quality ingredients. The beauty of this dish lies in its versatility; you can make it as mild or as spicy as you like, and it pairs beautifully with rice, naan, or even crusty bread.
This recipe uses yellow moong dal or red lentils as the base, which cook down into a creamy, luxurious texture without requiring any cream or dairy. The magic happens when you temper whole spices in ghee or oil and pour that fragrant mixture over the cooked lentils – it’s called the “tadka” or “chaunce,” and this step transforms simple dal into something restaurant-worthy. What I love most about dal fry is that it’s naturally vegetarian, packed with protein and fiber, and makes for fantastic leftovers.
You can serve this alongside creamy pasta dishes if you’re doing a fusion dinner, or keep it traditional with basmati rice and pickled red onions for brightness. Some of my friends love topping it with a fried egg for extra richness, while others prefer it pure and simple. I’ve also found that making a big batch of dal fry and storing it in the freezer means you always have a healthy, satisfying meal ready to go – just reheat gently with a splash of water and add a fresh tadka on top.
For the best results, I recommend using quality lentils from a trusted source, as they cook more evenly. Don’t skip the tadka step – it really is what makes this dish special. And remember, cooking times can vary depending on how old your lentils are, so start checking for doneness around the 20-minute mark. This dal fry recipe serves 4-6 people and comes together in about 45 minutes from start to finish, making it perfect for busy weeknights or lazy weekends.
If you’re looking for more legume-based recipes, check out my chickpea salad recipe for a fresh, cold option. For more inspiration on Indian cooking techniques, Serious Eats has an excellent guide to dal varieties. And if you want to explore more comfort food dishes, the New York Times has a beautiful dal makhani recipe that showcases the richness possible with this humble ingredient.
Ingredients
- 1 cup yellow moong dal or red lentils, rinsed thoroughly
- 4 cups vegetable or chicken broth
- 1 medium onion, diced
- 2 tomatoes, diced (or 1 can crushed tomatoes)
- 2 tablespoons ghee or vegetable oil
- 1 tablespoon ginger-garlic paste
- 1 teaspoon turmeric powder
- 1 teaspoon red chili powder (adjust to taste)
- 1 teaspoon ground cumin
- Salt to taste
- For the tadka: 2 tablespoons ghee or oil
- For the tadka: 1 teaspoon cumin seeds
- For the tadka: 1 teaspoon mustard seeds
- For the tadka: 1-2 dried red chilies
- For the tadka: 8-10 curry leaves
- For the tadka: 1 medium onion, thinly sliced
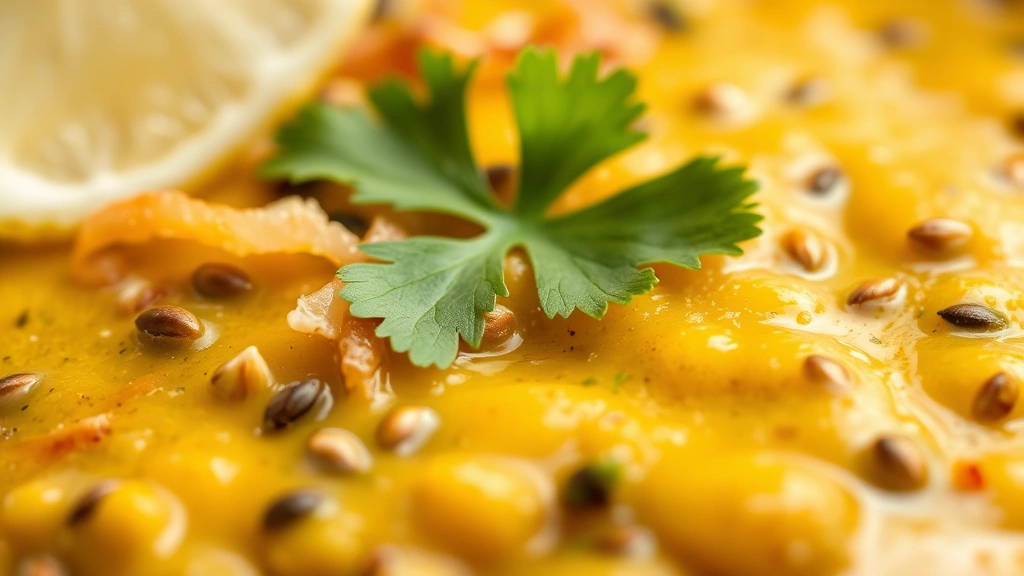
- Fresh cilantro for garnish
- Juice of 1 lemon
Instructions
- Rinse the moong dal or red lentils under cold running water until the water runs clear. This removes excess starch and helps the lentils cook evenly. Place the rinsed lentils in a large pot and add 4 cups of broth.
- Bring the broth and lentils to a boil over high heat. Once boiling, reduce heat to medium and let it simmer. Skim off any foam that rises to the surface during the first few minutes.
- While the lentils are cooking, heat 2 tablespoons of ghee or oil in a separate pan over medium heat. Add the diced onion and cook for 3-4 minutes until softened and starting to turn golden.
- Add the ginger-garlic paste to the onions and cook for 1 minute until fragrant. Be careful not to let it burn – if it starts sticking, add a splash of water.
- Add the turmeric powder, red chili powder, and ground cumin to the onion mixture. Stir well to combine and cook for another 30 seconds. The spices should be fragrant but not burnt.
- Add the diced tomatoes to the spiced onion mixture and cook for 2-3 minutes, stirring occasionally, until the tomatoes start to break down.
- Once the lentils have been cooking for about 15 minutes and are starting to soften, add the cooked onion-tomato-spice mixture to the pot. Stir well to combine.
- Continue simmering the dal for another 15-20 minutes, stirring occasionally. The lentils should be completely soft and breaking down, and the mixture should have a creamy, porridge-like consistency. If it’s too thick, add more broth or water.
- Taste the dal and adjust seasoning with salt and additional spices as needed. The dal should be well-seasoned but not overly salty.
- Once the dal is cooked to your desired consistency, add the lemon juice and stir well. This brightens the flavors beautifully.
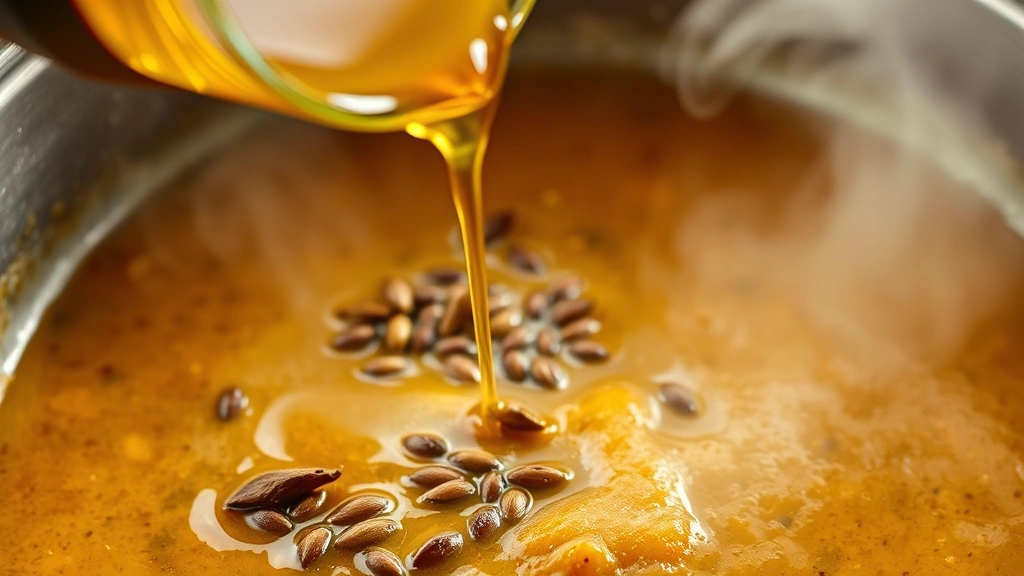
- Now prepare the tadka while the dal is at its final stages. Heat 2 tablespoons of ghee or oil in a small pan over medium-high heat.
- Once the ghee is hot and shimmering, add the cumin seeds and mustard seeds. They should start crackling and popping within seconds – this is exactly what you want.
- Immediately add the dried red chilies and curry leaves to the pan. Let them sizzle for just 10-15 seconds, being careful not to let them burn.
- Add the sliced onion to the tadka and cook for 2-3 minutes, stirring frequently, until the onions become golden brown and crispy. This adds wonderful texture and flavor to the dish.
- Carefully pour the entire tadka (including all the ghee and crispy bits) over the cooked dal. It will sizzle and bubble – this is normal and delicious!
- Stir the tadka into the dal thoroughly, making sure the spices and onions are well distributed throughout. The dal should now have a beautiful aroma and flavor complexity.
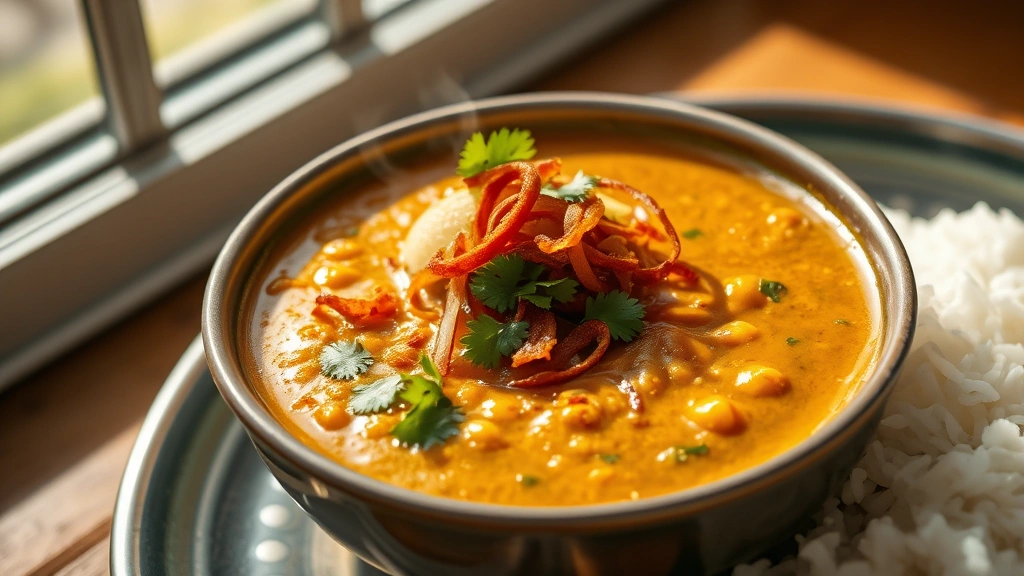
- Garnish generously with fresh cilantro and serve hot with steamed basmati rice, warm naan bread, or your favorite Indian bread.
- If making ahead, store the dal and tadka separately in airtight containers. The dal keeps for up to 5 days in the refrigerator, while the tadka is best made fresh and used within 2 days. Reheat gently and add the tadka just before serving for the best flavor and texture.
Pro Tips
- **Choosing Your Lentils**: Yellow moong dal is my top choice for dal fry because it has a naturally creamy texture when cooked. However, you can also use red lentils (masoor dal), which cook even faster. Avoid brown or green lentils as they don’t break down enough for this dish.
- **The Tadka is Essential**: This tempering step is what transforms simple dal into something spectacular. The hot oil or ghee blooms the spices and creates an incredible depth of flavor. Never skip this step – it’s what makes restaurant dal fry taste so good.
- **Consistency Matters**: The final texture should be creamy and pourable but not soupy. If your dal is too thick, add broth or water a splash at a time. If it’s too thin, let it simmer uncovered for a few more minutes to reduce.
- **Ginger-Garlic Paste**: You can make this fresh by blending equal parts peeled ginger and garlic with a little water, or buy pre-made versions. Fresh is always better if you have the time.
- **Spice Level Adjustment**: The heat in this recipe comes from red chili powder. Start with 1 teaspoon if you’re sensitive to spice, and add more to taste. You can also adjust by using fewer or more dried red chilies in the tadka.
- **Make-Ahead Instructions**: This dal fry actually tastes better the next day as the flavors have time to meld. Store it in an airtight container and reheat gently on the stovetop with a splash of water. Make a fresh tadka and add it right before serving for maximum flavor.
- **Serving Suggestions**: Serve with steamed basmati rice, warm naan, roti, or paratha. It’s also delicious with a dollop of plain yogurt, a squeeze of fresh lemon, and some pickled red onions on the side.
- **Freezing**: Dal fry freezes beautifully for up to 3 months. Cool completely before transferring to freezer-safe containers. Thaw overnight in the refrigerator and reheat gently on the stovetop.
- **Customization**: Add vegetables like carrots, spinach, or bell peppers during cooking for extra nutrition. You can also add coconut milk in the final minutes for a creamier version, though this isn’t traditional.
- **Cooking Time Variables**: The age of your lentils affects cooking time significantly. Older lentils may take 35-40 minutes, while fresh ones might be done in 25-30 minutes. Start checking at the 20-minute mark and adjust accordingly.
- **Ghee vs. Oil**: Ghee gives a richer, more authentic flavor, but vegetable oil works perfectly fine if you prefer. Coconut oil is also a delicious option that adds subtle sweetness.