

Darling, let me share the secret to bakery-perfect pastries and golden-brown baked goods – it’s all in the egg wash! This simple yet transformative technique is the difference between a home-baked dessert and one that looks like it came straight from a French patisserie. An egg wash is essentially a mixture of beaten egg and a touch of liquid that you brush onto pastries, breads, and baked goods before they go into the oven.
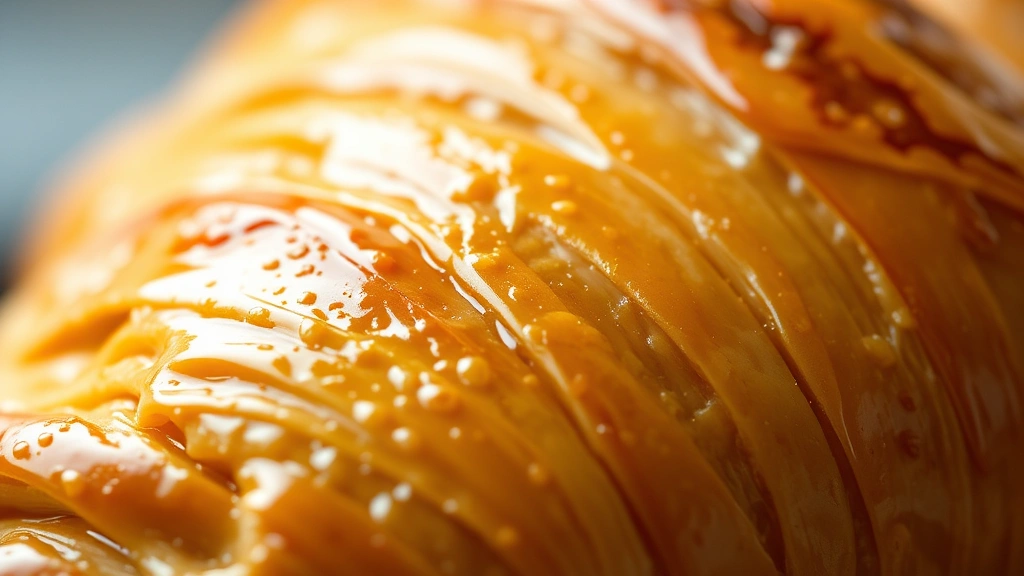
The magic happens as your pastries bake – the egg proteins coagulate and create that gorgeous, glossy, professional-looking finish that we all crave. Whether you’re making croissants, Danish pastries, dinner rolls, or a show-stopping pie, mastering egg wash is truly non-negotiable. I’ve been using this technique in my kitchen for years, and I’m absolutely thrilled to walk you through it today.
What makes egg wash so spectacular is its versatility. You can customize it based on what you’re baking and the exact finish you’re hoping to achieve. Want a high-shine, lacquered look? Use just egg yolk. Prefer a more subtle, matte finish? Whole egg is your friend. The variations are endless, and I’m going to share all my favorite combinations with you today.
I absolutely love how foolproof this technique is. Once you understand the basics, you’ll be creating bakery-quality results every single time. Your family will be absolutely stunned when you serve homemade pastries that look professionally made. Trust me, this is one of those simple techniques that makes an enormous difference in your baking.
Let me walk you through everything you need to know about making the perfect egg wash. I promise it’s easier than you think, and the results are absolutely stunning. You’ll be amazed at how this one simple step transforms your baked goods from ordinary to extraordinary. Let’s dive in!
Quick Tasty Bacon Carbonara Recipe is wonderful for using extra eggs, and this Best Heavy Cream Alfredo Sauce Recipe is another delicious way to use those precious eggs. If you’re looking for more egg-forward dishes, this Delicious Heavy Cream Pasta Recipe is absolutely divine. Don’t forget about these sides either – the Easy Pickled Red Onion Recipe and Best Chickpea Salad Recipe pair beautifully with egg-washed pastries.
For more detailed guidance on pastry techniques, I absolutely recommend checking out Serious Eats for their comprehensive baking guides. Bon Appétit also has wonderful pastry inspiration, and New York Times Cooking offers excellent foundational baking techniques that complement this egg wash method perfectly.
Ingredients
- 1 large egg, room temperature
- 1 tablespoon water, milk, or heavy cream
- Pinch of sea salt
- Small pastry brush or clean brush
Instructions
- Crack one large egg into a small bowl, making sure no shell pieces get into the mixture. If you do get shell, simply fish it out with a larger piece of shell – it will grab the tiny fragment easily.
- Add 1 tablespoon of your chosen liquid (water for shine, milk for subtle gleam, or heavy cream for richness) directly to the egg.
- Add just a tiny pinch of sea salt to the mixture. This enhances flavor and helps the egg proteins set more evenly during baking.
- Whisk the mixture vigorously with a fork for about 30 seconds to 1 minute until completely combined and slightly frothy. The mixture should be homogeneous with no streaks of white or yolk visible.
- Strain the egg wash through a fine-mesh sieve into a clean, shallow bowl if you prefer an ultra-smooth application. This step removes any stubborn bits of membrane or shell and ensures an absolutely flawless finish.
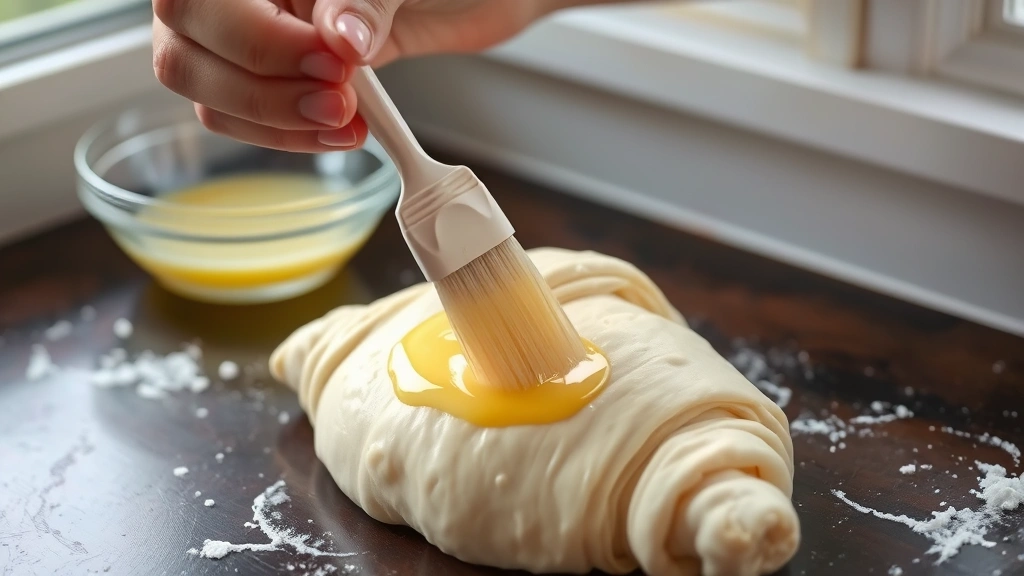
- Dip your pastry brush into the egg wash, ensuring the bristles are well-saturated but not dripping excessively.
- Brush the egg wash onto your pastries in thin, even strokes, working in one direction. Apply only one thin layer – more is not better, as thick layers can create a rubbery, uneven finish.
- For decorative elements like seeds, do this immediately after applying the egg wash while it’s still tacky, ensuring they adhere beautifully.
- Place your egg-washed pastries directly into a preheated oven according to your recipe’s instructions. The heat will set the egg wash and create that gorgeous golden-brown finish.
- Monitor your baking closely during the final 5-10 minutes. If your pastries are browning too quickly, you can tent them loosely with aluminum foil to prevent over-browning while allowing them to finish cooking through.
Pro Tips
Temperature matters more than people realize. Room temperature eggs whisk more easily and incorporate more evenly than cold eggs straight from the refrigerator. If you forget and grab a cold egg, simply let it sit in warm water for 2-3 minutes before using. The difference in application smoothness is genuinely noticeable.
One crucial tip that separates home bakers from professionals is applying egg wash at the correct time. Never apply it more than 15 minutes before baking, as it can begin to dry and create an uneven finish. If you’re preparing pastries ahead, apply the egg wash right before the pastries go into the oven for the most beautiful, consistent result.
Don’t make the mistake of applying egg wash too heavily. A thin, delicate coat is far superior to a thick layer. Thick applications can create a rubbery, plasticky texture that actually detracts from your pastries. Think of it like makeup – a light touch is always more elegant than heavy application. One thin, even coat is absolutely perfect.
If you’re making laminated doughs like croissants or puff pastry, be especially careful not to let egg wash drip down the sides into the layers. This can prevent proper lamination and puffing. Keep your brush strokes horizontal and contained to the top surface only.
For savory applications, consider adding a crack of freshly ground black pepper or a tiny pinch of garlic powder to your egg wash base. Herbs like thyme or rosemary are also absolutely lovely brushed on before the egg wash sets. These additions create sophisticated, restaurant-quality results that will absolutely impress your dinner guests.
Store leftover egg wash covered in the refrigerator for up to 24 hours, though fresh is always best. If your egg wash becomes too thick or starts to separate after refrigeration, simply whisk it vigorously again before using.
For vegan baking, you can substitute the egg wash with a mixture of plant-based milk and cornstarch, or aquafaba (the liquid from canned chickpeas) beaten until frothy. These alternatives won’t create quite the same glossy finish, but they’ll still provide a lovely appearance and help with browning.
Cleaning your brush immediately after use prevents the egg from drying and becoming difficult to remove. Simply rinse under warm water and wash with soap – this takes just seconds and keeps your brush in perfect condition for future use.