
Making fermented pickles at home is easier than you might think, and the results are absolutely delicious! This classic preservation method has been used for centuries, and it’s experiencing a well-deserved renaissance among home cooks who appreciate the complex flavors and probiotic benefits that come with fermentation.
Unlike vinegar-based pickles that are processed and shelf-stable, fermented pickles develop their tangy flavor naturally through the magic of lacto-fermentation, where beneficial bacteria convert the vegetables’ natural sugars into lactic acid. This process not only creates that signature sour taste but also develops a deeper, more nuanced flavor profile that’s impossible to achieve with vinegar alone.
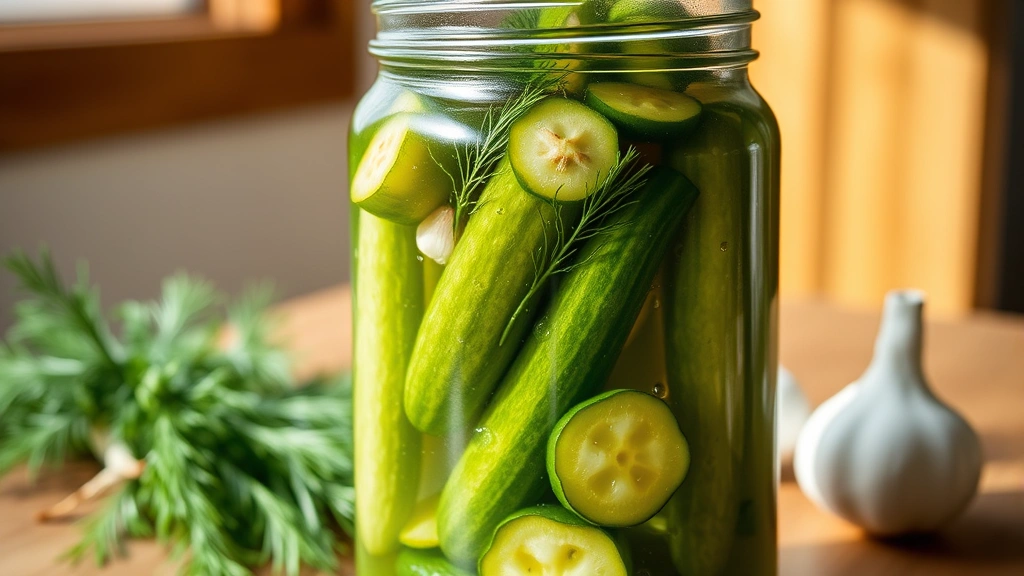
The beauty of this fermented pickle recipe is its simplicity. You’ll need just a few basic ingredients: cucumbers, salt, water, and aromatics like dill, garlic, and spices. No special equipment is required beyond a clean jar, making this project perfect for beginners and experienced fermenters alike.
What makes fermented pickles special is the transformation that happens over time. During the first few days, you’ll notice bubbles forming as the Lactobacillus bacteria gets to work. By day three or four, your pickles will start developing that characteristic tangy flavor. The longer they ferment, the more complex and developed the taste becomes.
I love serving these pickles alongside charcuterie boards, using them as a crisp, probiotic-rich condiment for sandwiches and burgers, or simply enjoying them straight from the jar as a healthy snack. They’re also wonderful chopped up and added to relishes, potato salads, or grain bowls for an extra flavor punch.
One of the best parts about making your own fermented pickles is that you have complete control over the flavor profile. Want extra heat? Add more chili peppers. Prefer a more herbaceous note? Increase the dill and tarragon. This recipe is infinitely customizable to suit your taste preferences.
The fermentation process does require a bit of patience, but the hands-on time is minimal. Once you’ve assembled your jar, you can essentially let nature do the work. Check on them occasionally, taste as you go, and transfer to cold storage once they reach your desired level of fermentation.
These pickles will keep in the refrigerator for several months, getting better with age as the flavors continue to develop and meld together. For more guidance on vegetable fermentation, check out this Serious Eats guide to fermented vegetables. You might also enjoy learning about quick-pickled alternatives if you’re short on time. For additional inspiration, explore this New York Times quick pickle recipe.
Ingredients
- 2 pounds small to medium pickling cucumbers (ideally picked within 24 hours of use)
- 3 tablespoons kosher salt (or 2.5 tablespoons if using table salt)
- 2 cups filtered or dechlorinated water
- 4-5 cloves fresh garlic, smashed or sliced
- 2-3 fresh dill heads (or 1 tablespoon dried dill seeds)
- 1 teaspoon black peppercorns
- 1/2 teaspoon red pepper flakes (optional, for heat)
- 2-3 bay leaves
- 1/2 teaspoon mustard seeds
- 1 small piece fresh horseradish root, sliced (optional, for crispness)
- 1 large grape leaf or oak leaf (optional, helps maintain crispness)
Instructions
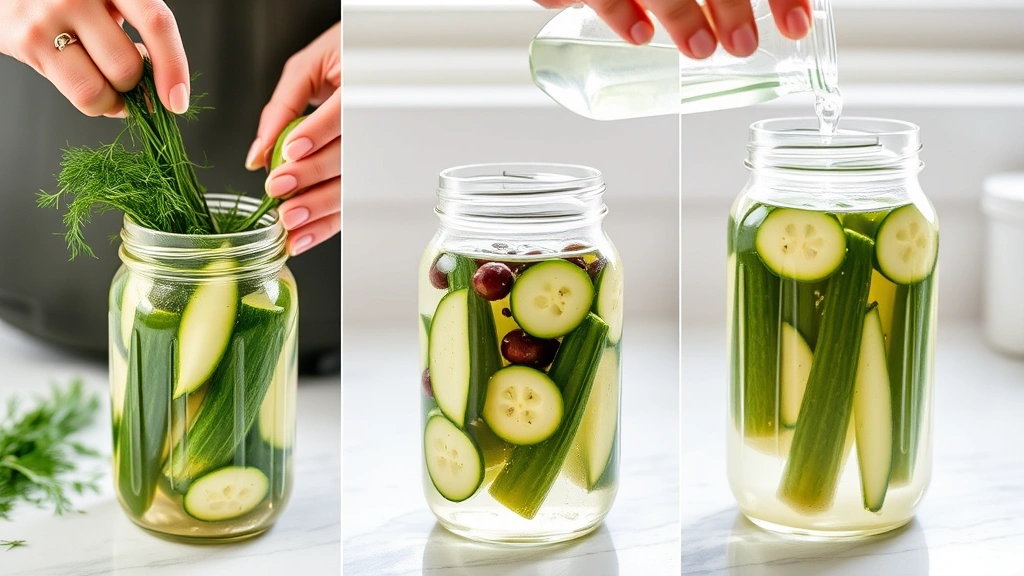
- Start by preparing your cucumbers. Rinse them thoroughly under cool water and use a soft brush to remove any dirt or debris. Pat them completely dry with a clean kitchen towel—any excess moisture can interfere with fermentation. Trim off the blossom end (the end opposite the stem) as it contains enzymes that can soften your pickles.
- Prepare your fermenting vessel by washing a clean quart-sized glass jar with hot soapy water and rinsing thoroughly. You can also run it through the dishwasher if preferred. Make sure it’s completely clean and free of any residue.
- In a separate bowl, combine your filtered water with kosher salt. Stir until the salt is completely dissolved. This creates your brine, which should taste pleasantly salty—similar to ocean water. If using tap water, let it sit out for 24 hours to allow chlorine to dissipate, or use filtered water to ensure the best fermentation environment.
- Gather all your aromatics and spices: garlic cloves, dill, peppercorns, red pepper flakes, bay leaves, and mustard seeds. If using grape or oak leaves, have them ready as well. These ingredients will add flavor complexity and help keep your pickles crisp.
- Begin layering your jar by placing half of your aromatic ingredients on the bottom: arrange some garlic cloves, add a sprig of dill, scatter some peppercorns and mustard seeds, and place a bay leaf.
- Pack the cucumbers into the jar vertically, fitting them as snugly as possible without crushing them. Stand them upright if possible, as this helps them stay submerged. Work in batches if needed, arranging them in a single layer before adding more ingredients on top.
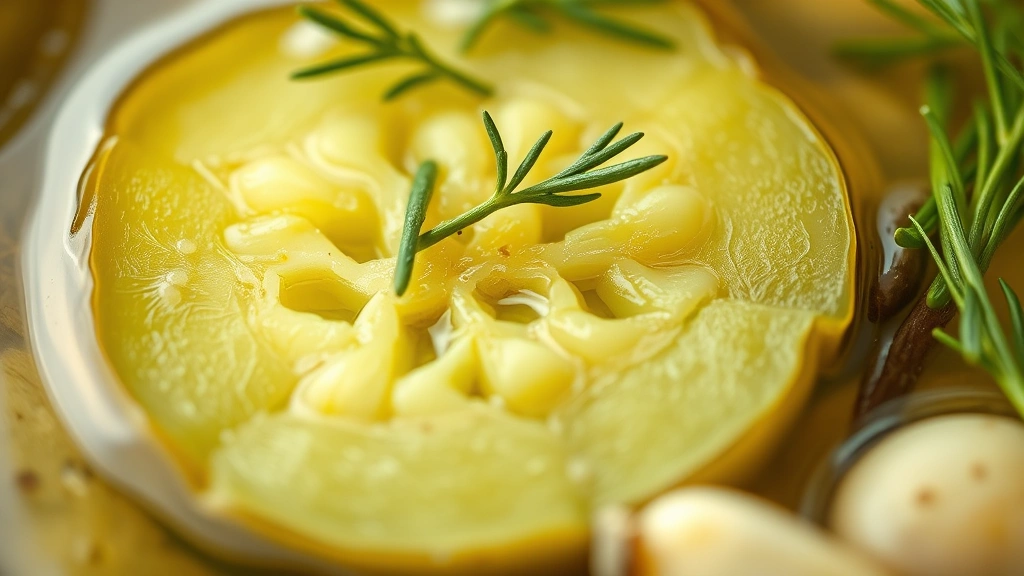
- Once you’ve filled the jar with cucumbers, distribute the remaining aromatics over the top: remaining garlic, dill, peppercorns, bay leaves, and mustard seeds. If using a grape or oak leaf, place it on top of everything—these leaves contain tannins that help maintain the pickles’ crispness.
- Pour your prepared brine slowly over the cucumbers and aromatics, filling the jar until everything is completely submerged. The cucumbers must stay below the brine level throughout fermentation, or they may develop mold.
- To keep the cucumbers submerged, use a fermentation weight, a small jar filled with brine, or even a cabbage leaf weighted down with a small glass. There are many options available—choose whatever works best for your setup and keeps everything safely below the brine.
- Cover the jar loosely with a clean cloth, coffee filter, or paper towel secured with a rubber band. This allows gases to escape during fermentation while keeping dust and debris out. Do not use a tight lid at this stage.
- Place your jar at room temperature (ideally between 65-75°F) in a spot away from direct sunlight. A kitchen counter, pantry, or cabinet works perfectly. Avoid areas near heat sources or in direct sun, as temperature fluctuations can disrupt fermentation.
- Within 24 hours, you should notice the brine becoming slightly cloudy and small bubbles beginning to form—this is the Lactobacillus bacteria getting to work! This is a good sign that fermentation is progressing normally.
- Check on your pickles daily, tasting them and observing the fermentation progress. By day 3-4, they should develop a noticeably tangy flavor. The fermentation time depends on your room temperature and personal preference—cooler temperatures mean slower, longer fermentation; warmer temperatures speed up the process.
- Continue tasting your pickles daily after day 3. Some people prefer them lightly fermented (3-4 days), while others like a more intensely sour pickle (7-10 days or longer). There’s no single ‘right’ answer—it’s entirely based on your taste preference.
- Once your pickles have reached your desired level of fermentation, remove the weight and cover the jar with a tight-fitting lid. Transfer the jar to your refrigerator, where the cold temperature dramatically slows down fermentation.
- In the refrigerator, your fermented pickles will keep for several months, continuing to develop subtle flavor changes over time. The cold storage is key to preserving them and preventing over-fermentation.
Pro Tips
- **Choosing the right cucumbers**: Select small to medium pickling cucumbers (often labeled Kirby cucumbers) rather than slicing cucumbers. Pickling varieties have thinner skins and fewer seeds, resulting in crispier, better-textured fermented pickles.
- **The importance of salt**: Don’t skip or reduce the salt—it’s not just for flavor. Salt creates an environment where beneficial Lactobacillus bacteria thrive while preventing harmful bacteria from developing. Use kosher salt or sea salt; avoid iodized table salt which can cloud the brine.
- **Water quality matters**: If your tap water is heavily chlorinated, the chlorine can inhibit fermentation. Use filtered water or let tap water sit out uncovered for 24 hours before using.
- **Temperature control**: Fermentation happens fastest between 70-75°F. In cooler conditions (60-65°F), fermentation proceeds more slowly but often results in better flavor development and crispness. Avoid fermentation below 55°F or above 80°F.
- **Brine cloudiness is normal**: The white sediment or cloudiness that forms during fermentation is composed of beneficial bacteria and yeast—it’s completely harmless and actually a sign of successful fermentation.
- **Maintaining crispness**: The addition of grape, oak, or horseradish leaves helps preserve crispness because they contain tannins. Avoid cucumbers that have been sitting around for several days before fermenting, as they’ll be softer to begin with.
- **Customization options**: Experiment with different spice combinations. Try adding coriander seeds, celery seeds, turmeric, or fresh dill flowers. Some people add a small fresh chile for heat or a strip of lemon zest for brightness.
- **Fermentation vessels**: Glass jars work best as they don’t interact with the brine. Avoid metal or plastic containers, which can react with salt and acids produced during fermentation.
- **Mold prevention**: If white mold appears on the surface (different from the white sediment), simply skim it off. It won’t affect the brine below. However, if you see fuzzy mold or notice an off smell, discard the batch as contamination has occurred.
- **Storage and longevity**: Once refrigerated, fermented pickles will keep for 4-6 months or longer. The flavor will continue to develop and deepen over time, making older pickles more complex than freshly fermented ones.
- **Troubleshooting**: If pickles taste mushy, fermentation likely went too long or temperatures were too warm. If they’re not sour enough, ferment longer at room temperature before refrigerating. If fermentation stops, check that vegetables are still submerged and that your water wasn’t too chlorinated.
- **Serving suggestions**: Serve as a side with sandwiches and burgers, chop into relish for hot dogs, add to charcuterie boards, include in grain bowls, or enjoy straight from the jar as a probiotic-rich snack.