
There’s truly nothing more essential to a show-stopping dessert than a perfect graham cracker crust! Whether you’re crafting an elegant New York-style cheesecake or a no-bake dessert dream, mastering this foundation is absolutely non-negotiable. I’ve been making graham cracker crusts for years, and I’m thrilled to share my foolproof method that guarantees a crispy, buttery, golden base every single time.
The beauty of a homemade graham cracker crust lies in its simplicity and versatility. With just three basic ingredients—graham crackers, butter, and a touch of sugar—you can create something truly spectacular. What makes this recipe different from others is the precise ratio of ingredients and the technique that ensures your crust stays crispy even after being filled with creamy cheesecake or silky chocolate mousse. I always use full-fat butter and fresh graham crackers for the best texture and flavor.
Many people make the mistake of over-processing their graham crackers or using too little butter, which results in a dry, crumbly crust that falls apart when you cut into it. This recipe solves all those problems with exact measurements and professional techniques that will have your guests asking for your secret. The crust bakes just long enough to set perfectly while maintaining that delightful crunch that contrasts beautifully with creamy fillings.
I recommend checking out our heavy cream sauce recipes if you’re interested in exploring other versatile bases for desserts and sauces. For more baking inspiration, check out our seasoning techniques that apply to sweet and savory applications alike.
This graham cracker crust is the perfect canvas for so many beautiful creations. Whether you’re making a classic cheesecake following professional techniques or crafting a simple dessert, this crust will elevate your creation to restaurant quality. The technique I’m sharing today comes from years of testing and refinement, and I’m confident it will become your go-to recipe.
The secret to preventing a soggy crust is understanding how moisture interacts with your baked base. By baking your crust briefly before adding filling, you create a moisture barrier that keeps everything perfectly textured. This is especially important when working with wet fillings like cheesecake batter. Additionally, using the right type of butter—unsalted so you can control the salt content—makes a tremendous difference.
I’ve tested this recipe with various graham cracker brands and different butter types, and I’ve found the measurements work beautifully across the board. For extra flavor dimension, some people add a hint of cinnamon or vanilla extract to their crust, which I’ll mention in the notes section. This recipe yields enough crust for a standard 9-inch springform pan or pie dish, with no waste.
Once you master this foundational recipe, you’ll find yourself making it constantly. It’s the base for cheesecakes, chocolate pies, key lime pies, and no-bake desserts. Professional pastry chefs rely on similar techniques, and now you can too. The confidence you’ll feel creating this perfect crust will shine through in every dessert you make.
For more baking fundamentals and advanced techniques, explore Bon Appétit’s comprehensive baking guides. Their expertise combined with this recipe will set you up for success. I also love how this recipe connects to other foundational cooking skills—just as a great sauce base elevates any dish, understanding creamy bases applies across all your cooking endeavors.
The beauty of this recipe is that it comes together in about five minutes of active time. Once you’ve measured your ingredients and crushed your graham crackers to the perfect consistency, you’re simply combining everything and pressing it into your pan. The oven does the rest of the work while you prepare your filling or plan your presentation.
I guarantee that once you make this crust, you’ll never buy a store-bought version again. The taste difference is remarkable—real butter creates a richness that pre-made crusts simply cannot achieve. Your homemade version will be fresher, more flavorful, and infinitely more impressive to anyone lucky enough to taste your creation.
Let me walk you through every step so you feel completely confident in the process. I’ll explain the why behind each instruction, not just the what, so you understand how to troubleshoot if needed and how to adapt this recipe to your specific needs. This knowledge will serve you well for years to come.
Ingredients
- 2 cups graham cracker crumbs (about 14-16 full crackers)
- 6 tablespoons unsalted butter, melted
- 3 tablespoons granulated sugar
- ¼ teaspoon fine sea salt
- Optional: ¼ teaspoon ground cinnamon or ½ teaspoon vanilla extract
Instructions
- Preheat your oven to 350°F (175°C). Position a rack in the center of the oven so your crust bakes evenly.
- Place whole graham crackers in a food processor and pulse until you achieve fine, uniform crumbs. You should have approximately 2 cups of crumbs. If you don’t have a food processor, place crackers in a zip-top bag and crush them with a rolling pin until very fine.
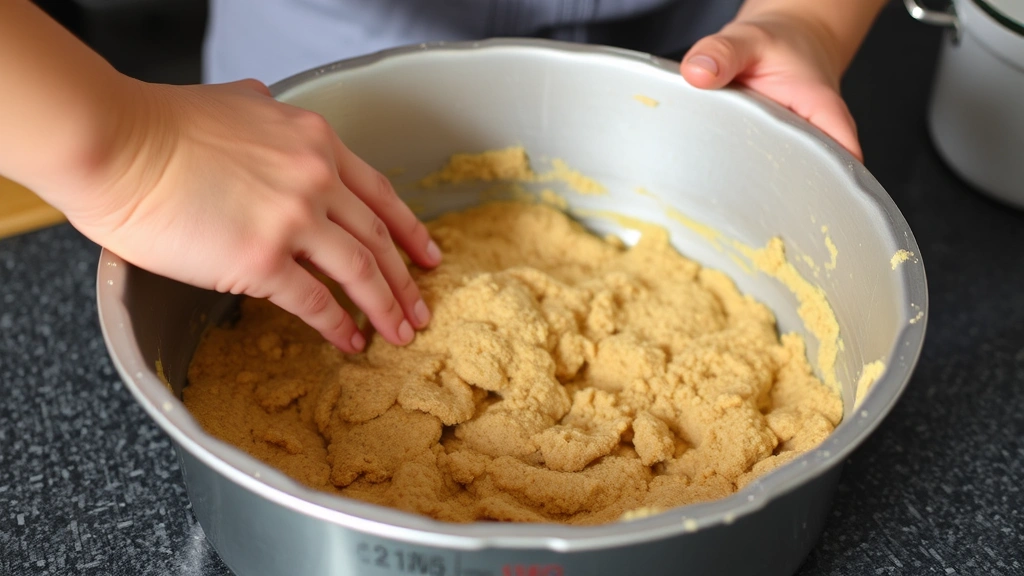
- Pour the graham cracker crumbs into a medium mixing bowl. Add the melted butter, sugar, salt, and any optional flavorings like cinnamon or vanilla extract.
- Stir the mixture thoroughly with a fork or wooden spoon until all the crumbs are evenly coated with butter and the mixture resembles wet sand. Make sure there are no dry pockets of crumbs.
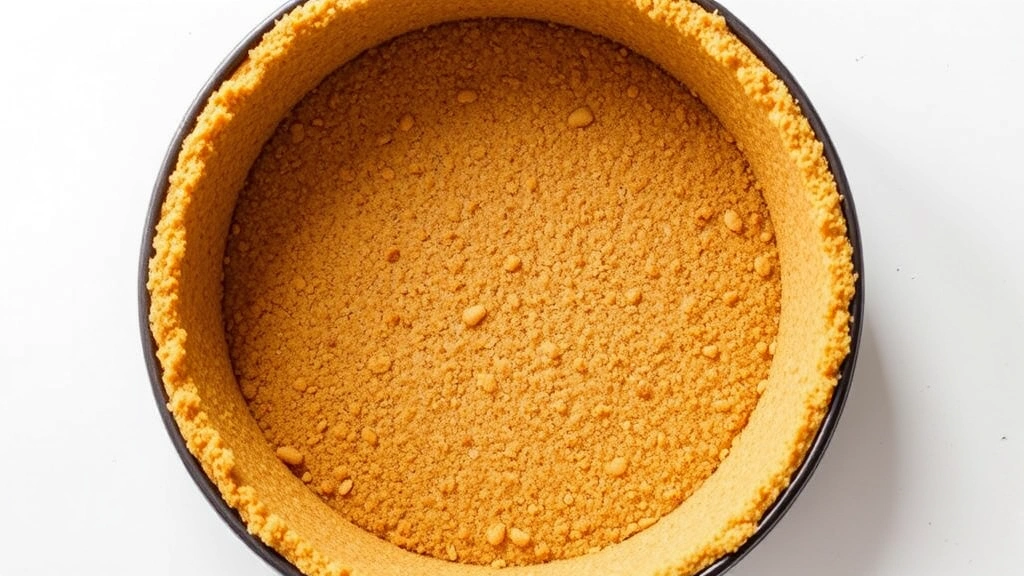
- Pour the mixture into a 9-inch springform pan or pie dish. Press the mixture firmly and evenly across the bottom of the pan, then work it up the sides to create an even thickness of about ¼ inch.
- Use the bottom of a measuring cup to press and smooth the crust, ensuring it’s compact and even throughout. Pay special attention to the corners where the bottom meets the sides.
- Bake the crust in the preheated oven for 8 minutes, until it’s lightly golden and fragrant. You’re looking for a gentle color, not a deep brown.
- Remove the crust from the oven and let it cool for about 5 minutes. This brief cooling allows it to set slightly before you add your filling.
- If you’re making a no-bake dessert, let the crust cool completely to room temperature before adding filling. If you’re making cheesecake, you can add the batter while the crust is still slightly warm, as the cheesecake will bake further.
- For extra crispness with wet fillings, brush the cooled crust lightly with a beaten egg white or melted chocolate before adding your filling—this creates a moisture barrier that keeps the crust crispy.
Pro Tips
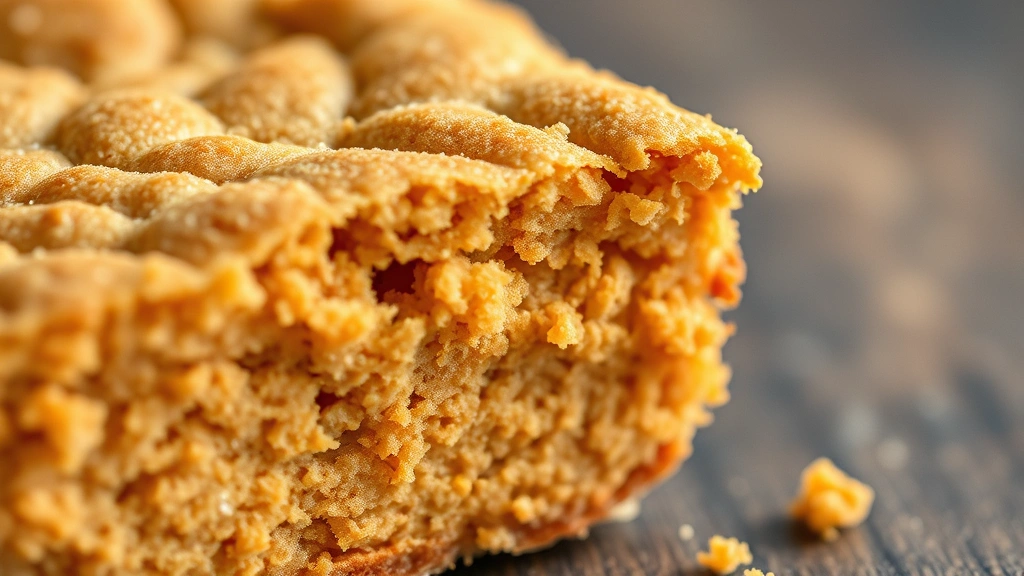
o Graham cracker consistency matters tremendously. Aim for fine crumbs similar to breadcrumbs—not too chunky or too powdery. If your food processor over-processes and creates a paste, your crust will be dense instead of crispy.
o The butter must be melted but not hot when mixing. If it’s too hot, it’ll cook the sugar and create an uneven texture. Let it cool for a minute or two.
o For a chocolate version, add 2 tablespoons of cocoa powder and reduce sugar to 2 tablespoons. The cocoa adds richness and pairs beautifully with cheesecake.
o Honey or brown sugar can replace granulated sugar for different flavor profiles. Brown sugar creates a deeper, more molasses-forward taste that some people prefer.
o The crust can be made up to 2 days in advance. Store it covered at room temperature or in the refrigerator. Bring to room temperature before adding filling.
o If your crust cracks after baking, don’t panic. These cracks seal when you add filling, and they won’t affect the final result or structural integrity.
o For a no-bake cheesecake that sets in the refrigerator, you can skip baking the crust entirely and press it into your pan, then refrigerate while preparing the filling.
o Always use unsalted butter so you can control the salt content precisely. Salted butter can make the crust taste overly salty.
o The 8-minute baking time is ideal, but this varies slightly by oven. Look for a light golden color rather than a specific time.
o For deeper flavor, toast your graham crackers briefly in a 300°F oven for 3-4 minutes before crushing. This intensifies the graham cracker taste significantly.
o This recipe works perfectly for cheesecake, chocolate pie, key lime pie, peanut butter pie, banoffee pie, and any no-bake dessert requiring a crust.
Pingback: How to Make the Perfect Pork Chop Supreme Recipe! – Simple Recipe Finder