
There’s truly nothing quite like perfectly cooked Instant Pot chicken breast – tender, juicy, and ready in a fraction of the time traditional methods require. As someone who believes in creating restaurant-quality meals at home without the fuss, I’ve perfected this method through countless experiments, and I’m thrilled to share it with you today.
The beauty of using an Instant Pot for chicken breast lies in its ability to lock in moisture while cooking evenly from edge to edge. Unlike stovetop or oven methods that can leave you with dry, rubbery results, the pressurized steam environment of an Instant Pot keeps every bite succulent and flavorful. This foolproof technique has become my go-to method, and I’m confident it will revolutionize how you prepare chicken at home.
What makes this recipe truly special is its versatility. Once you master this basic technique, you can transform these perfectly cooked chicken breasts into countless dishes. Shred it for Quick Tasty Bacon Carbonara, toss it with Best Heavy Cream Alfredo Sauce, or create a stunning Delicious Heavy Cream Pasta. You could also serve it alongside Best Pickled Red Onion for a fresh, tangy contrast, or incorporate it into a vibrant Best Chickpea Salad.
I’ve learned that the secret to perfect Instant Pot chicken is all about timing, temperature, and technique. Many people make the mistake of cooking chicken too long, resulting in that dreaded stringy texture. Others don’t give their Instant Pot enough time to come to pressure, which throws off the entire cooking process. Through careful testing, I’ve discovered the exact timing and method that yields consistently perfect results every single time.
According to Serious Eats, proper pressure cooking relies on understanding how steam and pressure work together to cook food evenly. Their extensive testing has shown that chicken breast cooks best when the Instant Pot reaches full pressure quickly and maintains it consistently. Additionally, New York Times Cooking emphasizes the importance of natural release time, which allows the meat’s fibers to relax and reabsorb moisture.
This recipe serves as the perfect foundation for meal prep, too. Cook a batch on Sunday, and you’ll have protein-packed options ready for salads, wraps, grain bowls, and more throughout the week. It’s the kind of recipe that keeps on giving, transforming your kitchen routine into something more streamlined and efficient.
What I love most about this method is its reliability. There’s no guesswork, no constant checking, and no worry about overcooking. The Instant Pot handles everything with precision, and you’re left with beautiful, tender chicken breast that’s ready for whatever culinary adventure you have planned. Whether you’re a seasoned home cook or just beginning your kitchen journey, this recipe will quickly become your most trusted go-to technique. Let me walk you through the process step by step.
Ingredients
- 4 boneless, skinless chicken breasts (about 6-8 ounces each)
- 1 cup chicken broth or water
- 1 teaspoon kosher salt
- ½ teaspoon freshly ground black pepper
- 1 teaspoon garlic powder
- 1 teaspoon onion powder
- ½ teaspoon dried thyme
- ¼ teaspoon smoked paprika
- Fresh lemon juice (optional, about 2 tablespoons)
- 2 tablespoons unsalted butter (optional, for finishing)
Instructions
- Pat your chicken breasts dry with paper towels – this is an important step that ensures proper browning and helps the seasoning adhere better.
- In a small bowl, combine kosher salt, black pepper, garlic powder, onion powder, dried thyme, and smoked paprika to create your seasoning blend.
- Generously season both sides of each chicken breast with the seasoning mixture, using about half the blend for each side.
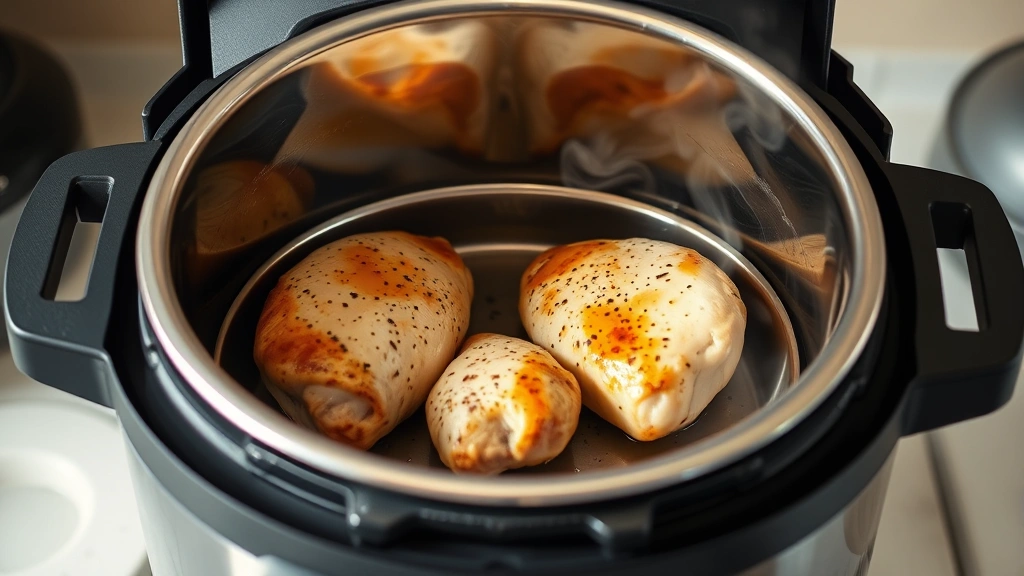
- Add the trivet (metal rack) to the bottom of your Instant Pot and pour in the chicken broth or water.
- Place the seasoned chicken breasts on the trivet in a single layer – they can overlap slightly if needed, but try to arrange them as evenly as possible.
- Close the Instant Pot lid and make sure the valve is set to ‘sealing’ position.
- Press the ‘Pressure Cook’ or ‘Manual’ button and set the timer for 8 minutes on high pressure – this is the magic number for perfect, juicy chicken breast.
- While the chicken cooks, prepare a bowl with ice water – this will be used for a quick release if desired.
- Once the cooking time completes, let the Instant Pot release pressure naturally for 5 minutes.
- After 5 minutes of natural release, carefully move the valve to ‘venting’ to release any remaining pressure – stand back as steam will release quickly.
- Carefully open the lid by tilting it away from you to avoid the steam.
- Remove the chicken breasts from the Instant Pot using tongs and transfer them to a clean plate.
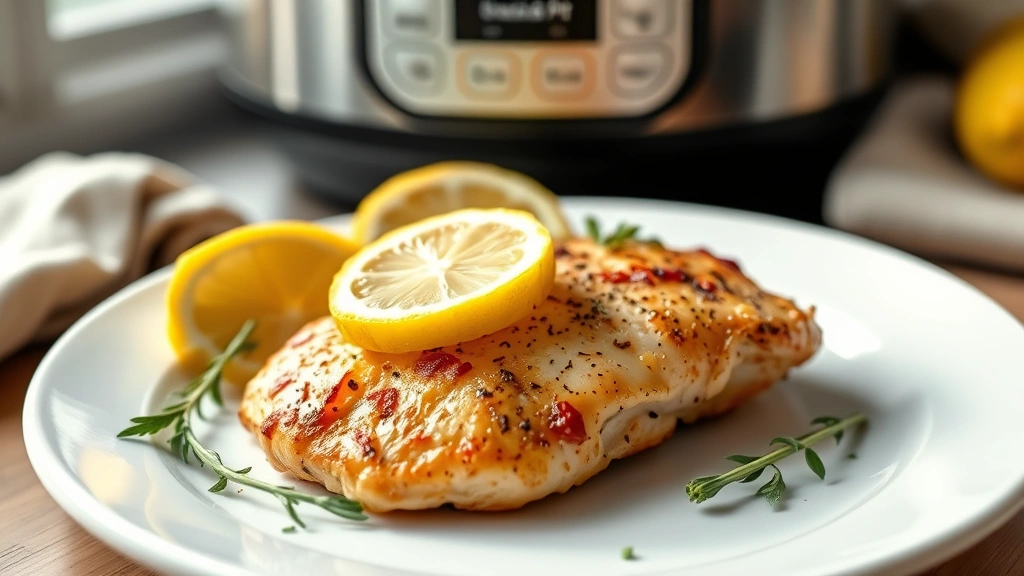
- If desired, finish the chicken by brushing with melted butter and a squeeze of fresh lemon juice for extra brightness.
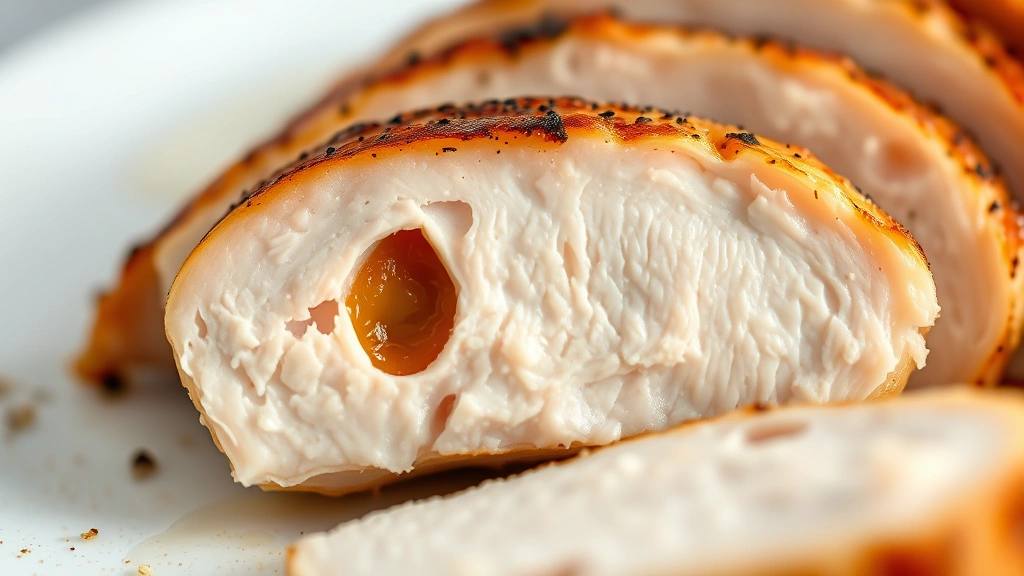
- Let the chicken rest for 2-3 minutes before slicing or shredding – this allows the juices to redistribute throughout the meat.
- Serve immediately as is, or use the chicken in your favorite recipes and preparations.
Pro Tips
- Chicken breast size matters significantly – try to choose breasts of similar thickness so they cook evenly. If you have very thick breasts, gently pound them to a more uniform thickness before cooking.
- The 8-minute cooking time is specifically for boneless, skinless chicken breasts of standard size (6-8 ounces). If your breasts are significantly larger or smaller, you may need to adjust by 1-2 minutes.
- Never skip the natural release step – this is crucial for maintaining moisture. Quick release can cause the meat to become tough and dry.
- The liquid in the bottom of the pot is now infused with chicken flavor and can be saved for making sauces, soups, or to use as broth in future recipes. Strain and freeze in ice cube trays for convenient portions.
- For extra flavor, add aromatics like onion slices, garlic cloves, or fresh herbs to the liquid before cooking. Bay leaves, rosemary sprigs, and thyme work beautifully.
- This recipe works perfectly for meal prepping – cook a large batch and store in an airtight container in the refrigerator for up to four days, or freeze for up to three months.
- If you prefer your chicken slightly more seasoned or with a golden exterior, you can sear the breasts in the Instant Pot’s sauté setting for 2-3 minutes per side before pressure cooking.
- For a creamier finish, reserve ½ cup of the cooking liquid and mix it with cream cheese or heavy cream after cooking, then toss with sliced chicken for a luxurious sauce.
- Always ensure your Instant Pot’s sealing ring is clean and properly seated – a worn or dirty ring can prevent proper pressure buildup.
- If your Instant Pot doesn’t reach pressure within 10 minutes, check that there’s enough liquid and that the lid is sealed properly.
- Leftover chicken can be transformed into countless dishes – salads, sandwiches, grain bowls, tacos, pasta dishes, or shredded for a protein-packed addition to any meal.