
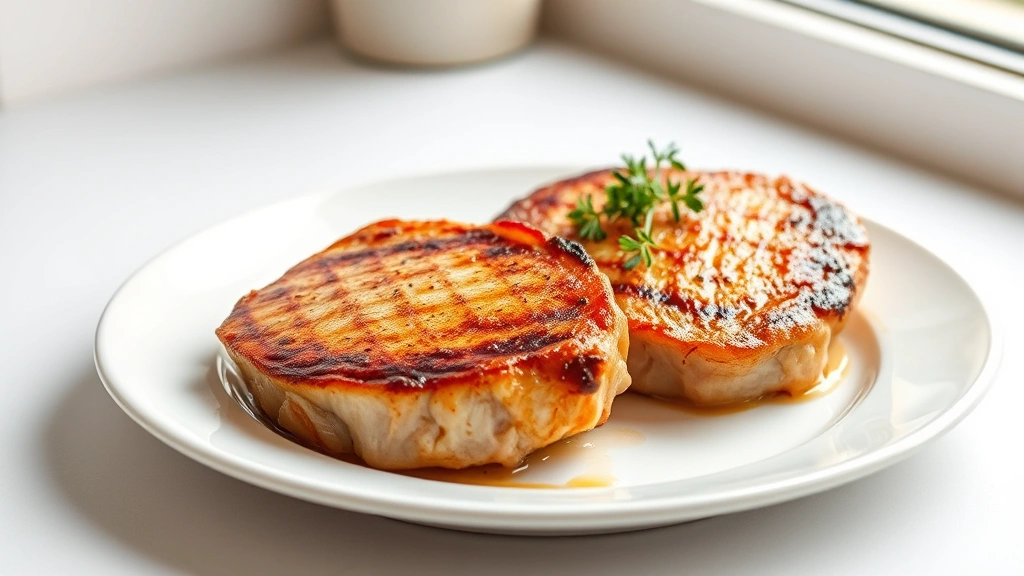
There’s something absolutely magical about a perfectly pan-seared pork chop – it’s one of those dishes that feels fancy enough for a dinner party, yet simple enough for a weeknight meal. The beauty of this recipe lies in its simplicity and the technique behind achieving that gorgeous golden crust while keeping the inside tender and juicy.
When I first learned how to make pan-seared pork chops, I realized that most people either overcook them until they’re dry as a bone, or they don’t get enough color on the outside. The secret is all about temperature control, proper seasoning, and knowing exactly when to flip. This recipe has become my go-to method, and I’m thrilled to share it with you today.
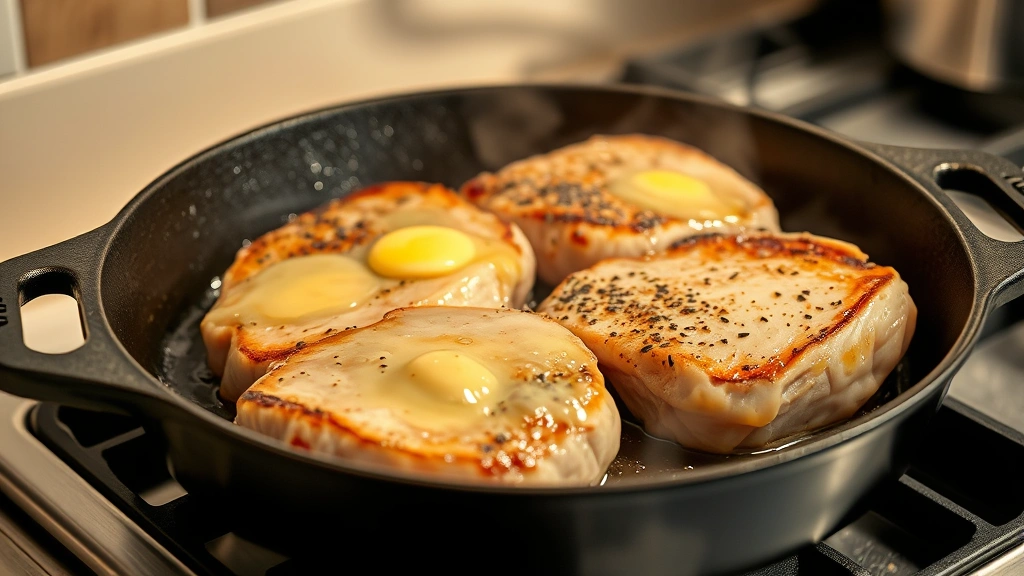
The technique we’re using here is straightforward but requires attention to detail. We’ll start with room-temperature pork chops, which is crucial for even cooking. Then we’ll build a flavorful crust using a hot skillet and a little bit of butter and oil. The combination of both fats is important – the oil prevents the butter from burning at high heat, while the butter adds incredible flavor.
What I love most about this recipe is how versatile it is. You can serve these with creamy macaroni salad for a classic comfort meal, or pair them with lighter sides like buttery cream peas or tender braised cabbage. For something a bit different, sautéed mushrooms make an elegant accompaniment.
I’ve tested this method dozens of times, and the results are consistently wonderful. The pork chops come out with a beautiful caramelized exterior and a juicy, tender interior. You’ll want to use bone-in, center-cut pork chops that are at least 1 to 1.5 inches thick – thinner chops tend to dry out too quickly. Thickness is your friend here; it gives you time to develop that crust without overcooking the meat.
One thing I always emphasize is the importance of letting your pork chops rest at room temperature for about 20-30 minutes before cooking. This ensures they cook evenly throughout. Cold meat fresh from the refrigerator will have a cold center by the time the outside is properly seared, leading to uneven cooking.
The seasoning in this recipe is intentionally simple – just salt, pepper, and a touch of garlic powder. This lets the natural flavor of the pork shine through. However, don’t skip the seasoning step! Proper seasoning is what separates a good pork chop from a great one. I recommend using kosher salt, as it distributes more evenly and tastes better than table salt.
After searing your pork chops, we finish them in the oven, which is a technique I learned from professional kitchens. This allows the inside to reach the perfect temperature while keeping the outside from burning. It’s a foolproof method that takes the guesswork out of cooking. For more techniques on achieving perfect results, check out Serious Eats’ cooking guides.
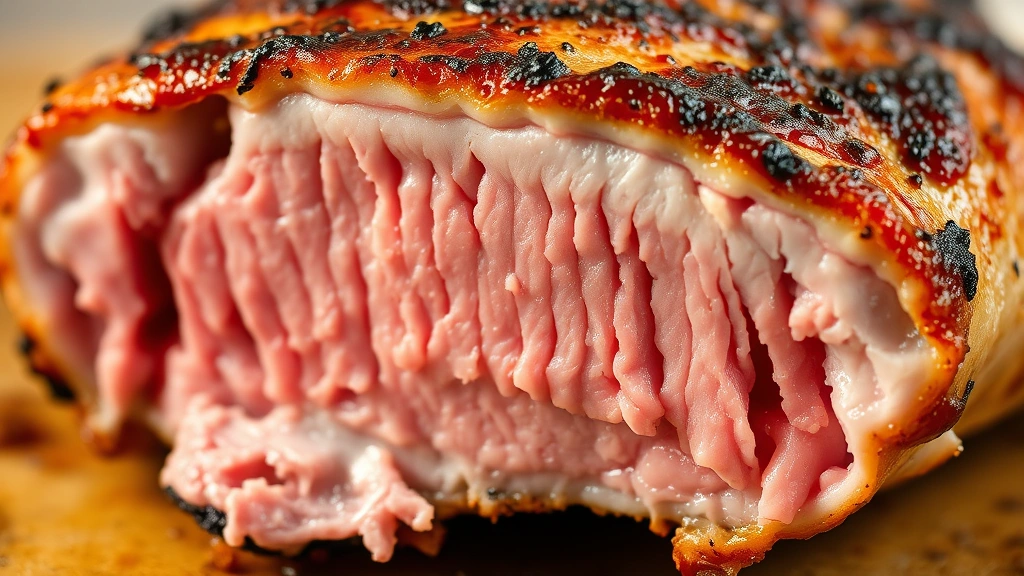
The internal temperature you’re aiming for is 145°F (63°C), which is the USDA recommendation for pork. At this temperature, the pork is still slightly pink in the center but completely safe to eat. The meat will continue to cook a bit after you remove it from the heat, so don’t overcook it.
If you want to add a pan sauce – and I highly recommend it – you can make a simple one with the drippings left in the skillet. A splash of apple cider vinegar, a touch of honey, and fresh thyme create a sauce that’s both sweet and savory, perfectly complementing the richness of the pork.
This recipe is also wonderful for meal prep. You can sear the pork chops ahead of time and reheat them gently in a low oven, though they’re truly best served fresh and hot. For additional inspiration on pan-searing techniques, Bon Appétit offers excellent video tutorials.
Whether you’re cooking for yourself or feeding a crowd, this pan-seared pork chop recipe is sure to impress. It’s elegant enough for a special occasion, but approachable enough that anyone can master it. The combination of technique and quality ingredients creates a dish that tastes far more complicated than it actually is. Once you’ve made this a few times, you’ll have it down to a science, and you’ll find yourself making it again and again. I promise you won’t regret learning this classic cooking technique – it’s a skill that will serve you well in the kitchen for years to come.
Ingredients
- 4 bone-in, center-cut pork chops, 1.5 inches thick (about 8-10 oz each)
- 1.5 teaspoons kosher salt, divided
- 1 teaspoon freshly ground black pepper, divided
- 0.5 teaspoon garlic powder
- 2 tablespoons olive oil
- 3 tablespoons unsalted butter
- 4 sprigs fresh thyme (optional)
- 2 cloves garlic, smashed (optional)
- Salt and pepper to taste for finishing
Instructions
- Remove your pork chops from the refrigerator and place them on a clean cutting board. Let them sit at room temperature for 20-30 minutes – this is crucial for even cooking.
- While the pork chops are coming to temperature, preheat your oven to 400°F (204°C).
- Pat the pork chops completely dry with paper towels. Moisture is the enemy of a good crust, so don’t skip this step.
- In a small bowl, combine 1 teaspoon of kosher salt, 0.75 teaspoon of black pepper, and the garlic powder. Mix well.
- Season both sides of each pork chop generously with the salt and pepper mixture, pressing gently so it adheres to the meat.
- Place a large cast-iron skillet or heavy-bottomed stainless steel pan over medium-high heat and let it preheat for 2-3 minutes until it’s very hot.
- Add the olive oil to the hot skillet and swirl to coat evenly. Let the oil heat for about 30 seconds until it shimmers.
- Carefully place each pork chop in the skillet, being mindful of any splattering oil. Do not move them for the first 3-4 minutes – this is when the crust develops.
- After 3-4 minutes, check the underside of one pork chop by gently lifting the edge with tongs. It should be golden brown. If it looks good, flip all the chops over.
- Sear the second side for another 2-3 minutes until it also develops a golden brown crust.
- Add the butter to the skillet, tilting the pan so the butter coats the bottom. If using thyme and garlic, add them now.
- Tilt the skillet toward you and baste the top of each pork chop with the melted butter using a spoon, tilting the pan back and forth for about 30 seconds.
- Transfer the entire skillet to the preheated 400°F oven for 5-7 minutes, depending on the thickness of your chops.
- Using an instant-read thermometer, check the internal temperature of the thickest pork chop. You’re looking for 145°F (63°C) in the thickest part, being careful not to touch the bone.
- Remove the skillet from the oven using oven mitts, as the handle will be extremely hot.
- Transfer the pork chops to a clean plate and tent loosely with aluminum foil.
- Let the pork chops rest for 3-5 minutes before serving. This allows the juices to redistribute throughout the meat, ensuring maximum tenderness.
- Serve the pork chops hot, optionally with pan sauce drizzled over the top or on the side.
Pro Tips
Bone-in pork chops are preferable to boneless because the bone provides insulation and helps conduct heat more evenly through the meat. Plus, they look more impressive on the plate and the bone adds flavor to the meat.
Don’t skip the resting period after cooking. This step is absolutely critical for tender, juicy pork chops. The resting allows the muscle fibers to relax and reabsorb the juices, resulting in a much more pleasant eating experience.
If you don’t have a cast-iron skillet, a heavy stainless steel skillet works just as well. Avoid non-stick pans for this recipe, as they don’t develop as good a crust and can’t handle the high heat as effectively.
For a simple pan sauce, after removing the pork chops, pour out most of the fat from the skillet, leaving about 1 tablespoon. Add 0.5 cup of apple cider or chicken broth, scraping up the browned bits. Reduce by half over medium heat, then whisk in 1 tablespoon of butter and a touch of honey. Season with salt and pepper.
The internal temperature of 145°F is the official USDA recommendation and ensures food safety while keeping the pork still slightly pink and juicy. Many home cooks worry about undercooked pork, but modern pork is much safer than it was decades ago.
You can prepare this recipe with different seasonings if you’d like. Try adding smoked paprika, cayenne pepper, or fresh rosemary for different flavor profiles. The technique remains the same regardless of your seasoning choice.
Leftover cooked pork chops can be refrigerated for up to 3 days. Reheat them gently in a 300°F oven until warmed through, about 10-12 minutes, to avoid drying them out further.
For best results, use a meat thermometer. Cooking by time and appearance is helpful, but a thermometer removes all guesswork and ensures perfectly cooked pork every single time.
This recipe is naturally gluten-free and works well with most dietary preferences. It’s also naturally paleo and keto-friendly if you’re following those diets.