
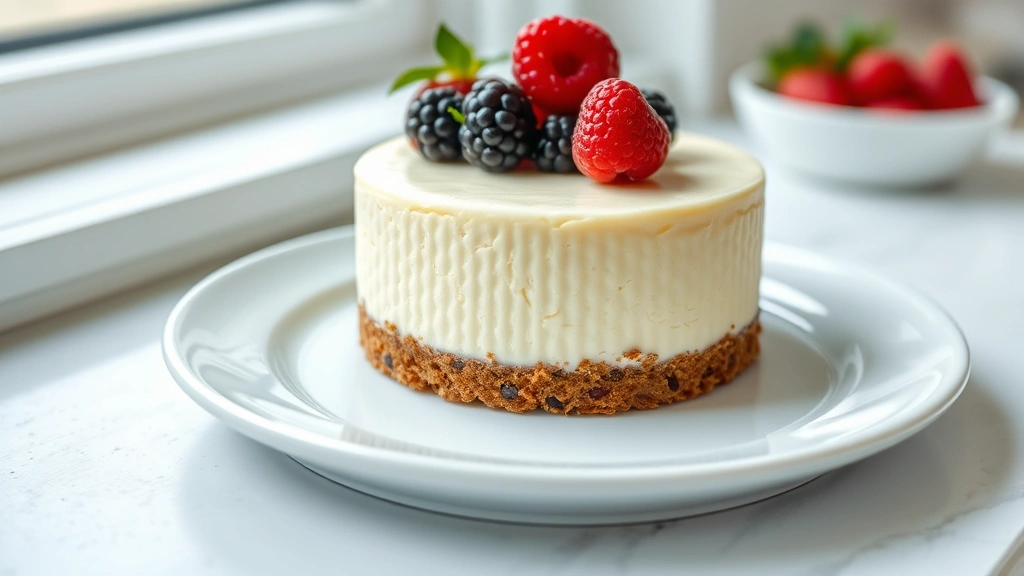
There’s something absolutely magical about a small cheesecake—it’s the perfect dessert for those moments when you want that rich, creamy indulgence without the commitment of a full-sized cake. Whether you’re baking for two or treating yourself to something special, this small cheesecake recipe delivers restaurant-quality results from your own kitchen.
I’ve been making cheesecakes for years, and I’ve learned that the secret to perfection isn’t about size—it’s about technique, quality ingredients, and a little patience. This recipe uses a simple but foolproof method that guarantees a smooth, crack-free cheesecake every single time. The combination of cream cheese, eggs, sugar, and a hint of vanilla creates that signature dense yet creamy texture that makes cheesecake so irresistible.
What I love most about this small cheesecake recipe is its versatility. You can serve it plain with fresh berries, dress it up with a homemade berry compote, or add a chocolate ganache on top. It’s elegant enough for a dinner party but simple enough for a weeknight dessert. Plus, making a smaller version means you can have cheesecake more often without feeling guilty about leftovers taking up precious refrigerator space.
The beauty of this recipe is that it works perfectly in individual ramekins, a 6-inch springform pan, or even as a single large cheesecake if you want to scale it up. I’ll walk you through every step, from preparing the graham cracker crust to achieving that perfect creamy center with no cracks. This is the only small cheesecake recipe you’ll ever need.
Before you start, let me share a few pro tips: room temperature ingredients are absolutely crucial—they blend together smoothly without overmixing, which is the enemy of cheesecake. Make sure your cream cheese is softened for at least an hour before you begin. Also, don’t skip the water bath; this gentle, moist heat is what transforms a dense cake into silky perfection. And here’s my secret weapon: understanding how to work with dairy products like heavy cream teaches you valuable techniques that apply to cheesecake making too.
This recipe is forgiving and foolproof, making it perfect for both beginners and experienced bakers. The result is a small cheesecake that’s creamy, tangy, and absolutely unforgettable. Let’s get started on creating your next favorite dessert! For more detailed baking techniques, Serious Eats offers wonderful guidance on perfecting dessert textures.
Ingredients
- 1 cup graham cracker crumbs (about 8 crackers)
- 3 tablespoons granulated sugar
- 4 tablespoons unsalted butter, melted
- 12 oz cream cheese, room temperature
- 1/4 cup granulated sugar
- 2 large eggs, room temperature
- 1/4 cup sour cream, room temperature
- 1/2 teaspoon vanilla extract
- 1/4 teaspoon salt
- Zest of 1/2 lemon (optional)
- Hot water for water bath
Instructions
- Preheat your oven to 325°F (165°C). If using a 6-inch springform pan, wrap the outside with aluminum foil, making sure to seal all seams so water doesn’t seep in during the water bath.
- In a small bowl, combine graham cracker crumbs, 3 tablespoons sugar, and melted butter, stirring until the mixture resembles wet sand.
- Press the crust mixture firmly into the bottom of your prepared springform pan, using the bottom of a measuring cup to create an even layer. Bake for 8 minutes until lightly golden, then remove and let cool slightly.
- While the crust cools, place the room temperature cream cheese in a large mixing bowl. Using an electric mixer on low speed, beat the cream cheese for 2-3 minutes until smooth and creamy, scraping down the sides as needed.
- Add 1/4 cup sugar to the cream cheese and continue beating on low speed for another 2 minutes until well combined. Avoid overmixing, as this can incorporate too much air and cause cracks.
- Add the room temperature eggs one at a time, beating on low speed after each addition. Mix just until combined—overmixing at this stage is the number one cause of cracks in cheesecake.
- Gently fold in the sour cream, vanilla extract, salt, and lemon zest (if using) using a rubber spatula. Mix until just combined and smooth.
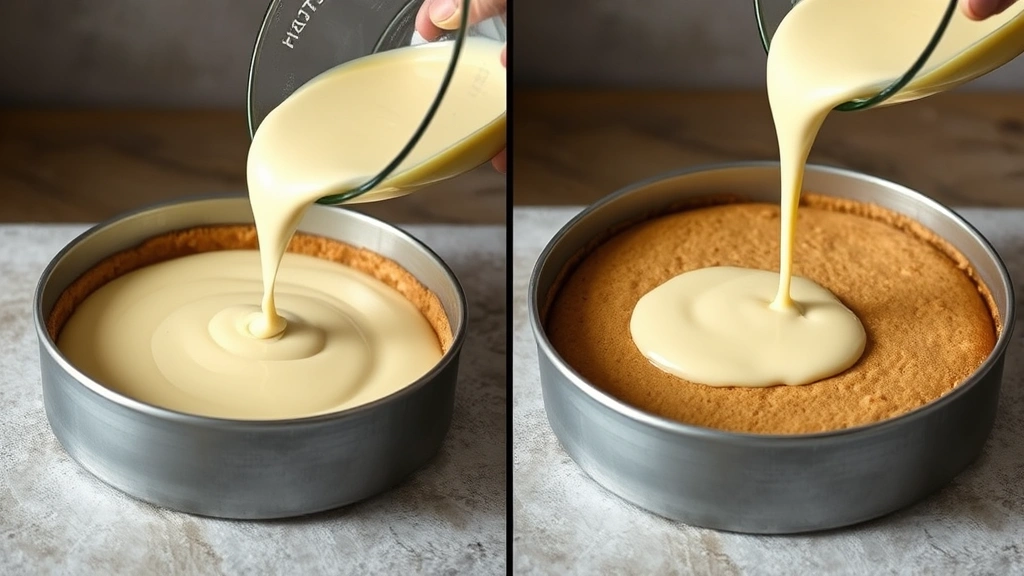
- Pour the cheesecake filling over the cooled crust, smoothing the top with a spatula.
- Place the springform pan inside a larger roasting pan. Pour hot water into the roasting pan until it reaches halfway up the sides of the springform pan. This water bath ensures gentle, even cooking.
- Carefully place the roasting pan in the preheated oven and bake for 30-35 minutes. The cheesecake is done when the edges are set but the center still jiggles slightly when gently shaken—about a 2-inch circle in the center should wobble.
- Turn off the oven and crack the door open about 4 inches. Let the cheesecake sit in the cooling oven for 1 hour. This gradual cooling prevents the dreaded cracks from forming.
- Remove the cheesecake from the oven and water bath. Allow it to cool completely to room temperature on the counter, about 1 hour.
- Once cooled, refrigerate the cheesecake for at least 4 hours, preferably overnight. This chilling time allows the flavors to develop and the texture to set perfectly.
- To serve, run a thin knife around the edges of the cheesecake before removing the springform pan sides. This prevents sticking and ensures clean edges.

Pro Tips
The water bath is not optional—it provides gentle, moist heat that prevents cracking and ensures creamy texture throughout. Make sure to wrap the springform pan securely with foil to prevent water from seeping in.
Don’t skip the gradual cooling process. Turning off the oven and cracking the door allows the cheesecake to cool slowly, which significantly reduces the likelihood of cracks forming on the surface.
Overmixing is the enemy of cheesecake. Mix just until ingredients are combined. If you see small lumps of cream cheese, that’s perfectly fine—they’ll smooth out during baking.
This cheesecake can be made up to three days in advance, making it perfect for entertaining. Store it covered in the refrigerator. You can also freeze the cooled, unmolded cheesecake for up to one month wrapped tightly in plastic wrap and foil.
For flavor variations, try adding lemon juice and zest for a bright tang, or swirl in a tablespoon of melted chocolate before baking. Berry compote, fresh fruit, or chocolate ganache make excellent toppings.
If cracks do form, don’t worry—they’re completely hidden once you add toppings or fruit. A simple dusting of powdered sugar or a dollop of whipped cream goes a long way.
Make sure your oven temperature is accurate. An oven thermometer is a worthwhile investment for baking success. Even a 25-degree difference can affect baking time and texture.
Individual cheesecakes baked in ramekins will require less baking time—check them around 20-25 minutes instead of 30-35 minutes.
Pingback: How to make the BEST Poppy Seed Chicken Recipe! – Simple Recipe Finder