

Making homemade Southern pork rinds is easier than you might think, and the results are absolutely divine! These crispy, golden morsels of pure pork perfection have been a beloved staple in Southern cuisine for generations. There’s something undeniably special about fresh pork rinds—they’re crunchy, salty, and utterly addictive.
Pork rinds, also known as chicharrones in Spanish cuisine, are the crispy skin of a pig that’s been fried until it puffs up into those irresistible little nuggets we all know and love. Unlike store-bought versions that can sometimes taste stale or overly processed, homemade pork rinds have a delicate crunch and authentic flavor that simply cannot be replicated. The beauty of making them at home is that you control the seasoning, the crispiness level, and the overall quality of this Southern snack.
This recipe walks you through the entire process, from selecting your pork skin to achieving that perfect golden-brown exterior. Whether you’re planning a gathering with friends, looking for a low-carb snack option, or simply want to impress your family with a homemade treat, these Southern pork rinds are guaranteed to be a hit.
The key to achieving restaurant-quality results is understanding the two-stage cooking process. First, we’ll render the pork skin slowly to cook out the fat and begin the crisping process. Then, we’ll finish them in hot oil to achieve that satisfying crunch. It’s important to source high-quality pork skin from a butcher who can cut it into uniform pieces, as this ensures even cooking throughout.
One of the best parts about making pork rinds at home is the flexibility in seasonings. While I’m sharing a classic preparation here, you can easily customize these with your favorite spices. Think about trying complementary flavor profiles or creating your own signature seasoning blend. Many people enjoy pairing homemade pork rinds with creamy dips or serving them alongside classic Southern sides.
These crispy delights are not only delicious but also surprisingly versatile. Crushed pork rinds can be used as a gluten-free breading for chicken or fish, added to salads for extra crunch, or simply enjoyed as a standalone snack with your favorite beverage. If you’re looking for other indulgent Southern treats, you might also enjoy making Sour Cream Pound Cake or Chewy Brownies for dessert.
For more insights on Southern frying techniques, check out Serious Eats’ comprehensive guide to deep frying. The Bon Appétit test kitchen also offers excellent tips for achieving crispy textures. You can also find valuable information about cooking techniques on the New York Times cooking section.
Once you master this recipe, you’ll never want to buy store-bought pork rinds again. The aroma alone as they cook will have everyone in your kitchen wondering what delicious creation you’re preparing. These Southern pork rinds are the perfect addition to any gathering, party spread, or simple snack situation. Ready to become a pork rind pro? Let’s get started!
Ingredients
- 2 pounds pork skin, cut into 2-3 inch pieces
- 2 teaspoons kosher salt, plus more for seasoning
- 1 teaspoon black pepper
- 1/2 teaspoon garlic powder
- 1/2 teaspoon paprika
- 1/4 teaspoon cayenne pepper (optional, for heat)
- Oil for frying (vegetable or peanut oil works best)
- 1/4 teaspoon onion powder
- 1/4 teaspoon dried thyme
Instructions
- Pat the pork skin completely dry with paper towels. This step is crucial because any excess moisture will cause the oil to splatter and prevent proper crisping. Take your time here and ensure every surface is thoroughly dried.
- Cut the pork skin into uniform 2-3 inch pieces. Uniform sizing ensures that all pieces cook at the same rate, preventing some from burning while others remain undercooked. Use a sharp knife or kitchen shears for clean cuts.
- In a small bowl, combine 2 teaspoons kosher salt, black pepper, garlic powder, paprika, cayenne pepper, onion powder, and dried thyme. Mix well and set aside. You can adjust the seasoning blend to your personal preference.
- Heat your oven to 300°F. Place the pork skin pieces on a large, rimmed baking sheet lined with aluminum foil for easy cleanup. Spread them out in a single layer without overlapping.
- Bake the pork skin at 300°F for 30-35 minutes until it becomes light golden and the fat begins to render out. You’ll notice the pieces starting to curl slightly at the edges and the color beginning to deepen.
- Remove the baking sheet from the oven carefully, as there will be hot rendered fat. Using tongs or a slotted spoon, transfer the pork skin pieces to a paper towel-lined plate to cool for about 5 minutes. Reserve the rendered fat in a bowl if you’d like to save it for cooking.
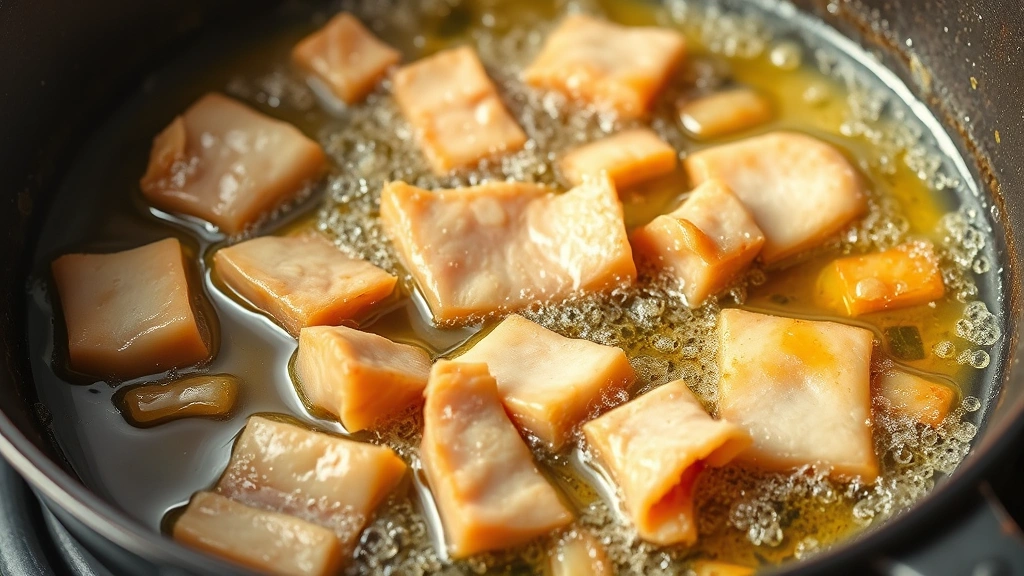
- Heat 2-3 inches of oil in a large, heavy-bottomed pot or Dutch oven to 375°F. Use a kitchen thermometer to ensure accurate temperature, as this is essential for achieving the perfect crunch. Too cool and they’ll be greasy; too hot and they’ll burn.
- Working in batches to avoid overcrowding the pot, carefully add the partially cooked pork skin pieces to the hot oil. They will immediately begin to puff and crackle. This is exactly what you want to see happening.
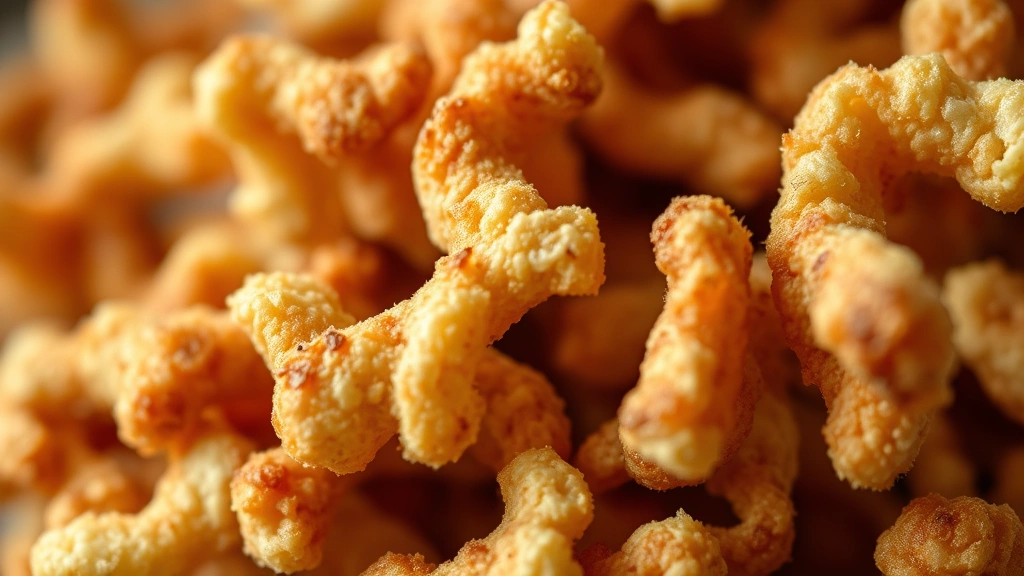
- Fry for 3-5 minutes, stirring occasionally with a slotted spoon, until the pieces are deep golden brown and completely puffed. The cooking time will depend on the size of your pieces and the thickness of the skin.
- Using a slotted spoon, transfer the fried pork rinds to a clean paper towel-lined plate. Drain them well, then immediately sprinkle with your seasoning mixture while they’re still hot, as this helps the seasonings adhere.
- Allow the pork rinds to cool completely on the paper towels for about 10 minutes. They will continue to crisp up as they cool. Once completely cooled, transfer to an airtight container for storage.
- Serve your homemade Southern pork rinds warm or at room temperature as a snack, appetizer, or alongside your favorite dips. Store in an airtight container at room temperature for up to one week, though they’re best enjoyed within the first few days when they’re crispiest.
Pro Tips
- Quality matters: Source your pork skin from a trusted butcher who can cut it into uniform pieces. Ask for fresh pork skin rather than skin that’s been sitting for several days.
- Rendering is key: The initial low-temperature oven step renders out much of the fat and ensures the pork skin is cooked through before deep frying. Don’t skip this step, as it’s essential for achieving the perfect texture.
- Temperature control: Maintaining proper oil temperature is crucial. A thermometer removes all guesswork and ensures consistent results every single time.
- Batch frying prevents soggy rinds: Don’t overcrowd your pot. Frying in batches allows the oil temperature to remain stable and ensures each piece gets crispy rather than steamed.
- Seasoning variations: Once you master the basic recipe, experiment with different seasonings. Try barbecue powder, ranch seasoning, spicy Cajun seasoning, or even a sweet and spicy combination.
- Oil reuse: Strain the used oil through cheesecloth and store it in a cool, dark place. You can reuse it for another batch or two, which makes this recipe more economical.
- Make ahead option: The pork rinds can be prepared through step 5 up to one day ahead. Store in the refrigerator until ready to finish frying.
- Troubleshooting: If your rinds aren’t puffing up properly, they may not have been dried thoroughly enough or the oil temperature might be too low. If they’re burning too quickly, reduce the oil temperature slightly.
- Nutritional benefits: Pork rinds are high in protein and zero-carb, making them an excellent choice for low-carb or keto diets while still being absolutely delicious.
- Storage tip: Store in an airtight container or resealable bag at room temperature. If they lose their crispness over time, you can refresh them by placing them on a baking sheet and warming in a 300°F oven for 5-10 minutes.