
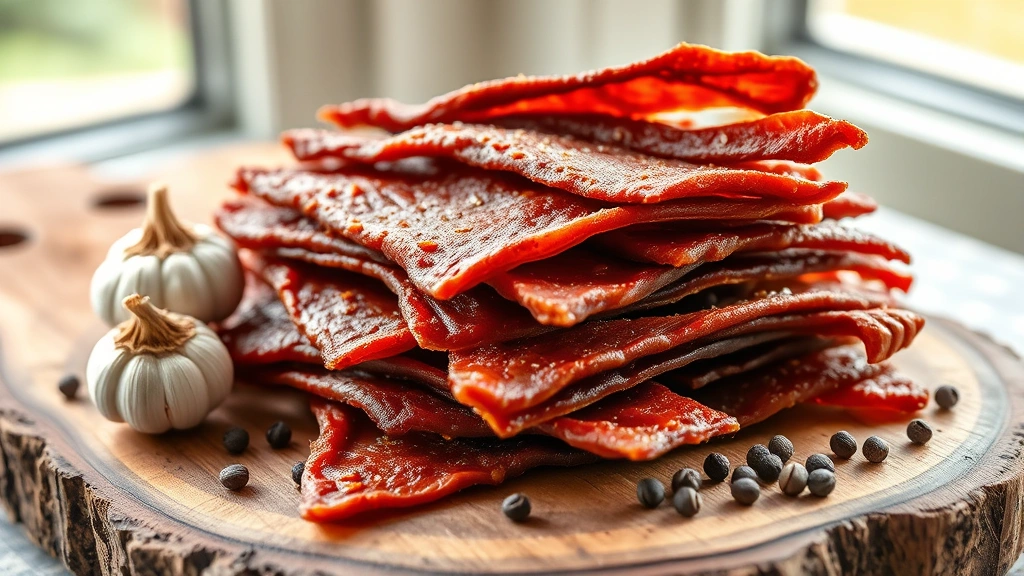
Making venison jerky at home is easier than you might think, and the results are absolutely incredible! This guide will walk you through every step to create perfectly tender, flavorful jerky that rivals any store-bought version. Venison has a naturally lean, rich flavor that takes beautifully to marinades and smoking. Whether you’re a seasoned hunter looking to use your harvest or sourcing venison from a butcher, this recipe will teach you the secrets to achieving that ideal texture—tender enough to chew easily, but with enough structure to maintain its shape.
The key to perfect venison jerky lies in three crucial elements: selecting the right cut of meat, preparing an exceptional marinade, and controlling your drying temperature and time. Unlike beef jerky, venison requires special attention because of its leanness. Too high a heat and you’ll end up with tough, brittle jerky. Too low, and you risk food safety issues. This recipe uses a combination of traditional smoking methods and modern food safety practices to give you jerky that’s both delicious and safe to eat.
Venison jerky is perfect for game day snacking, hunting trips, or anytime you want a protein-packed treat. The marinade I’ve developed balances savory, sweet, and smoky notes that complement venison’s natural gamey flavor beautifully. You’ll find that homemade jerky costs a fraction of what you’d pay retail, and tastes infinitely better. Plus, you control exactly what goes into it—no mysterious preservatives or excessive sodium.
This recipe serves as a foundation that you can customize based on your preferences. Like heat? Add more cayenne or ghost pepper. Prefer a sweeter jerky? Increase the brown sugar. Want something more Asian-inspired? Substitute soy sauce with tamari and add ginger. The beauty of making jerky at home is the complete control you have over flavors. I’ve included tips throughout for variations and troubleshooting, because even small adjustments can significantly impact your final product.
Before you start, understand that jerky is a preservation method that relies on removing moisture to prevent bacterial growth. The USDA recommends heating jerky to 160°F (71°C) to kill any potentially harmful bacteria before drying. This recipe incorporates that safety measure while still producing tender, delicious results. You can use a food dehydrator, smoker, or even your oven—I’ll cover all three methods. The time investment is minimal, but the reward is substantial: homemade jerky that tastes like a gourmet snack, not a gas station afterthought.
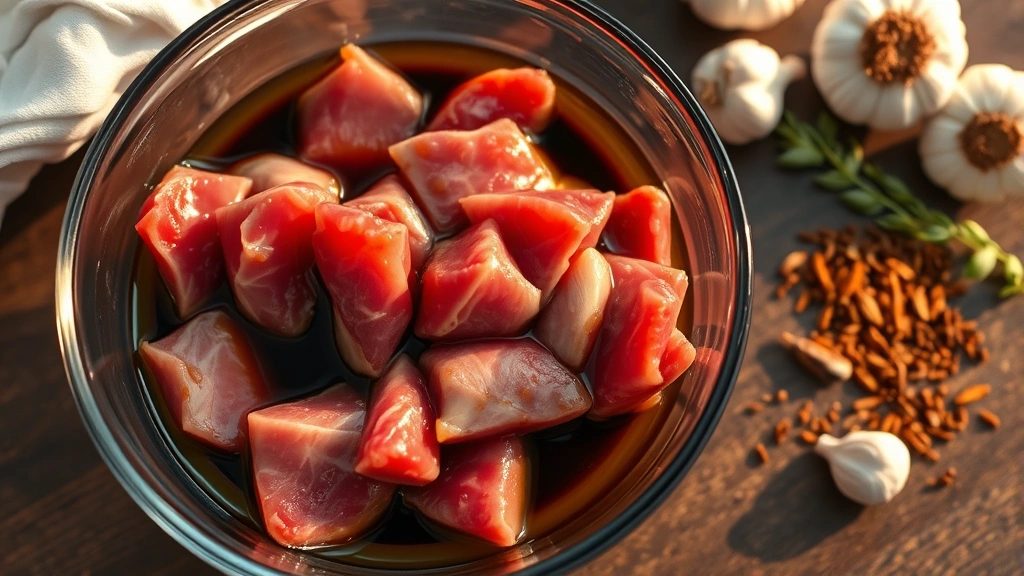
Many people are intimidated by making jerky, but honestly, it’s one of the most forgiving recipes in the kitchen. The marinade does most of the heavy lifting, infusing the meat with flavor while the acid and salt begin the curing process. Then it’s simply a matter of applying consistent, gentle heat over time. Once you’ve made your first batch, you’ll wonder why you ever bought jerky from the store. Your friends and family will be amazed when you tell them you made it yourself, and you’ll have a reliable go-to recipe for using venison throughout the year.
If you’re looking for other impressive game recipes or protein-forward appetizers to serve alongside your jerky, check out our Million Dollar Dip Recipe or these fantastic Beer Dip recipes that pair wonderfully with jerky platters. For more inspiration on preparing game meats, explore Serious Eats, which has excellent resources on working with wild game and alternative proteins.
Let me share some pro tips I’ve learned through years of making jerky. First, freeze your venison for 24-48 hours before slicing—this makes it much easier to cut uniform pieces. Second, slice against the grain for more tender jerky, or with the grain if you prefer a chewier texture. Third, don’t skip the heating step; it’s crucial for food safety. Finally, store your finished jerky in an airtight container with a food-grade oxygen absorber for maximum shelf life (up to 2 months at room temperature, longer in the refrigerator).
The beauty of venison jerky is that it showcases the meat’s natural qualities without overwhelming them. This recipe uses Worcestershire sauce, soy sauce, and liquid smoke to add depth, but the venison flavor remains the star. Brown sugar provides sweetness that caramelizes slightly during drying, creating a subtle crust. Garlic, onion powder, and black pepper round out the profile. Some recipes go overboard with spices, but I believe the best jerky lets you taste the meat first and foremost.
For more detailed guidance on meat preparation and cooking techniques, check out New York Times Cooking and Bon Appétit, both of which have extensive resources on working with game meats and preservation methods. These sites have inspired many techniques I’ve incorporated into this recipe.
Once you master this basic venison jerky, you can experiment with variations like Hawaiian-style marinades or using spice blends from other cuisines. Jerky is wonderfully versatile, and once you understand the basic principles, you’ll be creating custom recipes that rival commercial brands. This is the recipe that will change your relationship with jerky forever.
Ingredients
- 2.5 pounds venison, sliced 1/4-inch thick (backstrap or hindquarter)
- 1/2 cup soy sauce
- 1/4 cup Worcestershire sauce
- 3 tablespoons brown sugar
- 2 tablespoons honey
- 1 tablespoon liquid smoke
- 1 tablespoon apple cider vinegar
- 6 cloves garlic, minced
- 1 tablespoon onion powder
- 1 teaspoon black pepper
- 1 teaspoon ground cayenne pepper (optional, for heat)
- 1/2 teaspoon red pepper flakes
- 1/2 teaspoon pink curing salt (optional, for extended shelf life)
- 1 teaspoon paprika
Instructions
- Trim all visible fat from your venison backstrap or hindquarter, as fat can become rancid and spoil the jerky. Pat the meat completely dry with paper towels.
- Place the venison in your freezer for 24-48 hours until it’s very firm but not completely frozen; this makes slicing much easier.
- Remove the venison from the freezer and using a sharp knife or meat slicer, cut the meat against the grain into uniform 1/4-inch thick strips. Consistency in thickness is key for even drying.
- In a large bowl, whisk together soy sauce, Worcestershire sauce, brown sugar, honey, apple cider vinegar, and liquid smoke until the sugar is completely dissolved.
- Add the minced garlic, onion powder, black pepper, cayenne pepper, red pepper flakes, and paprika to the marinade, stirring well to combine all spices evenly.
- Place the venison strips into a large zip-top bag or vacuum-seal bag, then pour the marinade over the meat, ensuring every piece is thoroughly coated.
- Remove as much air as possible from the bag, seal it, and refrigerate for 8-12 hours (overnight is ideal). Massage and flip the bag every 2-3 hours if possible to ensure even marinating.
- After marinating, remove the venison from the refrigerator and pat each strip with paper towels to remove excess marinade; this helps the jerky dry more evenly.
- Preheat your drying device: for a dehydrator, set to 160°F; for an oven, set to 160°F with the door slightly acracked open; for a smoker, set to 160-180°F.
- Arrange the venison strips on dehydrator trays, oven racks (lined with foil for easy cleanup), or smoker grates in a single layer without overlapping.
- If using a smoker, add soaked wood chips (hickory, apple, or oak work beautifully with venison) to achieve that authentic smoked flavor.
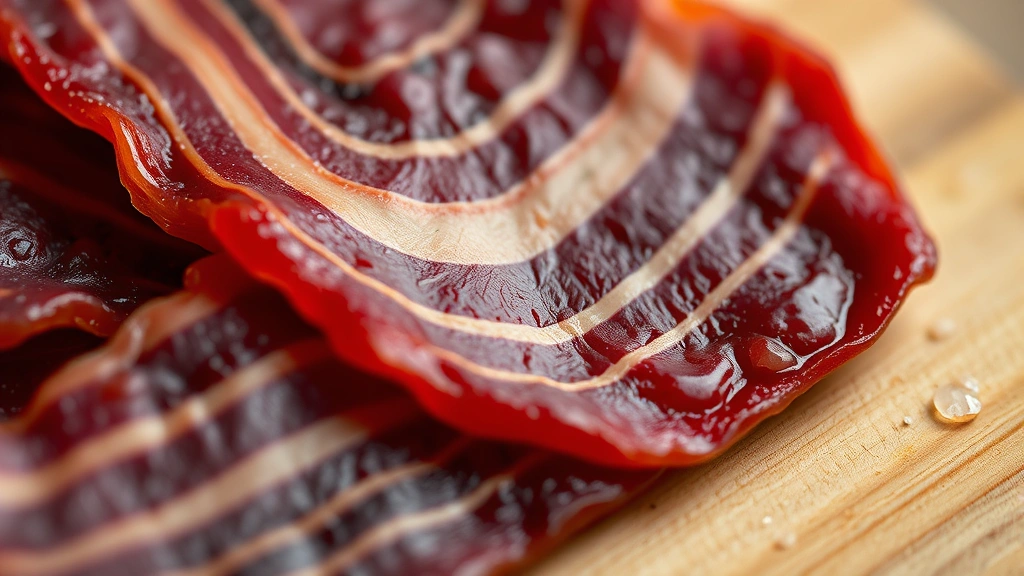
- Dry the jerky for 4-6 hours, checking progress after 3 hours. The jerky is done when it bends but doesn’t quite break, with no visible moisture when squeezed.
- Once the jerky reaches the proper texture, remove it from the heat source and allow it to cool completely to room temperature on a clean surface.
- Store finished jerky in airtight containers or zip-top bags. For extended shelf life, include a food-grade oxygen absorber packet in each container.
Pro Tips
- Venison cuts: Use backstrap (the most tender cut) or hindquarter meat. Avoid neck or shoulder meat as these are tougher and will result in chewy jerky.
- Meat thickness: Consistent thickness of 1/4-inch is crucial. Thicker pieces take much longer and may not dry safely; thinner pieces may become too brittle.
- Freezing tip: Freezing the venison makes slicing dramatically easier. You want it firm but not rock-hard; 24-48 hours is usually perfect timing.
- Marinade variations: For Asian-style jerky, use tamari instead of soy sauce and add fresh ginger and sesame oil. For spicy jerky, increase cayenne to 1-2 teaspoons and add ghost pepper powder.
- Drying methods: Dehydrators are most consistent and recommended for beginners. Ovens work well but require monitoring to prevent hot spots. Smokers add incredible flavor but require more attention.
- Temperature matters: 160°F minimum temperature for 1+ hour is USDA-recommended for food safety. Don’t rush this step or attempt lower temperatures, especially with wild game.
- Doneness test: Properly dried jerky should bend when fresh, with no visible moisture when pressed. It should never snap cleanly (which means it’s overdried) or feel moist (underdried).
- Storage: In airtight containers at room temperature, jerky lasts 2-3 weeks. Refrigerated, it lasts 4-6 weeks. Frozen, it lasts several months. Oxygen absorbers extend shelf life significantly.
- Yield: 2.5 pounds raw venison yields approximately 1 pound finished jerky due to moisture loss (roughly 60% water loss).
- Fat content critical: Venison is naturally very lean, which is why it makes excellent jerky. However, any remaining fat should be completely trimmed as it can go rancid quickly.
- Customization: Once you master the basic recipe, experiment with maple syrup instead of honey, sriracha for heat, or balsamic vinegar for depth.
- Humidity factor: In very humid climates, jerky takes longer to dry. In dry climates, it dries faster. Adjust your expectations based on local conditions.
- Safety note: Always source venison from verified hunters or reputable butchers. If processing your own game, ensure proper field dressing and handling practices.