

There’s something absolutely magical about homemade granola—the kind that fills your kitchen with the most incredible toasted aroma and tastes infinitely better than anything you’d find in a box at the store. This simple granola recipe is my go-to for weekend mornings, and honestly, it’s become such a staple in our household that I find myself making double batches just to keep up with demand.
What I love most about this recipe is how customizable it is. The base is always the same—wholesome oats, a touch of honey, and good quality butter—but from there, you can take it in any direction your heart desires. I’ve made it with coconut flakes and macadamia nuts, with dried cranberries and almonds, with cinnamon and vanilla, and even with a hint of maple syrup for extra depth. The possibilities are truly endless, and that’s part of what makes this recipe so special.
The beauty of homemade granola is that you control every single ingredient. There are no mysterious additives, no excessive amounts of sugar hiding under marketing claims, and no weird preservatives. Just pure, simple ingredients that you can pronounce and actually recognize. Plus, when you make it yourself, you get to decide exactly how crunchy or how chewy you want it to be. Do you prefer big clusters or individual pieces? Do you want it heavily toasted or just lightly golden? It’s all up to you.
I’ve been making this recipe for years, and I’ve learned a few tricks along the way that I’m excited to share with you. The key to getting that perfect crunch is all about the baking temperature and how you stir it throughout the cooking process. You want to give it a good stir every fifteen minutes or so to ensure even toasting and prevent any burning. It might seem like a lot of stirring, but trust me, it’s totally worth it for the results you’ll get.
This granola is perfect for so many things beyond just breakfast cereal. I love layering it in yogurt parfaits with fresh berries and a drizzle of honey for an elegant breakfast that looks like it came from a fancy café. You can also crush it up and use it as a topping for desserts and ice cream. Some people even enjoy it as a snack straight from the jar, and I certainly won’t judge you for that because I do it all the time.
One of my favorite ways to enjoy this granola is sprinkled over a big bowl of Greek yogurt with some fresh fruit and a generous drizzle of honey. It’s the perfect balance of creamy, crunchy, and sweet, and it keeps me satisfied all morning long. You can also enjoy it with your favorite milk—dairy, almond, oat, or whatever you prefer—just like traditional cereal.
Making your own granola is also incredibly budget-friendly compared to store-bought versions. You’d be amazed at how much money you can save by buying your ingredients in bulk and making this at home. Plus, the smell alone is worth the minimal effort required. Your entire house will smell like a cozy bakery, and everyone will want to know what you’re making.
I recommend storing your finished granola in an airtight container to keep it as fresh and crispy as possible. It will keep for up to two weeks, though honestly, it rarely lasts that long in our house. If you want to add dried fruit, I suggest doing that after the granola has cooled completely—this prevents the fruit from getting too soft and helps maintain that perfect texture.
This recipe is also perfect for gift-giving. I love filling mason jars with homemade granola and giving them to friends and family members. It’s a thoughtful, delicious, and personal gift that shows you really care. You can even add a cute label with the date and ingredients for anyone with dietary restrictions.
Whether you’re a granola enthusiast or you’re making it for the very first time, this recipe is going to become a staple in your kitchen. It’s simple enough for beginners but customizable enough to keep experienced bakers interested. So grab your mixing bowls, preheat that oven, and let’s make some absolutely delicious homemade granola together. Your mornings are about to get so much better.
For more breakfast inspiration, check out our creamy breakfast pasta and quick morning meals. You might also enjoy our comforting brunch recipes and simple sides to pair with breakfast.
Ingredients
- 3 cups old-fashioned rolled oats
- 1 cup unsweetened coconut flakes
- 1 cup sliced almonds (or nuts of your choice)
- 1/2 cup raw sunflower seeds
- 1/4 cup honey
- 1/4 cup coconut oil or unsalted butter, melted
- 2 tablespoons maple syrup
- 2 teaspoons vanilla extract
- 1 teaspoon ground cinnamon
- 1/4 teaspoon sea salt
- 1/4 teaspoon ground nutmeg (optional)
- 1 cup dried cranberries or raisins (added after baking)
- 1/2 cup dark chocolate chips (optional, added after baking)
Instructions
- Preheat your oven to 325°F (165°C). Line a large baking sheet with parchment paper or a silicone baking mat for easy cleanup and to prevent sticking.
- In a large mixing bowl, combine the rolled oats, coconut flakes, sliced almonds, and sunflower seeds. Toss everything together to ensure the nuts and seeds are evenly distributed throughout the oats.
- In a separate small bowl, whisk together the honey, melted coconut oil, maple syrup, vanilla extract, cinnamon, sea salt, and nutmeg if using.
- Pour the wet ingredients over the oat mixture and stir well using a wooden spoon or rubber spatula. Make sure every bit of the oat mixture is coated with the wet ingredients. This step is crucial for even toasting.
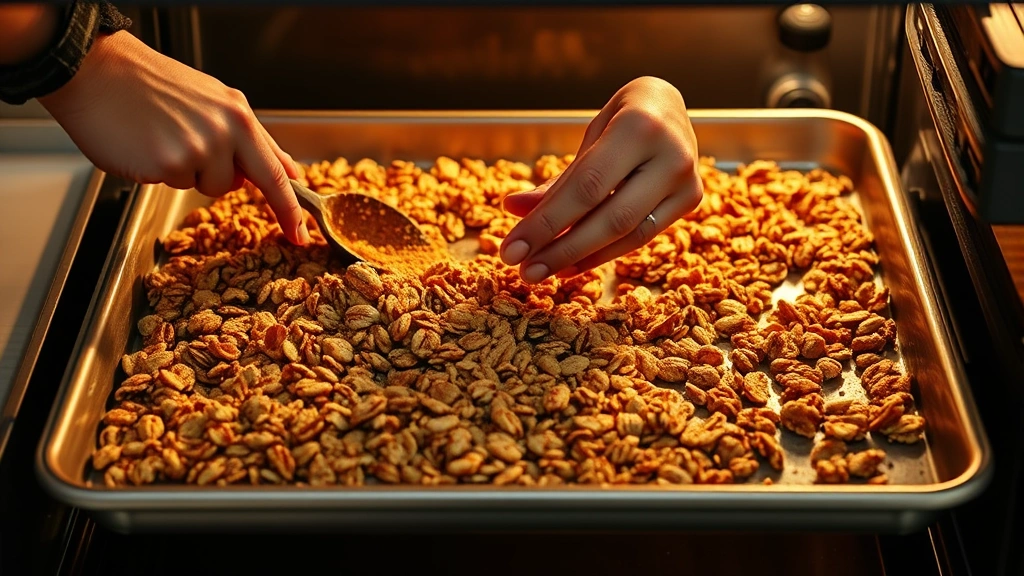
- Spread the granola mixture evenly across your prepared baking sheet in a single layer. Try not to compress it too much—you want it to be fairly spread out so it can toast properly and create those desirable clusters.
- Place the baking sheet in the preheated oven and bake for 15 minutes. Remove from the oven and give the granola a good stir, breaking up any large clumps that may have formed.
- Return the baking sheet to the oven and bake for another 15 minutes. Again, remove and stir the granola, paying special attention to the edges which tend to brown faster than the center.
- Bake for a final 10-15 minutes, watching carefully during this last stretch. The granola should be golden brown and fragrant. You’re looking for a rich, toasted color but not dark brown, which would indicate burning.
- Remove the granola from the oven and let it cool completely on the baking sheet. This is important because the granola will continue to crisp up as it cools, and you want that perfect crunch.
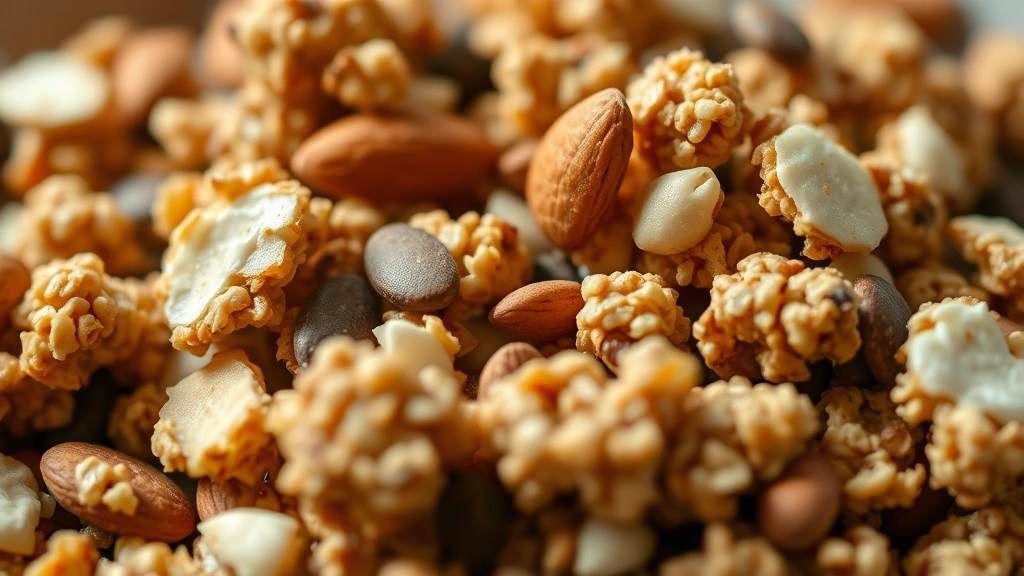
- Once completely cooled, break the granola into desired cluster sizes. Some people prefer large chunks while others like smaller pieces—it’s entirely up to your preference.
- Transfer the cooled granola to a large mixing bowl and gently fold in the dried cranberries and chocolate chips if using. Avoid stirring too vigorously or you’ll crush the granola.
- Store your finished granola in an airtight container or mason jar at room temperature. It will keep for up to two weeks, though it rarely lasts that long.
Pro Tips
Don’t skip the cooling step. I know it’s tempting to dig in right away, but the granola needs to cool completely on the baking sheet to achieve that perfect crispy texture. If you transfer it to a container while it’s still warm, it will retain moisture and become chewy rather than crunchy.
Feel free to customize the nuts and seeds based on your preferences and dietary needs. Pecans, walnuts, cashews, pumpkin seeds, and flax seeds all work beautifully. You can also experiment with different dried fruits like blueberries, apricots, or dates.
For a healthier version, you can reduce the honey and maple syrup slightly and add a tablespoon or two of coconut sugar for sweetness. The granola will be less sweet but still delicious.
This granola makes an excellent gift when packaged in cute jars with a handwritten label. It’s thoughtful, personal, and infinitely better than anything store-bought. Your friends and family will absolutely love receiving homemade granola as a gift.
If your granola becomes a bit soft after a few days, you can always refresh it by spreading it on a baking sheet and toasting it in a 300°F oven for about 5-10 minutes. This will restore the crunch beautifully.
For an extra special touch, try drizzling a small amount of melted dark chocolate over the cooled granola and letting it set before storing. This adds luxury without much extra effort.
You can make a double or triple batch and store the extra in the freezer for up to three months. Just thaw it at room temperature before eating, and it will taste just as fresh as the day you made it.
Pingback: How to make a Tasty Southwest Salad Recipe in Minutes! – Simple Recipe Finder